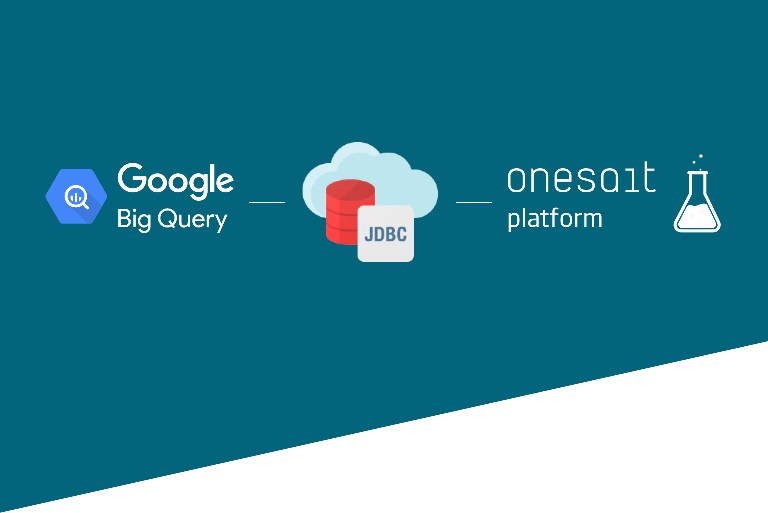
Connecting with Google BigQuery: JDBC Agents
Frequently, our business objective is based on accessing and operating on lots of information residing in different databases. In Onesait Platform, thanks to the ontology concept, we can have an abstraction on these, so that we can work with this data directly and independently of the implementation they have. To us, it will be just one more ontology, with all its capabilities.
On a technical level, we have different connectors on multiple databases, such as MongoDB, Kudu, Impala/Hive, MySQL, Oracle, SQLServer, PostgreSQL, etc. The Platform provides these without us needing to do anything.
Some of them can be used directly from the advanced options, ontology creation step by step:
Others, however, operate as JDBC connections to a database, allowing to infer ontologies from existing tables or to create new tables with the so-called ontologies on relational databases.
In this second type, it may happen that we have to access a new database via JDBC but it is not any of the previous ones, or it is some incompatible version of them, with the drivers provided by the Platform. In these cases, we could decide to include these new drivers, so that we would end up having infinite drivers with the possible problems that those could generate, conflicts between them, storage size, etc.
This is why a universal connector was implemented in the Platform for this kind of cases, so that we can decouple the driver from the database and even scale it independently if necessary, with Calcite Avatica‘s JDBC agents.
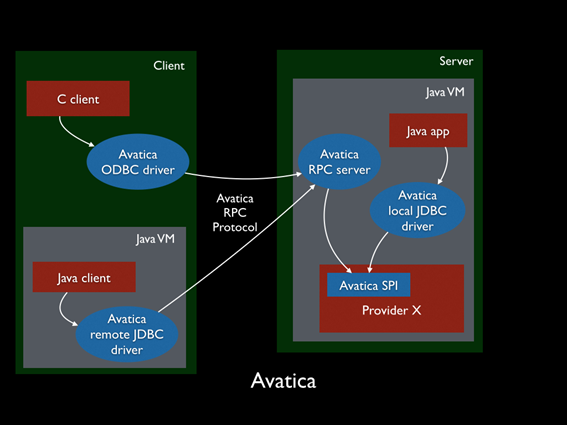
These JDBC agents, will be deployed as containers and will work as intermediaries between the Onesait Platform and the database we want to use. The database driver itself will be embedded in the JDBC agent container that will assemble an Avatica JDBC server, where the Platform, with only the Avatica client driver, will connect to any database managed by the agent, that will act as a proxy between the Platform and the database.
Configuration and Use of These Agents
We are going to follow a process in which we are going to connect through JDBC to Google BigQuery (via service account + JSON access token), which is a good case of heavyweifht driver and it doesn’t make sense to include it in the Platform’s core.
The JDBC driver can be obtained from this specific URL.
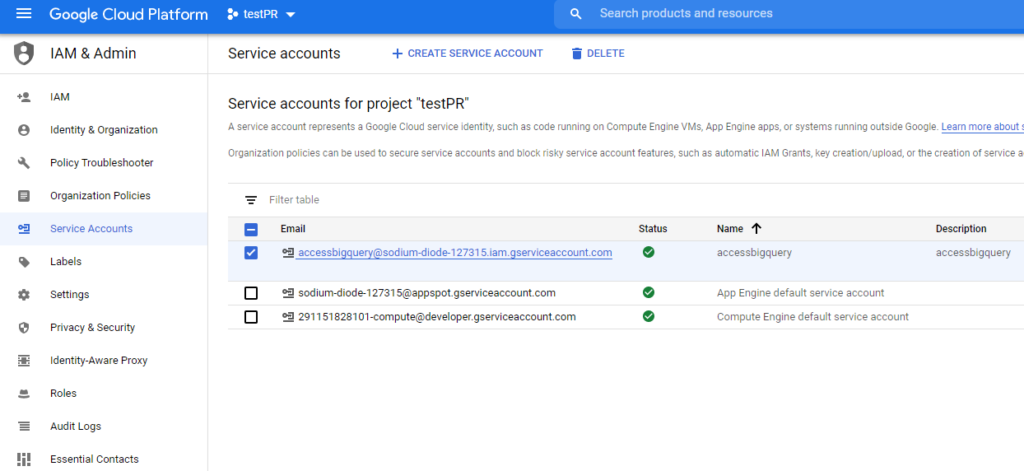
We will also need a BigQuery service account along with a JSON login token that we will need to download. This can all be created from the Google Cloud Platform console.
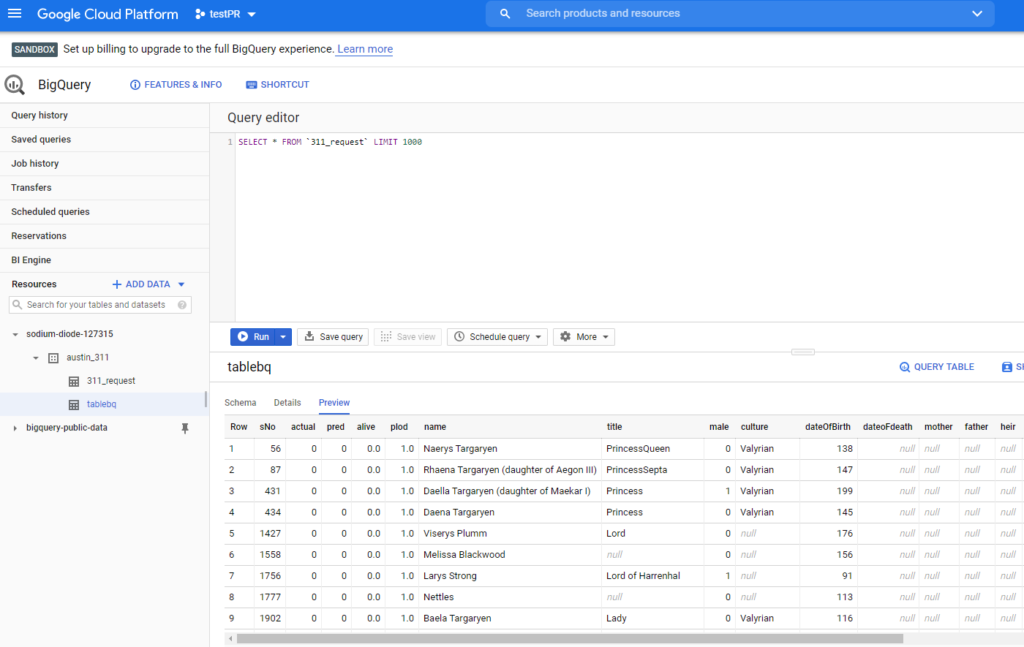
We will also use a table created with BigQuery that will be the one we use as ontology.
JDBC agent creation
The first step requires deploying one of the existing images as a container in the CaaS and configuring it correctly. It may also be necessary, depending on the case, to create a Docker image from an existing one, in order to specialize it in a certain database.
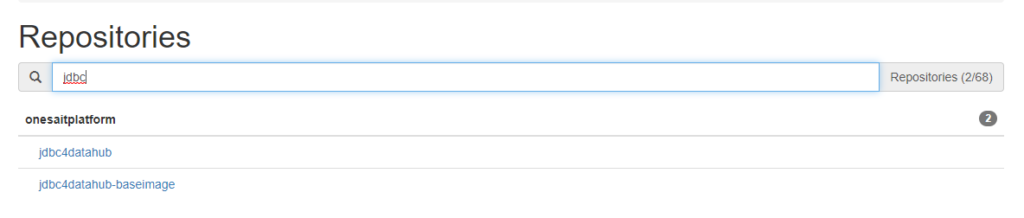
At this moment, there are 3 images, MySQL 8, BigQuery and a generic image to build our own JDBC agent.

Using the specific image to create connections
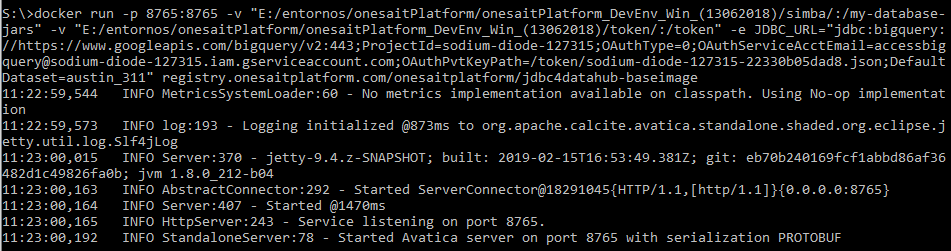
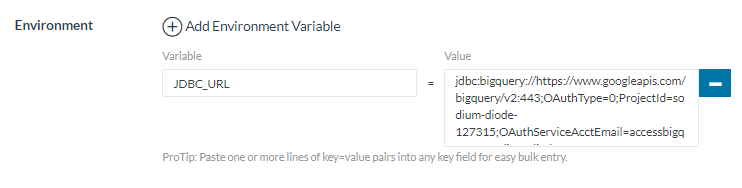
The specific images are easy to use, you only need to define the environment variable JDBC_URL which will determine the JDBC’s connection URL to the target database. For example, to define a connection to BigQuery via our JSON authentication file with the agent, we will use the BigQuery specific image.

We will need to use a shared volume where we will leave the JSON key (under /token) and then include the connection url itself (jdbc:bigquery://… https://www.simba.com/products/BigQuery/doc/JDBC_InstallGuide/content/jdbc/bq/using/connectionurl.htm):

This will start a JDBC agent that will attack BigQuery through the provided URL, along with the access token. This agent will be accessible through the container’s port 8765, which will be the one we will have to use to access it.
Using the generic image to create connections
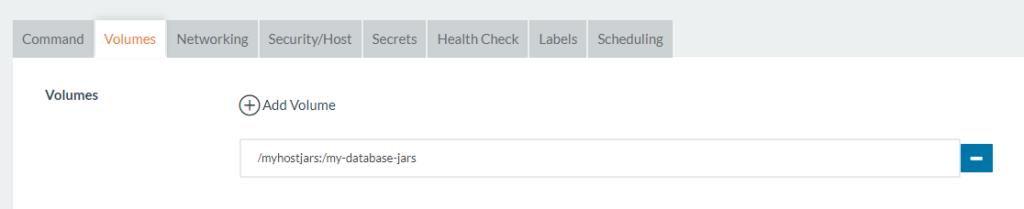
If we are using the generic image, we will also need to provide the drivers, via shared volume, under the folder “/my-database-jars”. Here we will include the downloaded ones.
To use these in Rancher, we only need to provide the environment variable JDBC_URL and, if we are using the generic image, the volume with the drivers:
Once the container is configured and booted, we can continue to the next step.
Creating Ontology from JDBC Agent
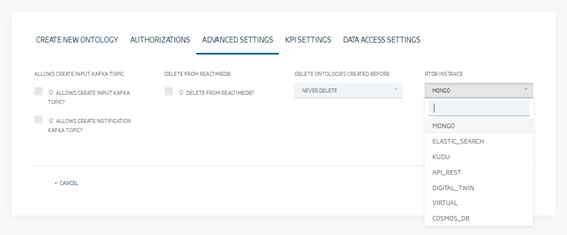
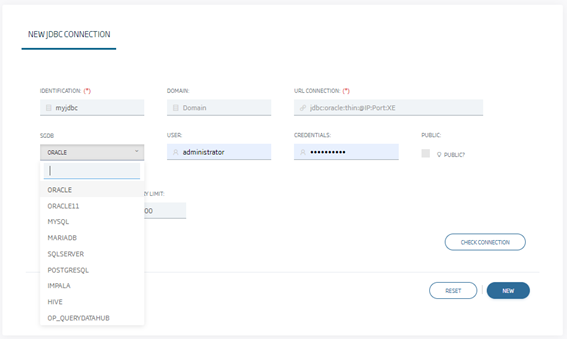
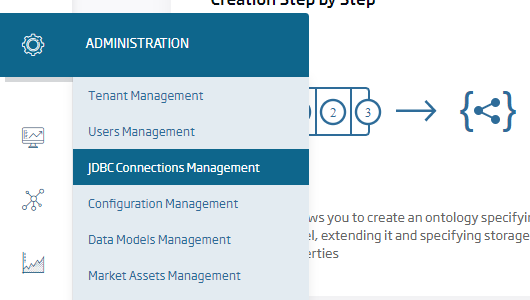
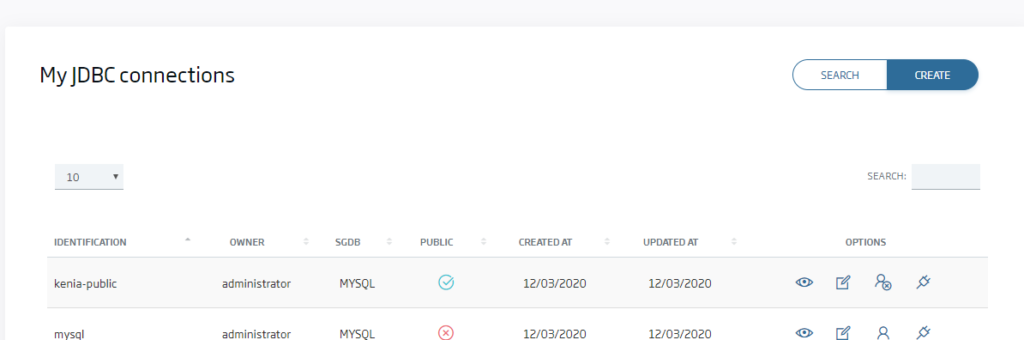
For this step, we will go to the JDBC Connections Management option, which is only available for the Administrator role, and create a new connection:
In this page, we must use the «OP_QUERYDATAHUB» option in the database and, when selecting the URL, fill in one like this:
jdbc:avatica:remote:url=http://{agentip}:{agentport};serialization=protobuf
For example:
jdbc:avatica:remote:url=http://jdbc4datahubbigquery:8765;serialization=protobuf
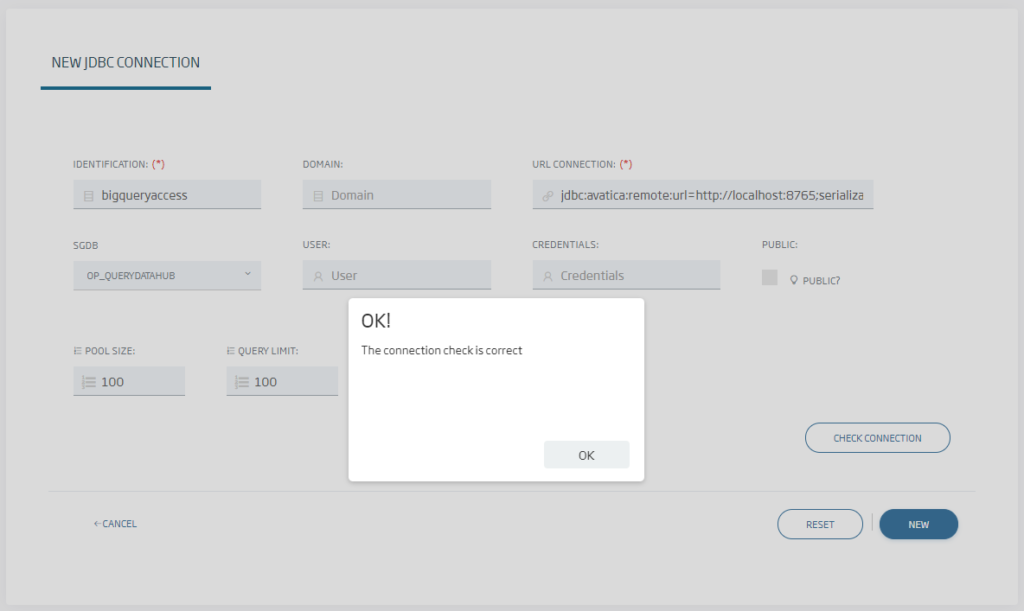
Then, only if the target database has a user and password, those must be provided on this screen and given to create the connection. The agent will send these credentials to the target database, so we will not need to have them stored elsewhere. In the case of BigQuery, this is not necessary (because we are using the access token), so we can leave it empty.
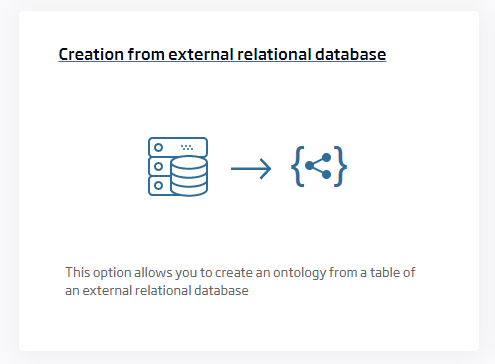
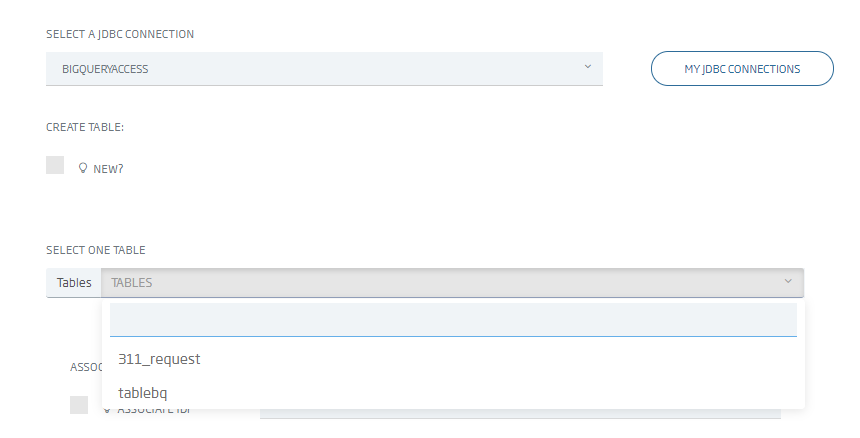
Having done that, we can now create ontologies like any of the relational type through the «Creation from external relational database» option, then selecting the new connection.
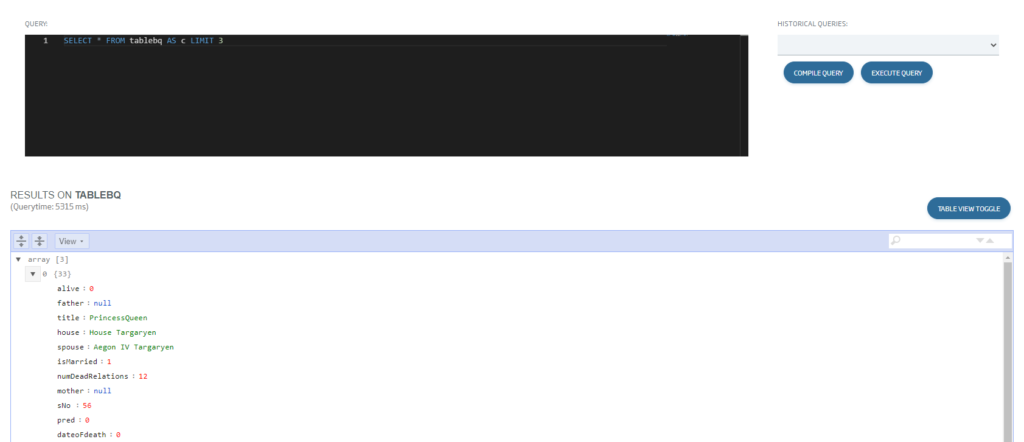
And finally accessing the data as any ontology, so we can use this ontology to generate a Dashboard on BigQuery, expose it as an API or any of the many other options the Platform offers.
Easy, isn’t it? We hope you found it interesting, and if you have any doubt, leave us a comment.