How to export and import data via the Onesait Platform REST API
Today we are going to talk about how to use the REST APIs to export and import Platform’s elements.
Isn’t it interesting? Let’s start by seeing what we can do with the import and export APIs, and what their properties are.
Export APIs
With this type of API:
- You will be able to export a single element, or several.
- You will be able to export an entity in the Platform. The user must either have permissions over that entity or have the role of «administrator».
- You will be able to export several entities. The user must be the owner (she will export all of her entities) or have the role of «administrator» (she will export all the entities).
- When several elements of the Platform are exported with a user with a «developer» or «analytics» role, only those elements owned by that user will be exported. If it is done with an «administrator» type user, all of the elements will be exported.
Import APIs
- As in the previous case, the user can either import a single element, or several of them.
- If the user has an administrator role, the elements with the owners assigned to them will be imported (if these users do not exist, they will not be created and will this be notified in the response json).
- If the user has a developer or analytics role, the elements will be imported assigning the user who performs the import as their owner.
- There is an optional overwrite parameter (false by default) with which specifie whether the elements being imported are to be overwritten (the user must be the owner or administrator) or not. If this parameter is set to false, it notifies in the response json which entities that have been imported and which have not been imported. If this parameter is set to true, those that match with the ones to be imported are deleted, notifying in the json all the elements that have been imported and which elements have not been.
- There is an optional parameter that allows you to import the elements associated with the entity (permissions).
Sure, but: how do I use the APIs to export or import?
It is very easy: From the Control Panel, in the upper right-hand part of the screen, we have access to the APIs of our instance of the Platform.

From that menu, we can access all the APIs of the Platform management, as well as to the OAuth2 user token.

By selecting the «Control Panel» API, we can access the documentation of all the APIs associated to the Platform resources. The list of available APIs can be found in list to the upper right.
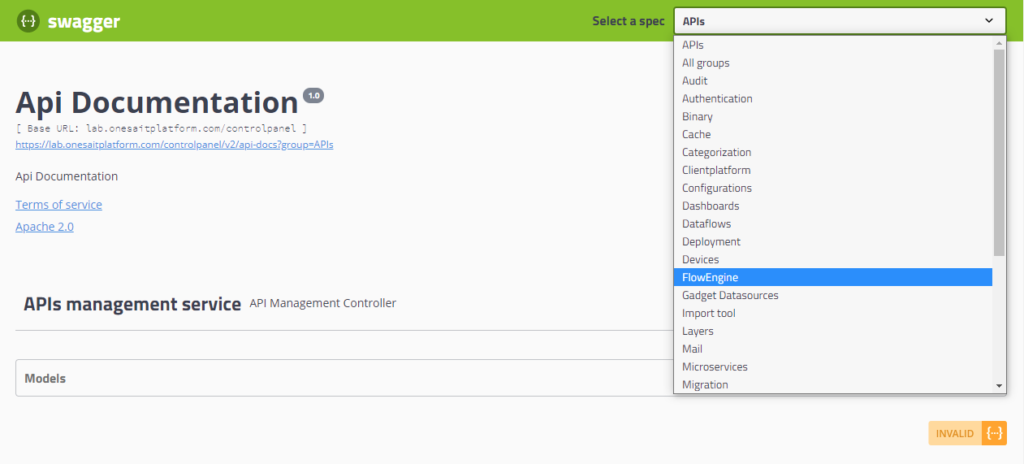
Well, let’s select the API we want from the list, to be able to access the resource to manipulate it (that is to say: query on it, create a new element, edit an existing one or delete it).
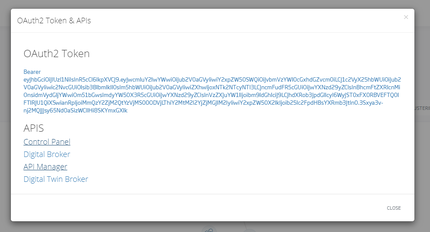
However, to be able to invoke these APIs and their operations, we need to use our user token, which, depending on the type of user we have, we may or may not be authorised to query certain things.
This token will be obtained by clicking, once more, on the API menu to the upper right side of the Control Panel, where we will copy the short alphanumeric code that appears.
For example, next we see the operation of exporting all the ontologies associated with a user named «Noether» in the CloudLab environment.
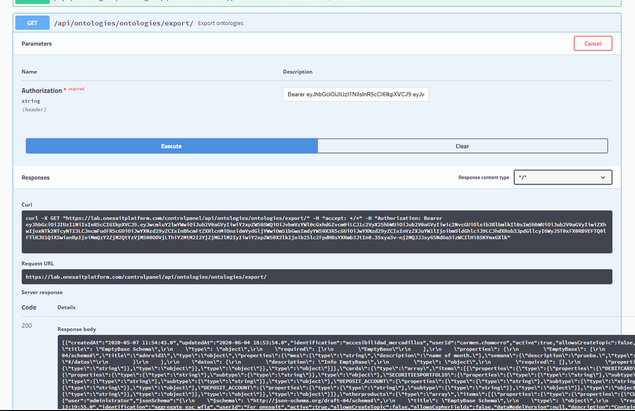
If we want to save the response of these APIs, in case we need to import the resources into another environment, we can easily do so from the command line with the following line:
curl --insecure -X GET 'https://$OP_HOST/controlpanel/api/ontologies/ontologies/export/' -H 'accept: */*' -H 'Authorization: $BEARER_TOKEN' > /mnt/ontologies.json
A curio to be taken into account here: We must have previously saved our environment’s DNS in the variable «OP_HOST», as well as the user token in the variable of «BEARER_TOKEN».

Executing this line, as we said, we can have our ontologies saved in the file «/mnt/ontologies.json».
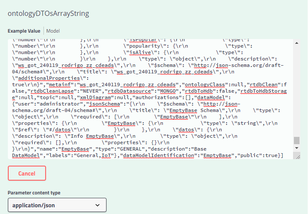
Okey, once we have exported this, we can proceed to import it in a different environment. This can be done by returning to the list of APIs again, and selecting the import API.

Once the import operation has been invoked, we will have to copy our previously exported ontology’s JSON file in the «ontologyDTOsArrayString» section.
Invoking these APIs from a Jenkins pipeline
Okay, we have already seen how to export an ontology and then import it somewhere else. This is interesting, but not practical if we have to do it manually. Thus, let’s see how to automate these tasks using a Jenkins pipeline.
The main advantage, apart from automating the process, is that we can create a cycle to version the Platform’s resources in Git.
Let’s see the following example, with a pipeline where all ontologies and APIs are exported to be uploaded to GitHub.
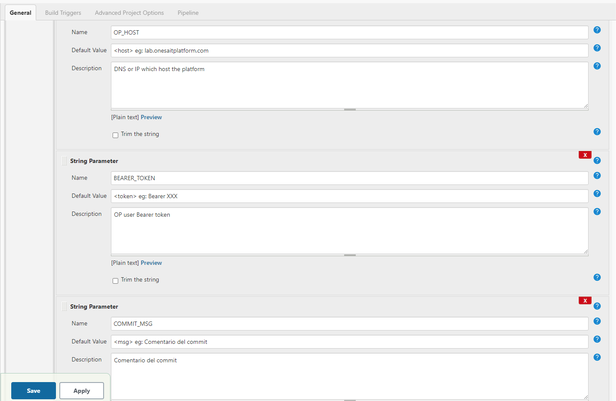
In this case, we’ve used templates for some variables, which we will have to introduce manually every time we want to run this pipeline. The code in question will be the following one:
pipeline {
   // Execute the Pipeline, or stage, on any available agent
   agent { node { label 'master' } }

   environment {
      // Base sources path
      SOURCESPATH = 'sources'
      FLOWENGINEPATH = 'sources/modules/flow-engine/docker'
      DOCKERSCRIPTS = 'devops/build-deploy/docker/scripts'
      EMBEDDEDGIT = 'git'
   }

   parameters {

       string(name: 'OP_HOST',
              defaultValue: '<host> eg: lab.onesaitplatform.com',
              description: 'DNS or IP which host the platform')
       string(name: 'BEARER_TOKEN',
              defaultValue: '<token> eg: Bearer XXX',
              description: 'OP user Bearer token')
       string(name: 'COMMIT_MSG',
              defaultValue: '<msg> eg: Comentario del commit',
              description: 'Comentario del commit')
       string(name: 'GIT_BRANCH',
              defaultValue: '<branch> eg: master',
              description: 'Rama donde hacer el push')
   }

   stages {

       stage('Get platform ontologies') {

            steps {
              sh "cd /mnt/"
              sh "curl --insecure -X GET 'https://$OP_HOST/controlpanel/api/ontologies' -H 'accept: */*' -H 'Authorization: $BEARER_TOKEN' | jq '.' > /mnt/ontologies.json"
            }
       }

       stage('Get platform APIs') {

            steps {
              sh "cd /mnt/"
              sh "curl --insecure -X GET 'https://$OP_HOST/controlpanel/api/apis' -H 'accept: */*' -H 'Authorization: $BEARER_TOKEN' | jq '.' > /mnt/apis.json"
            }
       }

       stage('push to git') {

            steps {
              sh "rm -rf /var/jenkins_home/workspace/export-import/*"
              // Fetch code from develop branch
              git url: 'https://github.com/cheessee/op-resources.git',
                  credentialsId: '4b7fa4a2-f4f1-49e1-9f74-97dd52529a20' ,
                  branch: '$GIT_BRANCH'
              sh "cd /var/jenkins_home/workspace/export-import"
              sh "cp -R /mnt/* /var/jenkins_home/workspace/export-import/"
              sh "git add ."
              sh "whoami"
              sh "git config --global user.name jriveiro"
              sh "git config --global user.email jriveiro@minsait.com"
              sh "git remote set-url origin git@github.com:cheessee/op-resources.git"
              sh "git commit -m '$COMMIT_MSG'"
              sh "git push origin $GIT_BRANCH"


            }
       }

   }

   post {
        always {
            echo "POST always section"
        }
        failure {
            echo "Failure section"
        }
   }
}
But there’s more: If, besides exporting and uploading our API to the Git, we also want to import to another environment, we must add the next step:
stage('Import platform ontologies') {

           steps {
             sh "cd /mnt/"
             sh "curl -X POST 'https://$OP_HOST_DESTINO/controlpanel/api/ontologies/ontologies/import?importAuthorizations=false&overwrite=true' -H 'accept: */*' -H 'Authorization: $BEARER_TOKEN_DESTINO' -H "Content-Type: application/json" -d '$(cat /mnt/ontologies.json)'"
           }
      }
We hope you found it interesting and that, if you have any doubts, you leave us a comment.