
How to start working with CloudLab
In today’s post, we want to show you the first steps to start using and working with the Onesait Platform CloudLab environment, the Platform’s Cloud installation that is available publicly and free of charge for everyone so that developers and potential users can carry out their tests and get to know the Platform.
Registration and access to the Platform
In this section, we are going to see how to register on the Platform and access the Control Panel. To do this, the first thing you have to do is access the environment’s address by clicking on the following button:
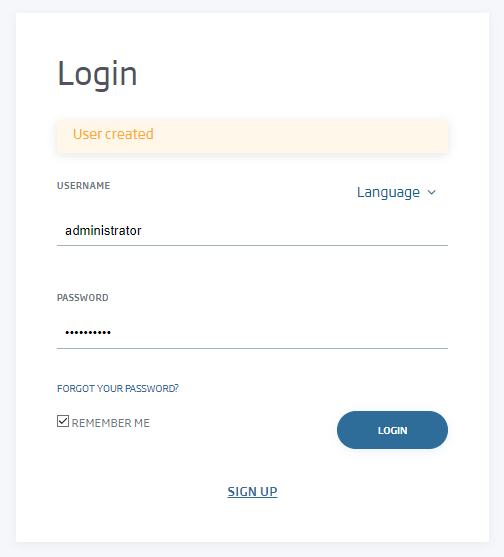
Once you access, you will see a screen that will ask you to access with your username and password.
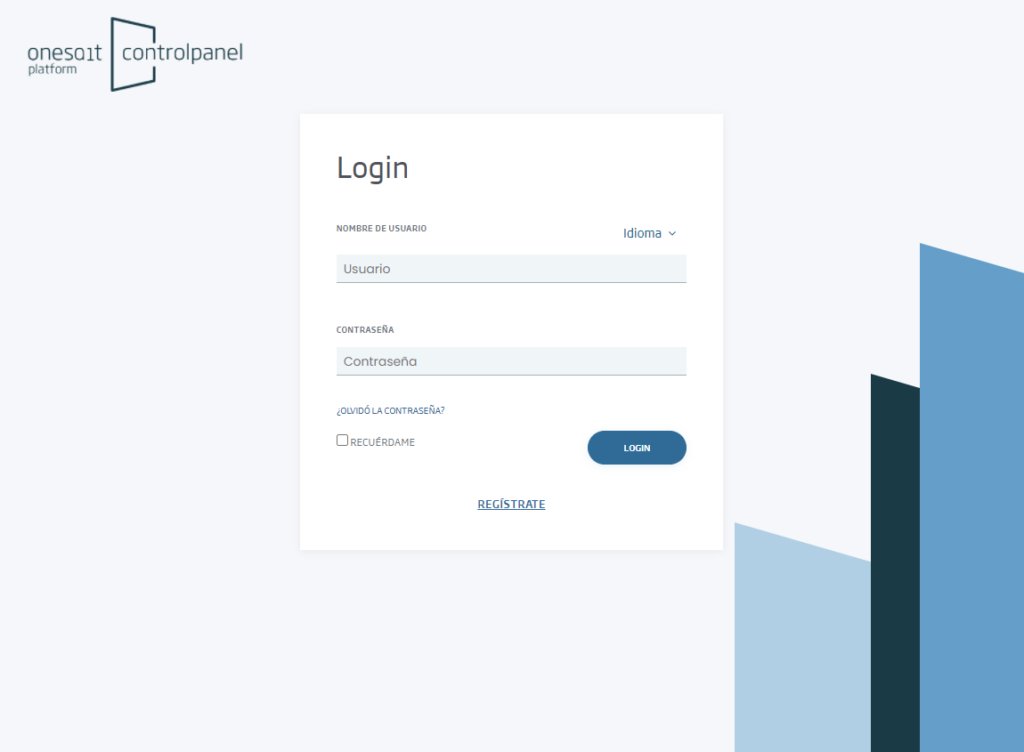
If you do not have a user name and password yet, you can register with a new one by clicking on the «Register» link. You will then be presented with a registration form, where you can choose the type of user you want to have.
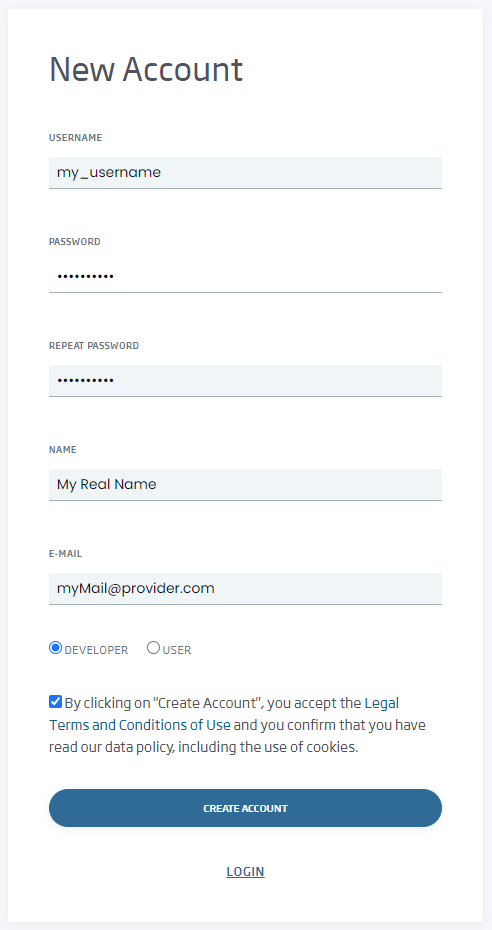
Regarding the password to be used, it must contain at least one capital letter, one lowercase letter and a number or symbol. In addition, the length must be between 10 and 128 characters. And you know what they say about passwords…
Respecto a la contraseña a utilizar, ésta debe contener al menos una letra mayúscula, una letra minúscula y un número o símbolo. Además, la longitud debe estar comprendida entre 10 y 128 caracteres. Y ya sabemos qué se dice de las contraseñas…
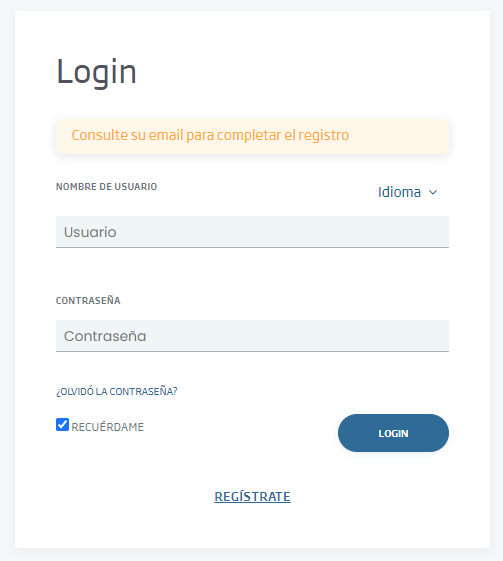
So, if the user creation process has been successful, you will be redirected to the login page, asking you to check your email to complete the registration (This confirmation e-mail does not usually fall into spam, but if you do not receive it, keep an eye there – just in case).
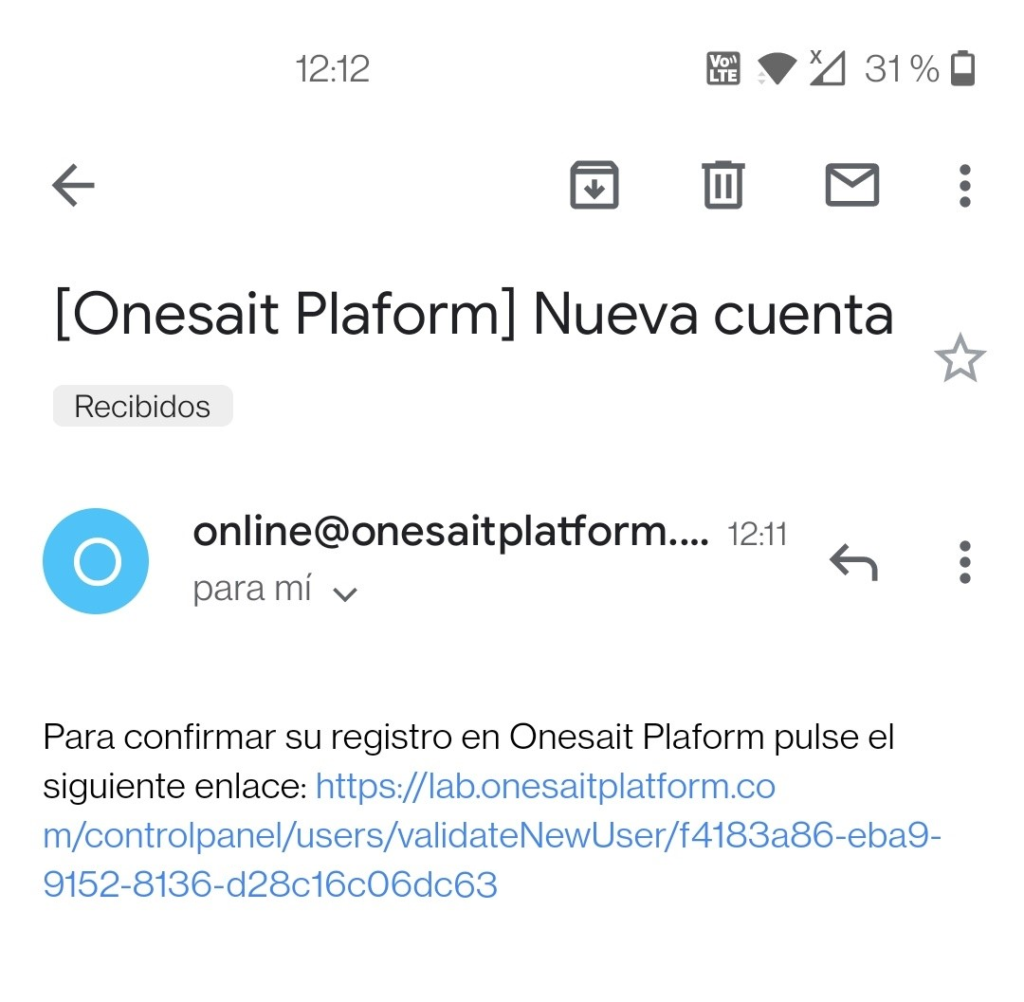
Accessing the link you received by email, you will activate your account, so now you will be able to access CloudLab with it.
Entering your data, you will access the CloudLab Control Panel and you will find a user interface like this one:
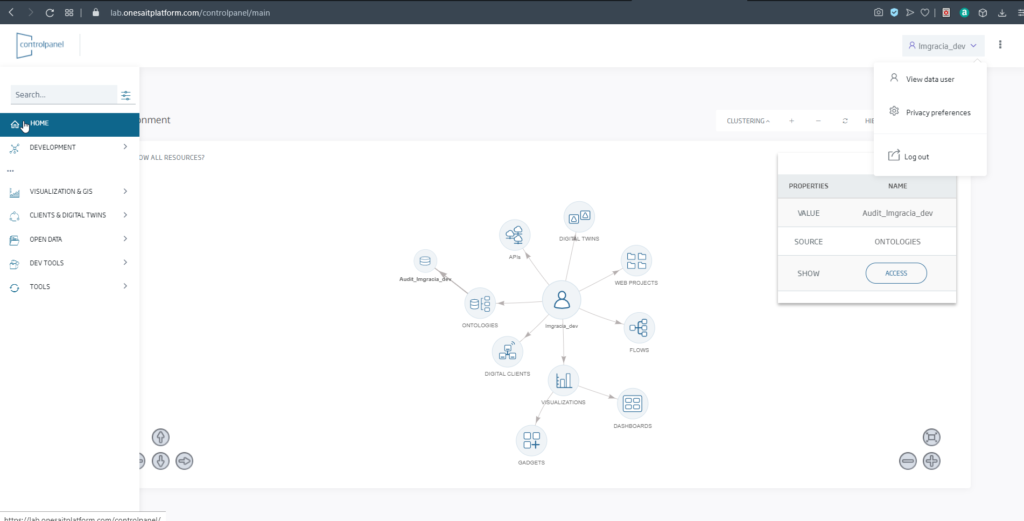
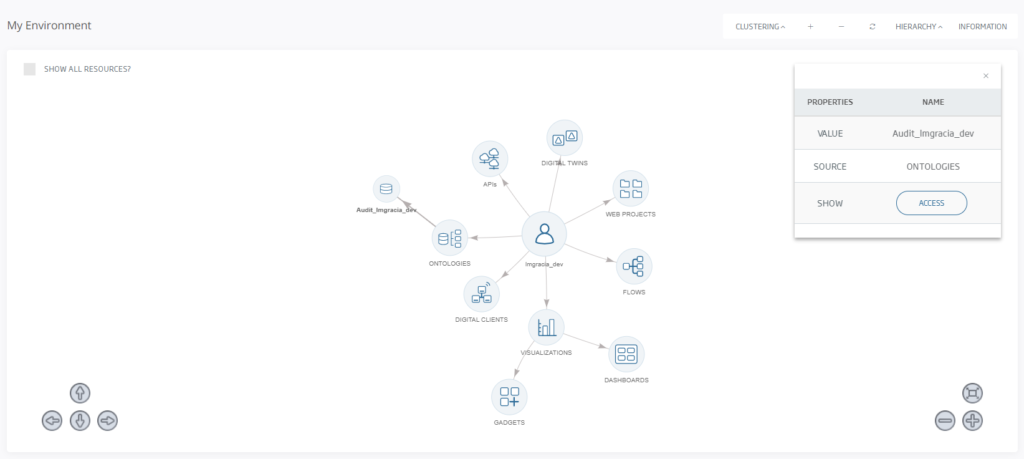
In this initial page, you will find:
- The options menu on the left side of the screen, with all the options for the user. This menu is organised into submenus.
- The header, from where you can access your profile, change language, log out, access the Platform management APIs or search in the Developer Portal.
- Access to My Universe, with all the concepts managed by the Platform. With the newly created user, you will only have an entity called «Audit_my_user_name», which is used to record all the actions of your user.
Creating an Entity/Ontology in the Platform
Now that you have accessed the environment and you have logged in correctly, what can you start to do? Let’s create your first ontology.
Onesait Platform is a Data-Centric platform, where data is the main and permanent asset, while applications come and go. In these architectures, the data model precedes the implementation of any given application and will be valid long after they are replaced. In the Platform, these data or entities are called «Ontologies».
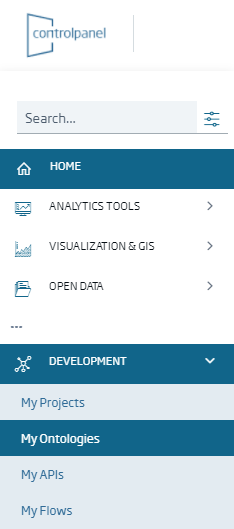
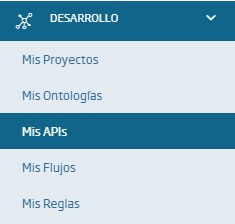
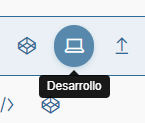
To create your first ontology, navigate to the «Development» menu, and once there, navigate to the «My Ontologies» submenu.
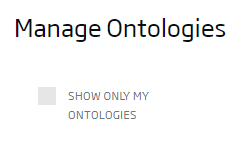
After accessing the submenu, you will see a list of your Entities/Ontologies. You also have the possibility of displaying the ontologies that are either public or that you are authorised to see. To do this, you must uncheck the option «Show only my ontologies», which is located above the list.
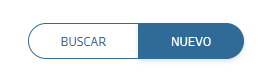
To create a new ontology, select the «New» option, located at the top right of the screen.
Once you click on it, a new ontology creation wizard will appear with several options:
- Creation step by step.
- Creation from file.
- Creation from a relational database.
- Creation from a REST API.
- KPI creation.
- Creation from timeseries.
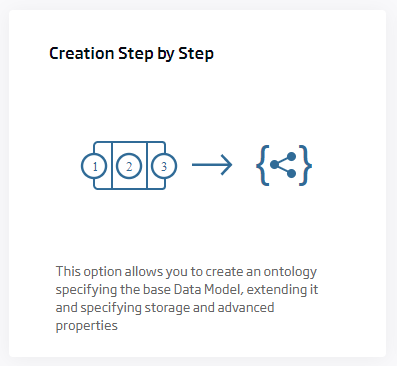
In this case, choose the first option, «Creation step by step».
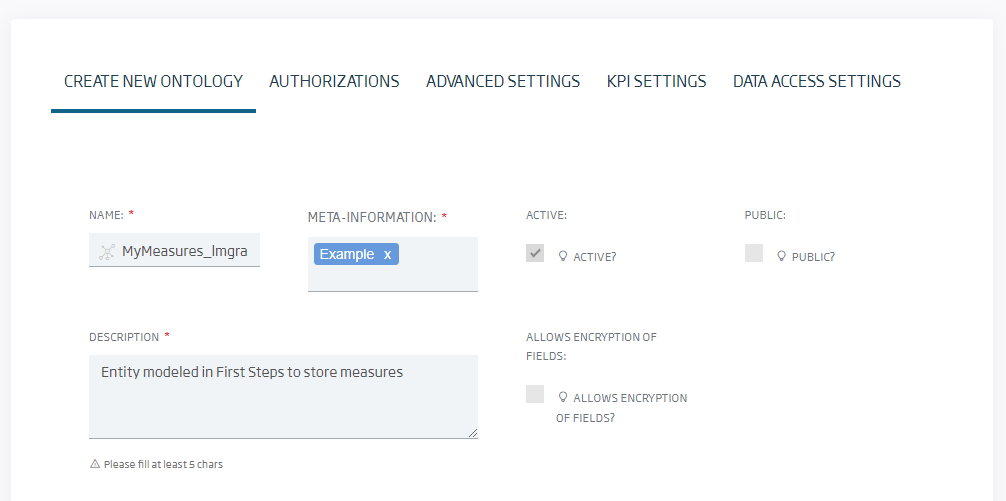
In the following screen, you will complete the initial information necessary to create the ontology:
- Name: to give a unique name to the Entity/Ontology. You cannot create ontologies with an existing name, so a widely used option is to add your username as a suffix to the ontology name.
- Meta-Information: to assign keywords to classify ontologies.
- Active: to mark the entity as Active and be able to use it (deactivated ontologies cannot be used).
- Public: if you mark the entity as public, all users will be able to query its data (but not modify the entity or insert data).
- Description: to give a description that can help to identify the purpose of the ontology.
An example of an ontology could be:
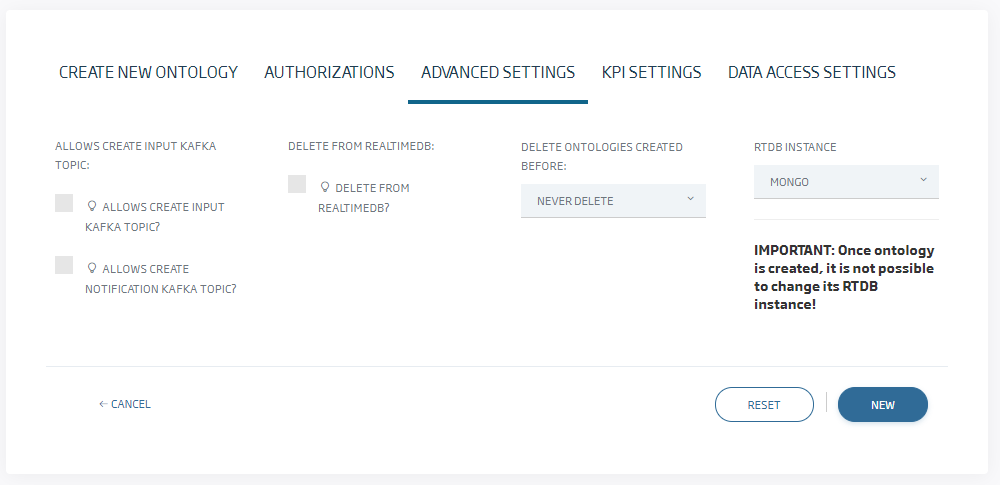
You can scroll through the various options when creating the Entity. Thus, if you go to «Advanced Options», you will be able to see several options, among them that the Entity/Ontology is stored in a MongoDB database managed by the Platform. For the time being, do not touch anything here.
Once you have completed the initial information for the Entity, you must continue completing the information to create it. The next step is to create this Entity from a Template. This allows you to reuse standardised data models (such as the GSMA Data Model), so that an Entity representing an Element (for example a car parking lot) is always modelled in the same way.

For this example, you want to model a simple Entity, so you will start from an empty template, called «EmptyBase Template», which can be found under the «General» tab. This template, as you can imagine from its name, is an empty base template in which you can model the Entity, tailor-made.
To load it, select the template, and in the modal menu that will appear, confirm that you want to load this template.

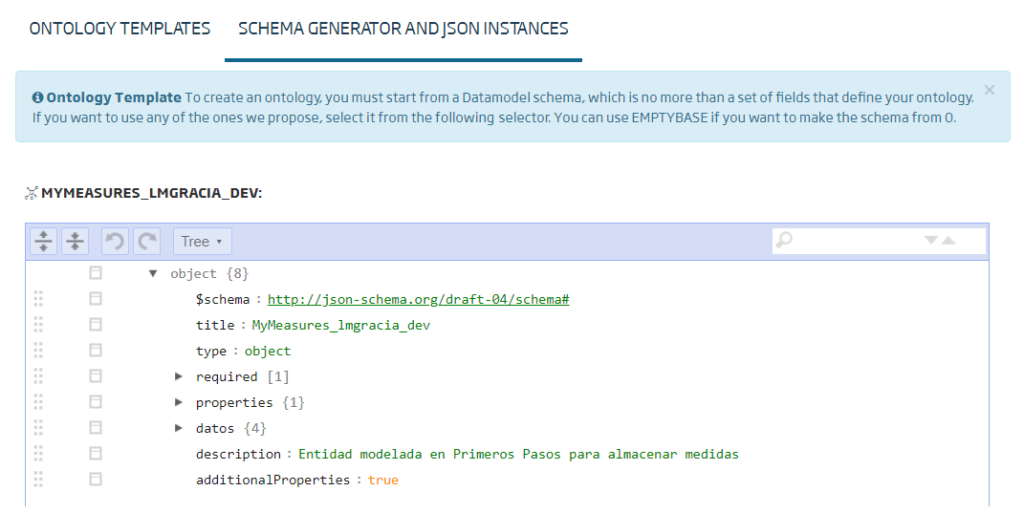
Having done this, you will see that an empty definition appears. The next thing to do is to add the properties of your Entity by clicking on «New property»:
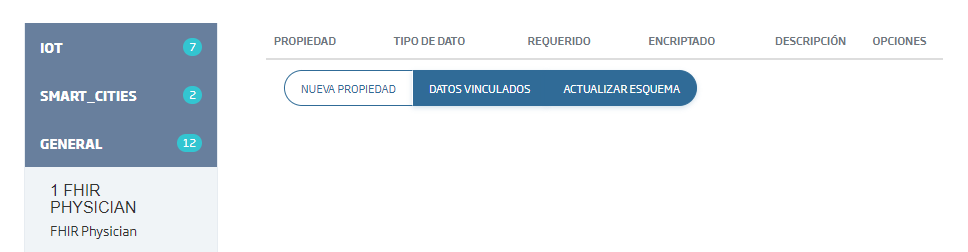
For this example entity, you are going to create the following properties:
- idDevice (STRING): represents the identifier of the device for which the measurement is taken.
- type (STRING): represents the type of measurement, for example humidity or temperature.
- measure (NUMBER): represents the measurement in numerical format.
- timestamp (DATE): represents the date and time at which the measurement was taken.

Once you have finished adding the properties, click on the «Update schema» button. This will show you the representation of that Entity in the Platform. The Platform uses JSON-Schema to represent the structure of the entities, independently of where they are being persisted (for example, even if this Entity/Ontology was stored in a relational database, the representation would be the same).
From here, you can also edit the structure of your ontology, if you are not satisfied with something you have included or omitted.
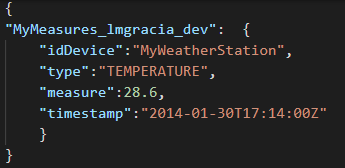
If you click on the «Generate Instance» button, the structure of an instance of the ontology will be displayed in the Platform. Just as JSON-Schema is used to represent these Entities/Ontologies, JSON is used to represent the instances of each Entity/Ontology, independently of the persistence behind it (again, even if the ontology is stored in a relational database underneath, the Platform will handle it this way).

An example of JSON with the defined structure would be this:
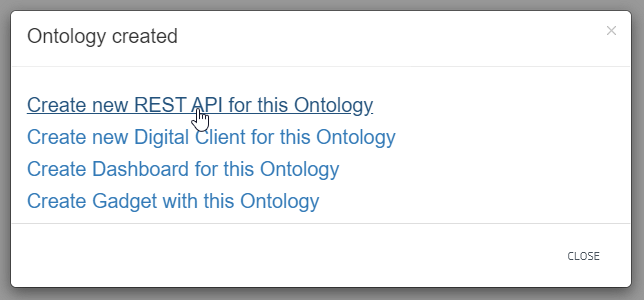
Finally, save the Entity/Ontology created by clicking on the «New» button at the bottom of the page.

With this, you would have already created your ontology, representing the information you want to manage in the system. Now, what can you do with what you have created? Next you are going to create a REST API to access this data in a simple and standardised way to be able to interact with it.
REST API to access your Entity/Ontology
You have two ways to generate a REST API of the ontology. The first way is just that, when creating the ontology, you can select the option «Create new REST API for this ontology» in the modal menu.
The other possibility is to select the «My APIs» submenu from the «Development» menu.
Whichever option you choose, you will access the list of APIs to which your user has access. You can see that, although your user is new, you already have access to many APIs- This is because other users have made their APIs public, so now you have access to those.
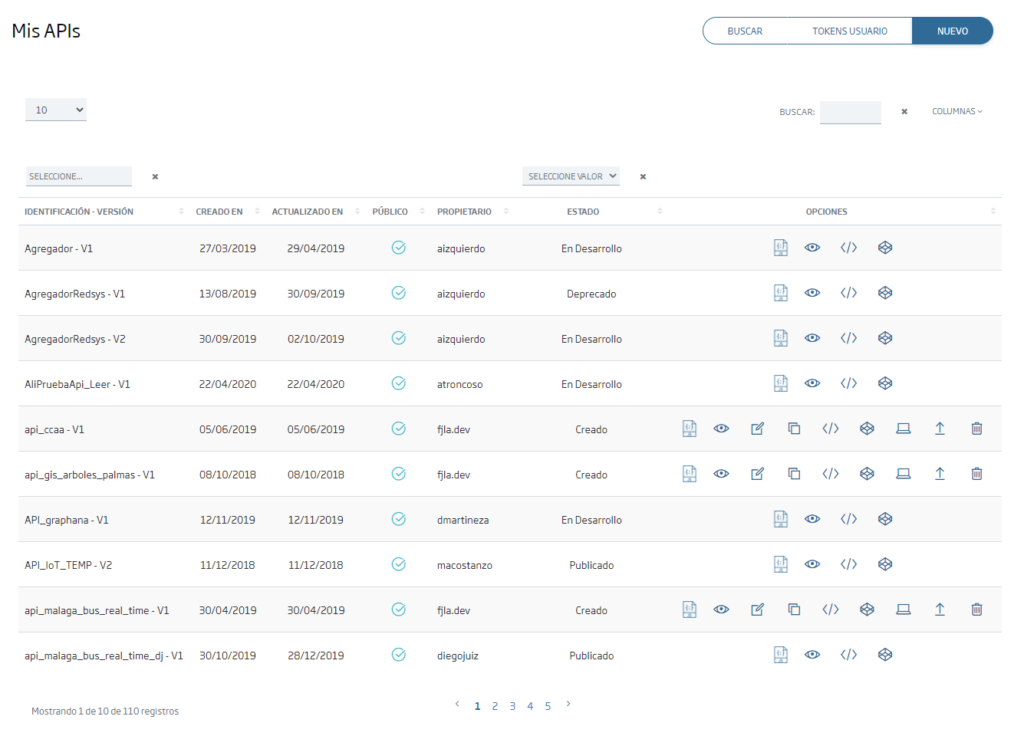
To create the new API, click on the «New» button at the top right of the screen.

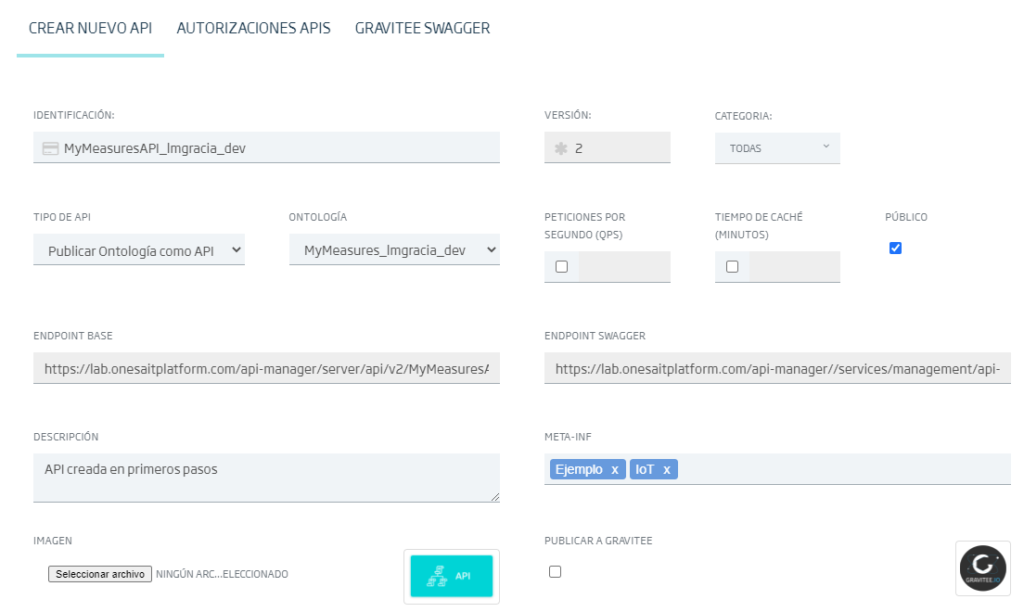
The API creation wizard will open, where, as in the case of the ontology, you will have to enter some information:
- Identification: this is the name of the API. It must be unique in the Platform instance.
- API Type: represents the type of API. The platform allows you to publish a REST API from an Ontology/Entity, or to create a REST API from a Swagger descriptor to act as a Proxy.
- Ontology: if you selected the Ontology API type, here you will select the ontology that handles the API.
- Description: provides a description of the API.
- Category: you can classify the API in a category, in order to visualise and search it.
- Public: by marking an API as public, it is visible to the rest of the users, who can use it.
- Meta-inf: allows you to assign different tags to the API.
- Image: allows you to assign an image to the API.
For this example, you are going to fill in these fields with something like this:
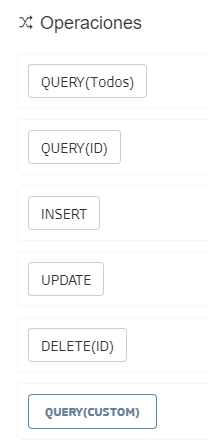
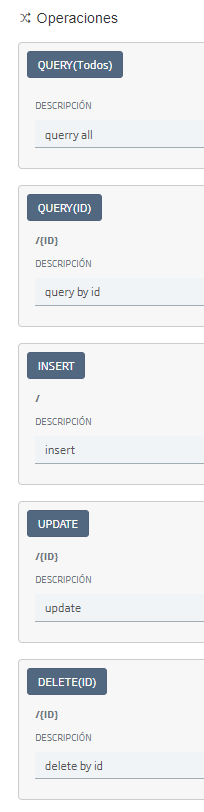
At the bottom of the form, you will see the Operations section, which represents the operations you want to enable in the API. The Platform allows you to automatically create the CRUD operations of an API, and also allows you to make custom queries.
- QUERY(ALL): GET request, retrieves all the data of an ontology/entity.
- QUERY(ID): GET request, retrieves an instance from the ID.
- INSERT: POST request, allows to insert a new instance.
- UPDATE: PUT request, allows to update an instance.
- DELETE(ID): DELETE request, allows to delete an instance from its ID.
- QUERY CUSTOM: GET request, allows to create a custom query.
For this guide, you are going to enable the default options (a description must be added to each option). In case you want to create a custom query, in this guide you can find all the information on how to create it.
Once you have the descriptions added, click on the «New» button, and you will have the API generated.

You will go straight back to the APIs list, where, if you check, you will see that your new API is listed.

When you create an API in the Platform, it is created in «Created» status, as APIs have a specific life cycle. For other users to be able to invoke the API, the status of the API must be at least «Development», something you can change by clicking the corresponding button:
Invoking the created REST API
To invoke the APIs of the Platform, you need an access token. The Platform allows invocation using two types of tokens:
- Custom Tokens: these tokens are generated for each user. This is the simplest mechanism to invoke an API.
- OAuth2 tokens: these tokens are generated by the Platform through the OAuth2 lifecycle.
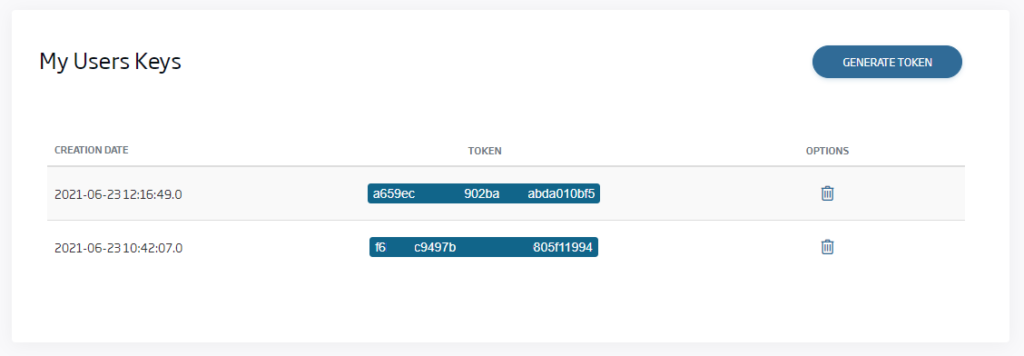
And how do you get these tokens? You can access them from the «My APIs» screen, by clicking on the «User Tokens» button:

Here you will see the custom tokens you have available, being able to delete it or create new ones by clicking on «Generate token».
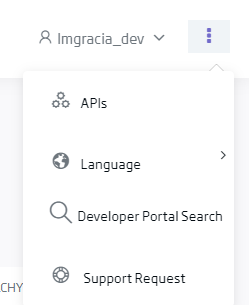
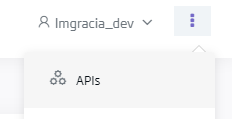
To obtain the OAuth2 token generated in the Control Panel for the user, you can find it by clicking on the three dots next to the user’s name, then selecting the «APIs» option:
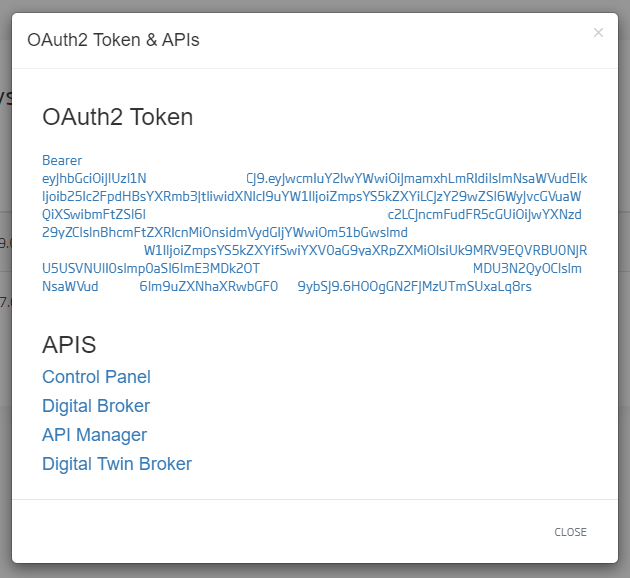
A modal menu will then open where you will find your OAuth2 token:
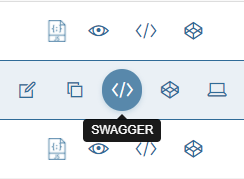
Once you have the tokens, you can go back to «My APIs». There, you will look for the API you want to invoke, and then select the «Swagger» button.
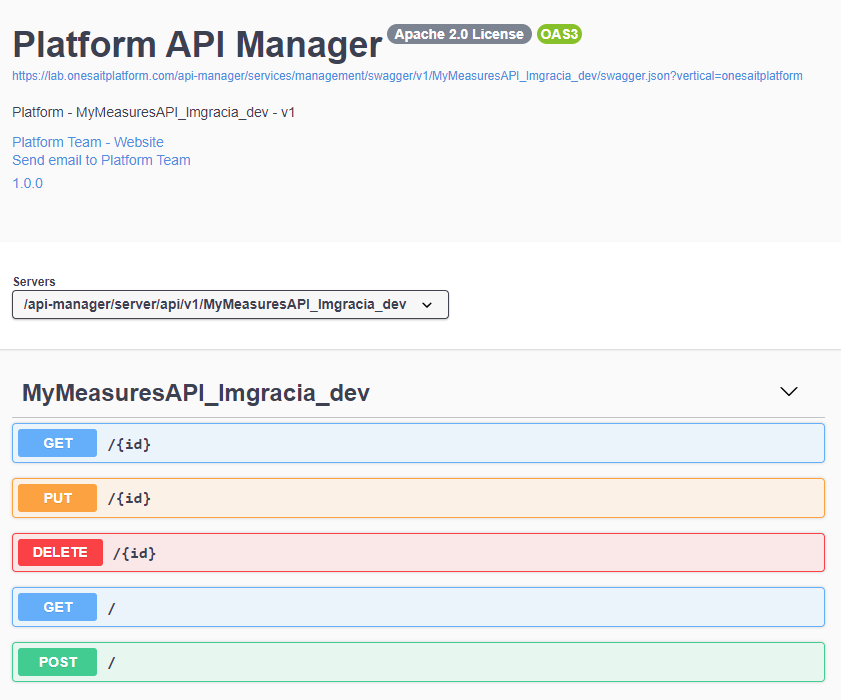
The Platform APIs are published following the Open API 3 standard. Within the Control Panel, the Swagger user interface is integrated in order to invoke these APIs. Thus, the screen that appears is typical of Swagger.
As the ontology is empty – no data has been ingested yet – you are going to start by invoking the POST method to add some data. By clicking on this method, a form will appear to test it:
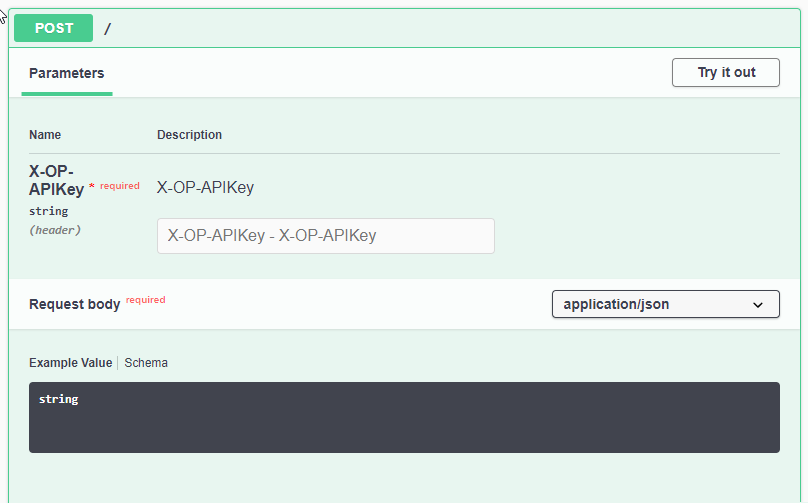
If you click on the «Try it out» button, the interface to introduce a record in the ontology will be enabled. And how can you do this? If you remember, we had previously discussed an example of the structure you need:
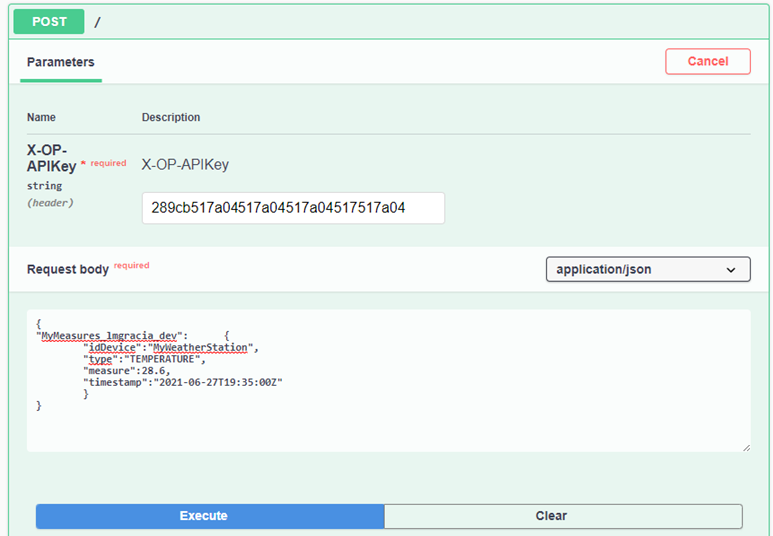
So, you just have to transcribe the object in the code window:
"MyMeasures_lmgracia_dev":	{
	"idDevice":"MyWeatherStation",
	"type":"TEMPERATURE",
	"measure":28.6,
	"timestamp":"2014-06-27T19:28:00Z"
	}
}
Finally, enter the user token in the X-OP-APIKey box, and click «Execute».
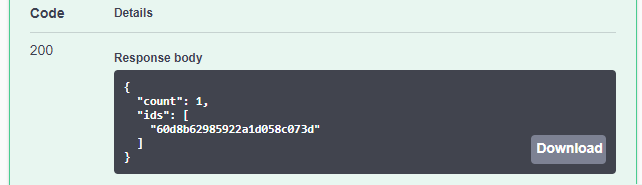
If the insertion is successful, you will receive a message like the following one, specifying the record’s ID:
To make the next step easier, you are going to perform some more ingestions, so that you have more data in the ontology (three or four will be more than enough).
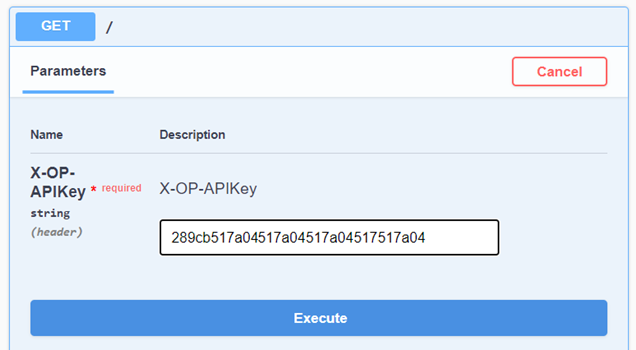
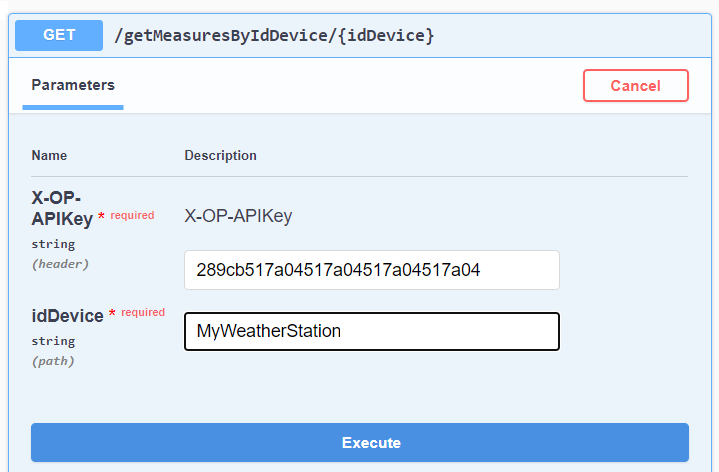
Having done this, you are now going to try out the API’s GET method, to retrieve all the measurements that you have ingested. Click on the method and, as in the previous case, the form to make the query will open. In this case, you will only have to enter your user token in the X-OP-APIKey box, and click on «Execute».
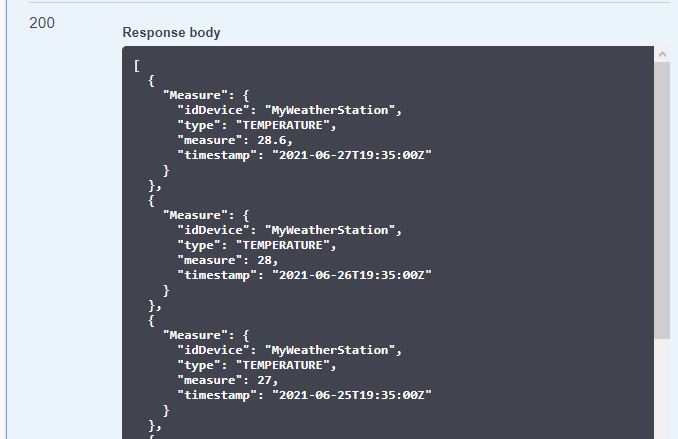
When you invoke the method, you will obtain as the output the list with all the measurement records that you have previously introduced in the ontology:
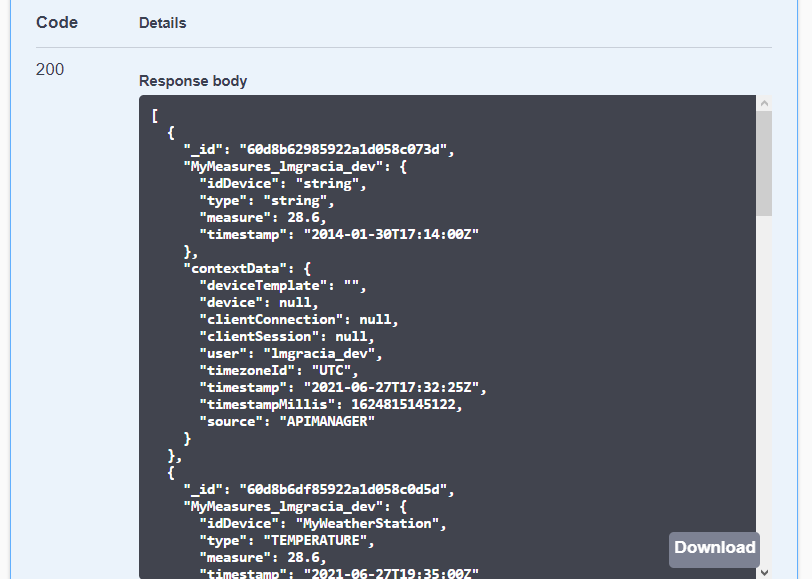
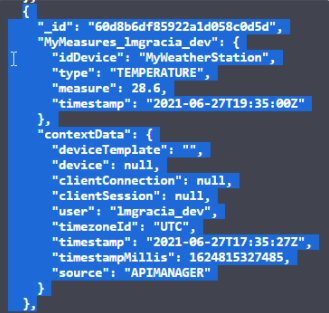
For each record, in addition to the measure, an object with the name «contextData» is included. This object is created automatically, and records the user who made the insertion, the time at which it was made and the module of origin, along with other information.
The rest of the API methods can be tested in the same way, so if we encourage you to do so, it is to test each method, so you will know what to expect from them.
Finally, you can also indicate that from within the Swagger interface, you can also obtain the request that you must make from a curl or from another client:

Completing the created REST API
So far, you have created an API with a set of basic operations. Next, you are going to see how to create a custom method that returns the measurements given a single «idDevice». You can do this because the API is still in the Development state.
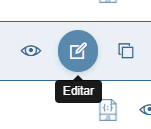
To do this, you need to edit your API. To do this, go back to the «My APIs» menu, find your API in the list, then select the «Edit» option.
Access the API configurator again. There, go to the bottom, where you defined the available API operations, and click on the «Query(Custom)» button.

In the wizard that will appear, introduce a query of the following type:
Select * from MyMeasures_lmgracia_dev as c where c.MyMeasures_lmgracia_dev.idDevice='MyWeatherStation'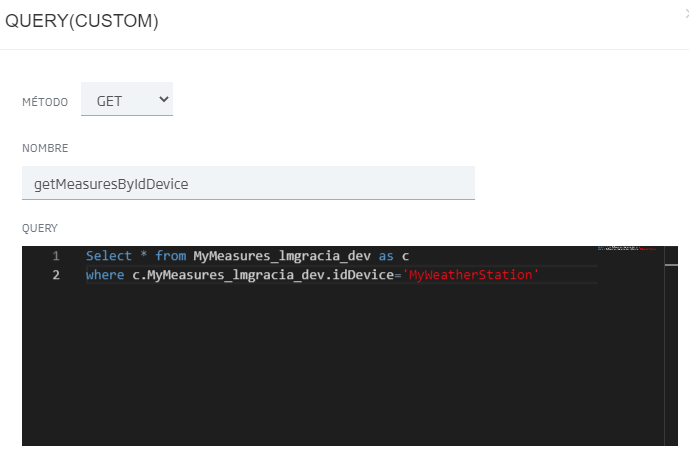
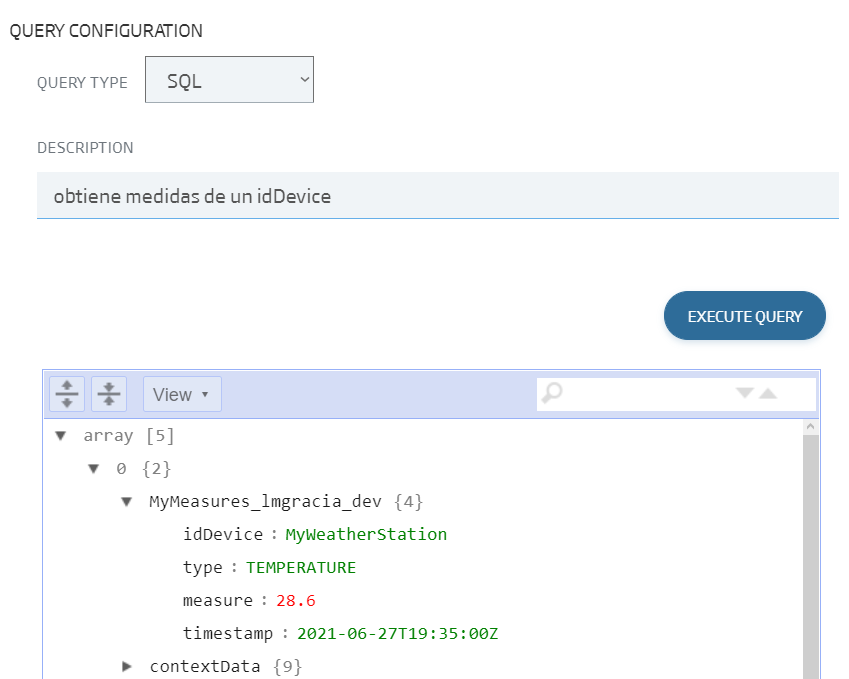
If you click on the «Execute query» button, you can see that you get the measurements from the record.
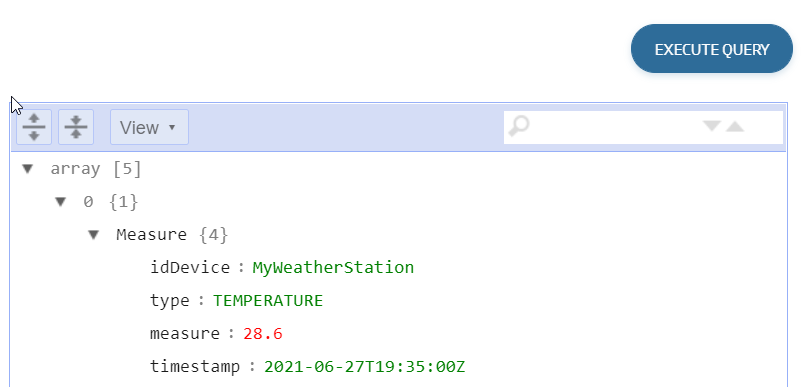
You can also format the query that you get – for example, to not see the contextData information. To do this, modify the query to another of this type:
Select c.MyMeasures_lmgracia_dev as Measure from MyMeasures_lmgracia_dev as c
where c.MyMeasures_lmgracia_dev.idDevice='MyWeatherStation'
Once this is done, you get a record like this one:
To finish, you are going to parameterise this API so that the «idDevice» parameter can be passed as a parameter. To do this, you just need to include the parameter with «{$<parameter_name>}» and specify the type of parameter, which in this case will be a «STRING» type.
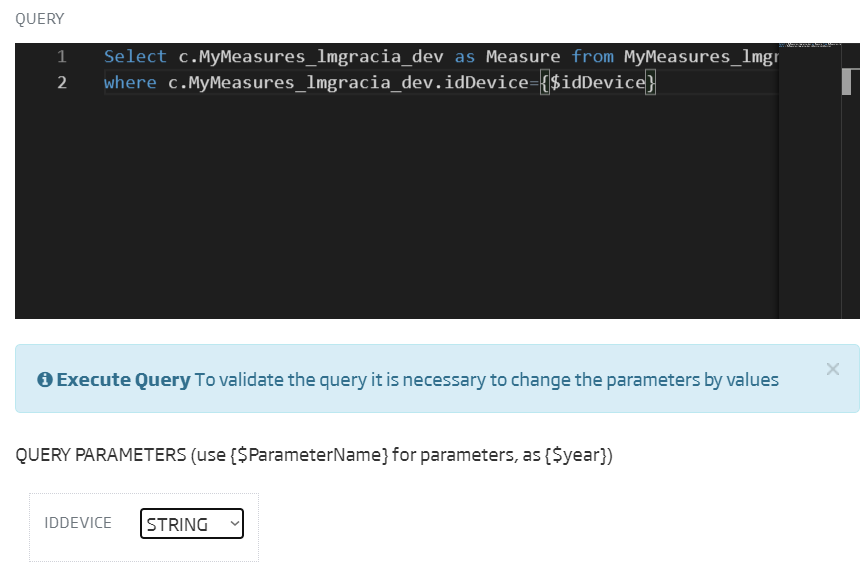
Having done this, click on «Save changes», and then, in the API configuration window, click on «Edit». With this, you will have the new API method available, which you will be able to invoke in the same way as the previous ones from the Swagger.
After executing the query, you will get something like the following:
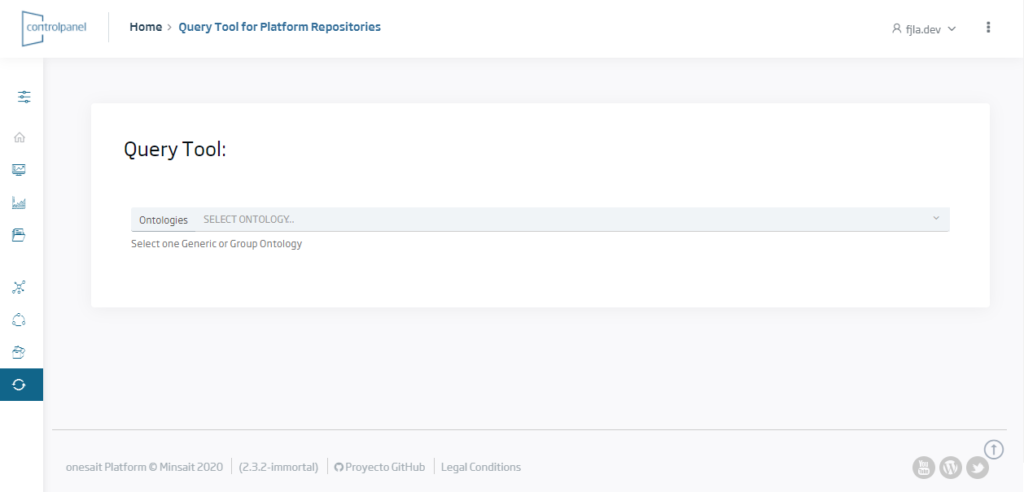
Using the Query Tool
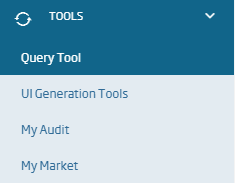
To finish with this entry of first steps with Onesait Platform, we don’t want to forget to show you a very important tool when developing with the Platform. We are talking about the Query Tool, which is accessible from the «Tools» menu, in the «Query Tool» submenu.
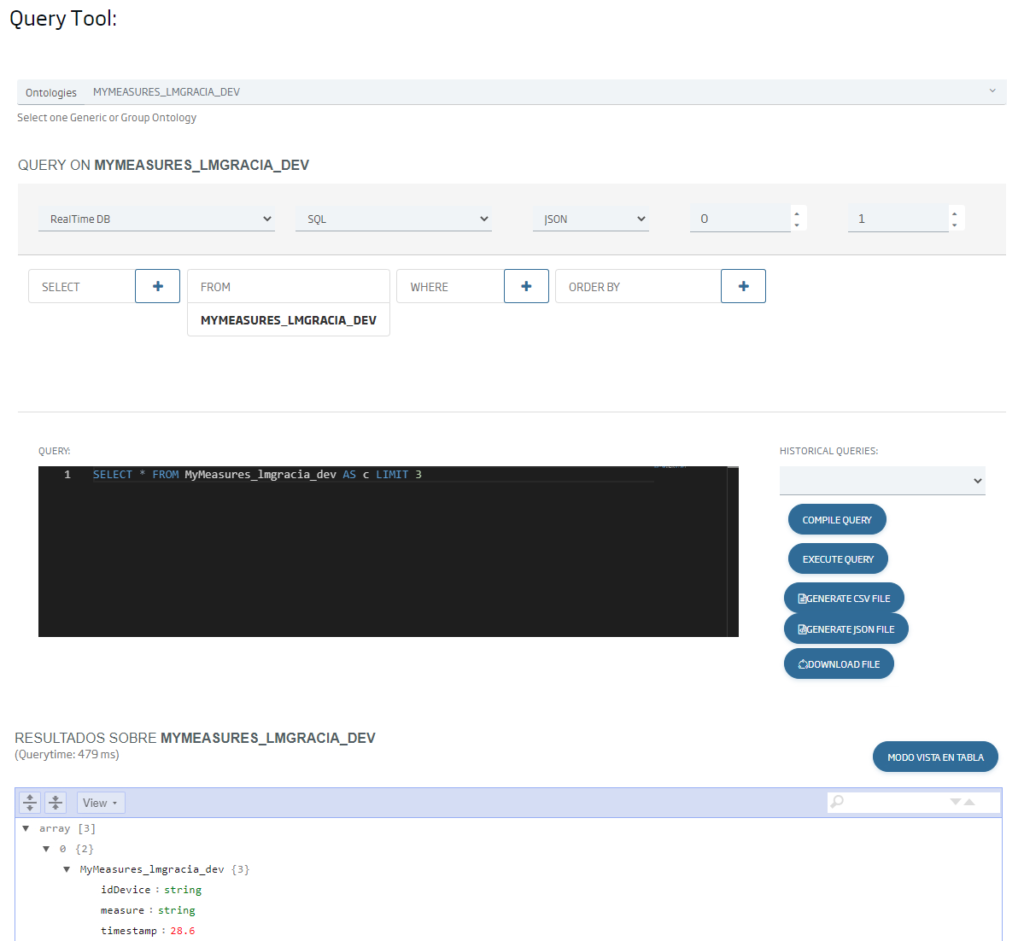
You will access the following interface, from where you will be able to select the Ontology/Entity on which you want to make queries and, in a simple way, be able to consult the information managed by the Platform.
The Platform transparently manages the repositories where the information is stored. So, although your Entity is stored in Mongo, you can execute a query in SQL:
Well, this is the end of this introductory post about the Onesait Platform and the first steps to start working with it.
We hope you found it interesting and, if you have any question, you can visit our Developer Portal, or leave us a comment with your query.

Pingback: How to create a multi-language Dashboard – Onesait Platform Blog
Pingback: Working with a Data Lake on Onesait Platform (part 5) – Onesait Platform Blog
Pingback: Onesait Platform Release 3.1.0-kickoff – Onesait Platform Blog
Pingback: How to work with Twitter from FlowEngine – Onesait Platform Community
Pingback: What Open Source technology do we recommend to replace Hadoop? – Onesait Platform Community
Pingback: Simulating data in Onesait Platform (part I) – Onesait Platform Community
Pingback: Simulating Data in Onesait Platform (Part 1) - TECHI MATTERS
Pingback: Simulating Data in Onesait Platform (Part 1) – Premium Downloads