
How to work with Twitter from FlowEngine
The Platform’s FlowEngine component offers a large number of connectors to work with social networks. Specifically, it includes two components, one to «listen» to what is happening on Twitter (for example, receiving tweets about a hashtag or doing a search), and another one to publish tweets.
Nothing is better than an example to understand it well, so in this post, we are going to see how to use these components to:
- Listen to what is said on Twitter about a specific topic (a hashtag).
- Store the information of that tweet in an entity of the Platform.
- Automatically publish a tweet from our account with information received from an external service (OpenWeatherMaps).
As the requirements, we are going to need to carry out all this is to have a Twitter account, so if we do not have one, it is a good time to register on this social network. In addition, we are going to use the Platform’s CloudLab environment, so you also need to be registered there.
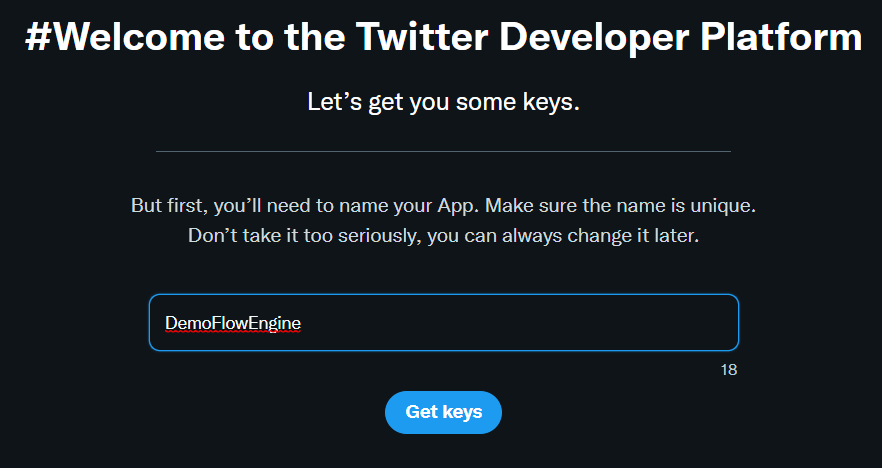
Step 1: Create an APP in the Twitter Development Portal
Let’s consider that we have our Twitter account already created and that we are logged in. Now, we are going to access the Twitter Development Portal. Once we have accessed, we will navigate to the Apps section, and inside we will select «Create an App»:

We will be asked to confirm that we want to create a developer account, and we will also be asked to fill in a data set. After doing all that, we will receive an email to confirm that we want to create a developer account:

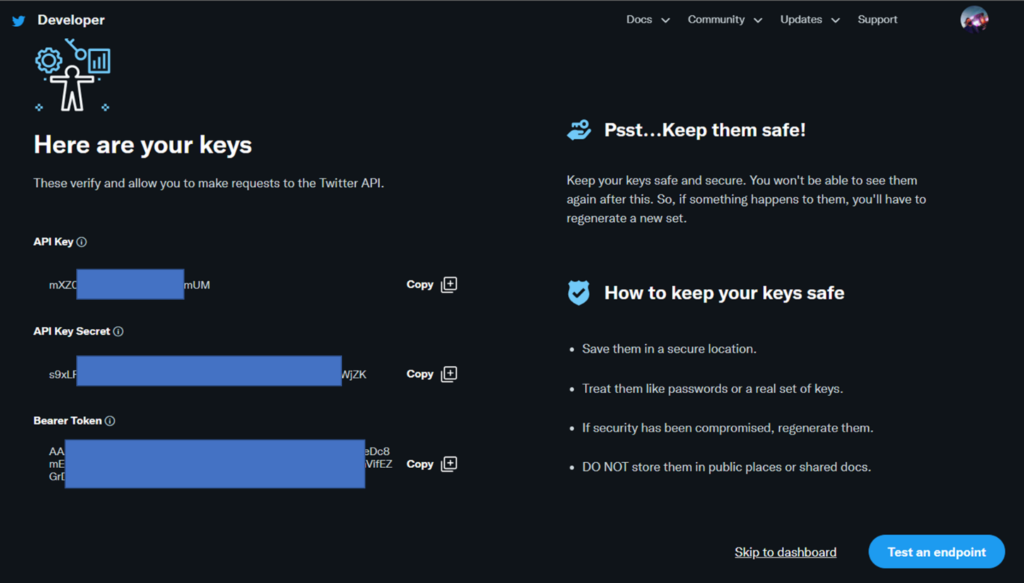
At this point, we can now proceed to create our application and get the API keys.
We will be reminded that we must save these keys to use them later in our applications, which in our case will be for use in the FlowEngine.
Now the million dollar question: Is this going to work? Well, we can test it nowby clicking on the «Test an endpoint» button. A window will open, and there we will be told that we can make a call using the following command:
curl -X GET -H "Authorization: Bearer <BEARER TOKEN>" "https://api.twitter.com/2/tweets/440322224407314432"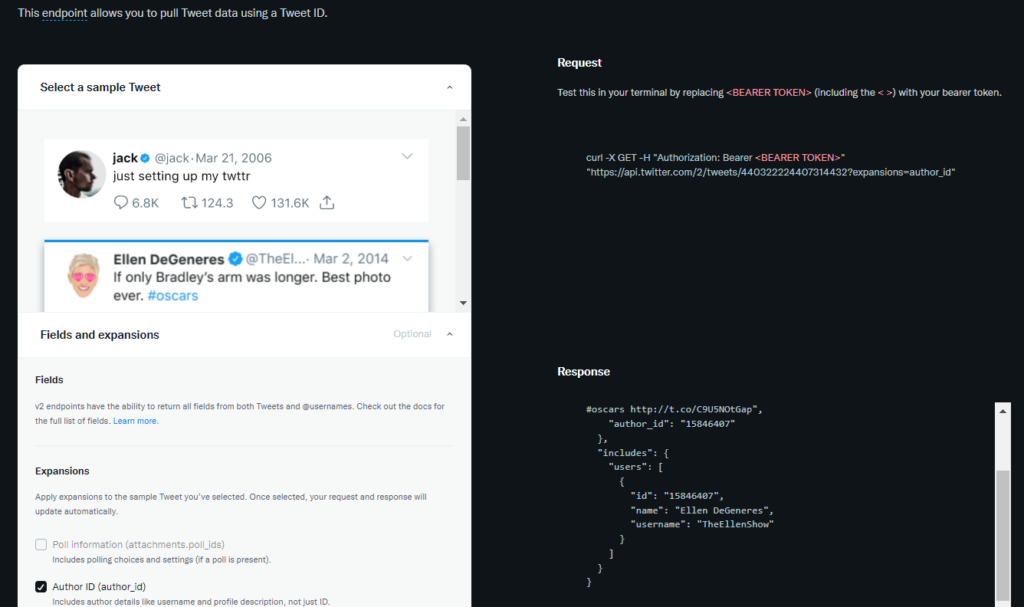
So, it seems that: Yes, that we can obtain information. Thus, so far, we are doing well.
The next thing we will do is go to the Dashboard, within which we can configure our application:
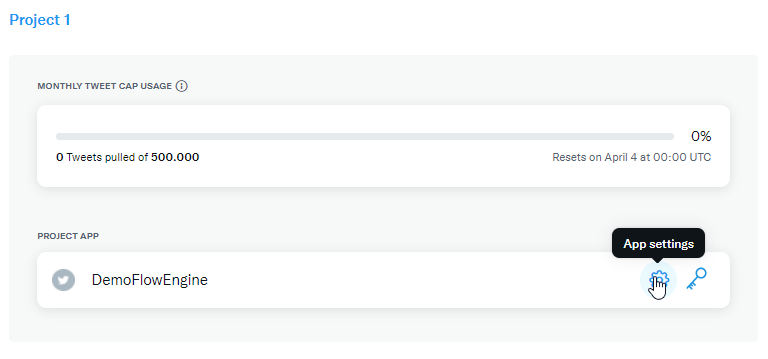
We navigate to the «Keys and tokens» tab and click on the «Generate» button in the Access Token and Secret part.
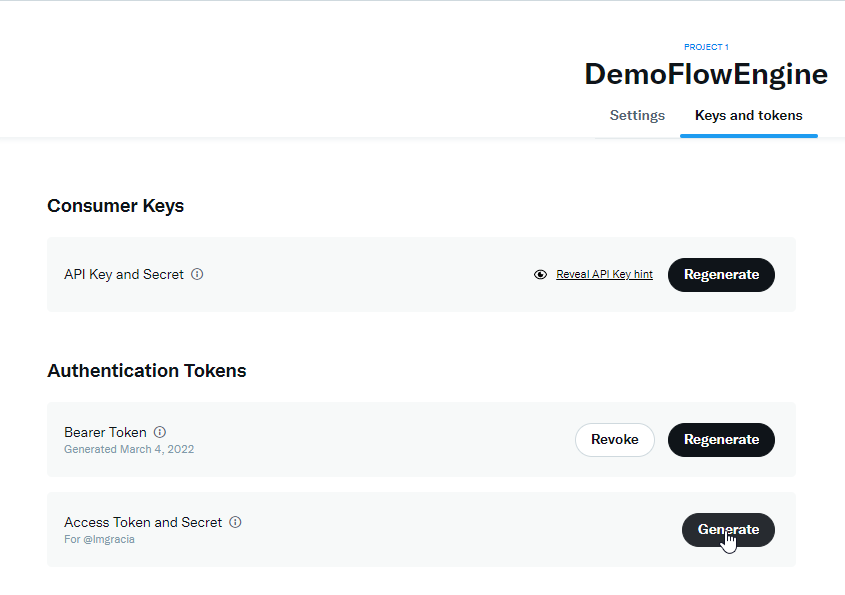
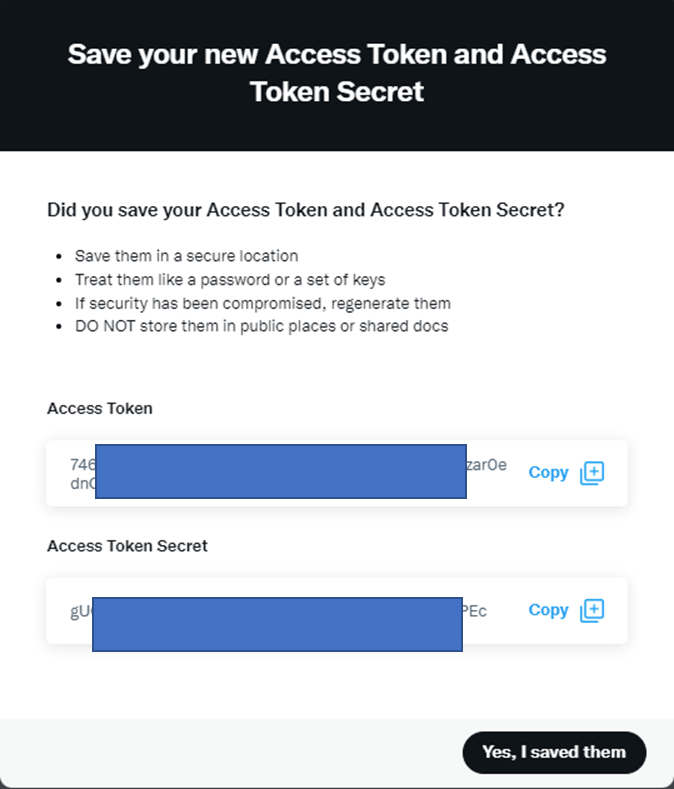
We will get a window with the access token and the secret access token, which we will have to keep safe along with the API keys.
Until not long ago, this was more than enough. However, with the rcent changes in Twitter’s API access policy, the new developer accounts have a so-called Essential level, which does not allow access to API 1.1 – which is the one used by the FlowEngine Node-Red component.
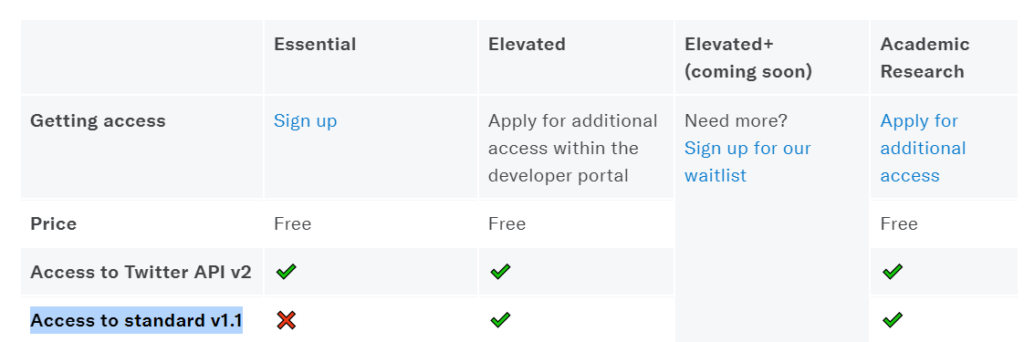
But don’t you worry, because reaching the Elevated level is easy: We have to go to the project in the Developer Portal, and request the change by pressing the «Apply for Elevated» button.
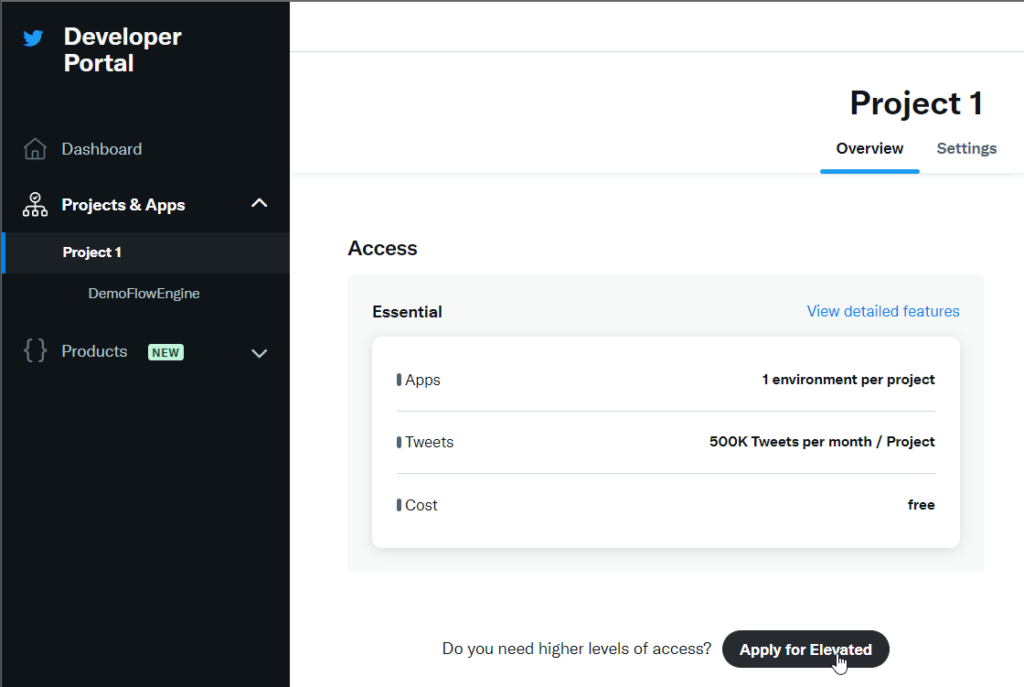
As Twitter is quite the gossip, we will be asked for some information to enable access to this level, such as the use we want to make – here we can indicate that we want to test the API to collect tweets with Node-red (or the reason that we choose).
Step 2: configure the Twitter component in Flowengine, and retrieve and publish Tweets
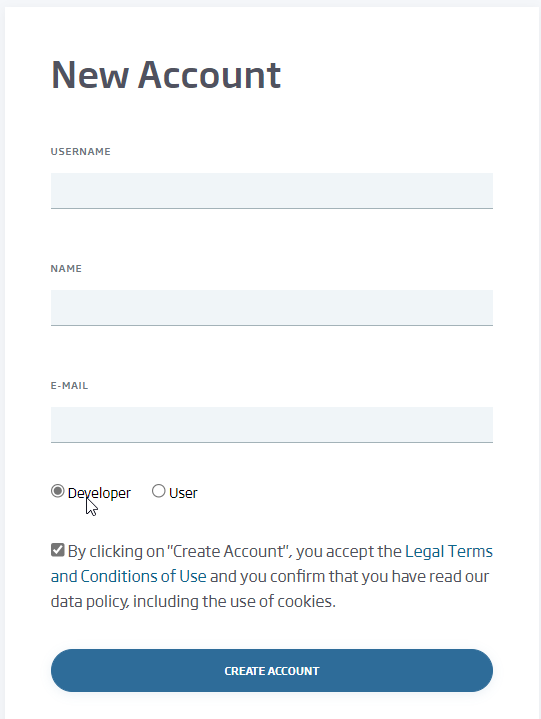
So, we already have everything we need ready on Twitter, so we move to the Onesait Platform, and specifically, as we said in the introduction, to the CloudLab experimentation environment. We are going to make use of a «Developer»-type user, so if yours is of a different type, or if you don’t have a user yet, register as that role.
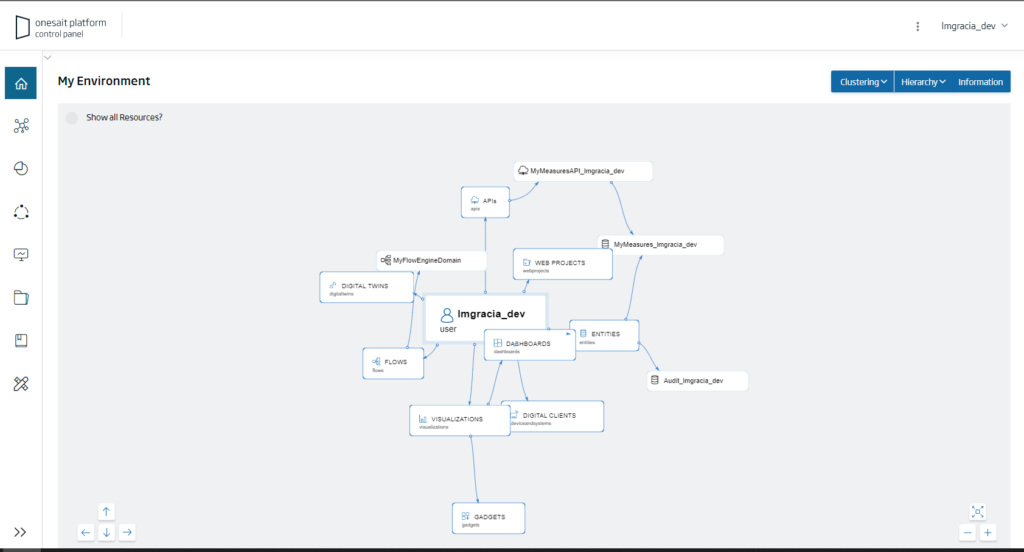
We log in with this user (if we have created it right now, we will receive an email to validate the registration) from the Platform’s Control Panel.
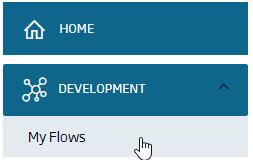
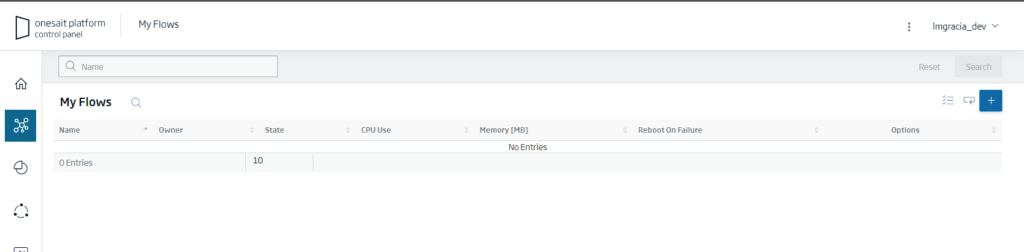
Once inside, we navigate to the «Development > My Flows» menu:
If it is the first time that we access the Platform, we will see that we have not created a FlowEngine domain, so we will press the «+» button to create it:
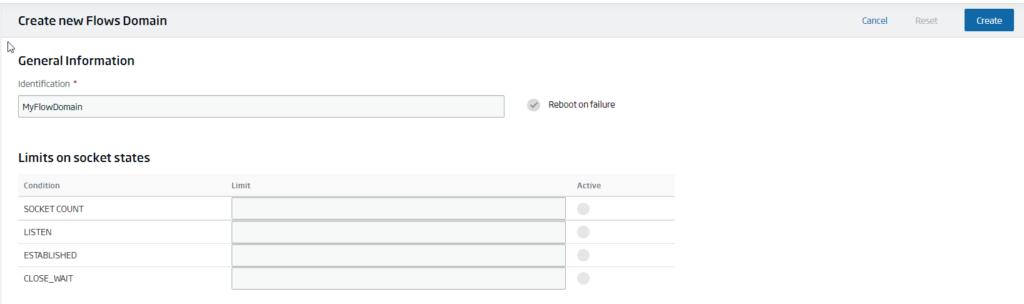
We give it a representative name, and click on the «Create» button:
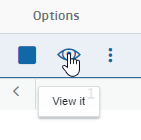
Now we can see our domain, which by default will be stopped, so firstly we will start it:

Once the domain is started, we can access it with the «View It» button:
Finally, we will access the FlowEngine palette, indicating when entering that we do not want to create a project.
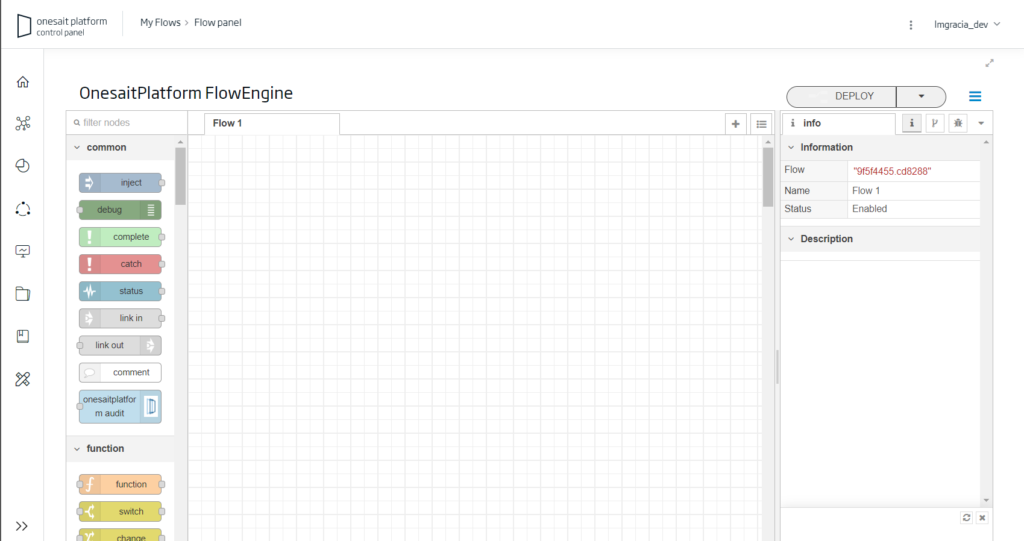
As a personal recommendation to facilitate viewing, we can maximize the work area with the following button located in the right corner:

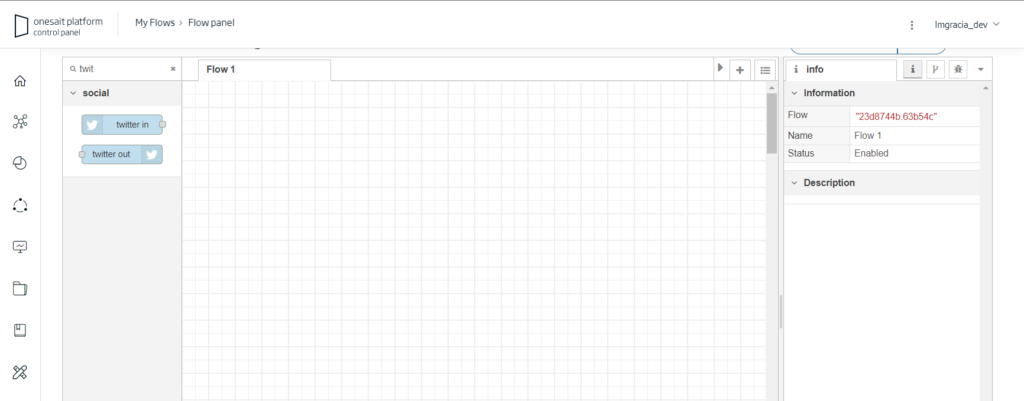
Well, we are now ready to start working. We will start by searching for the Twitter components with the search engine, and we will drag the «Twitter In» component to the palette:
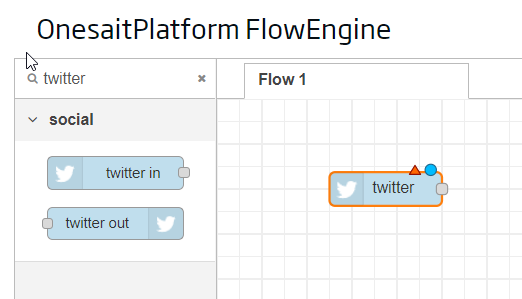
The triangle tells us that we must configure the component, for which we will double click on it to bring up the configuration window.
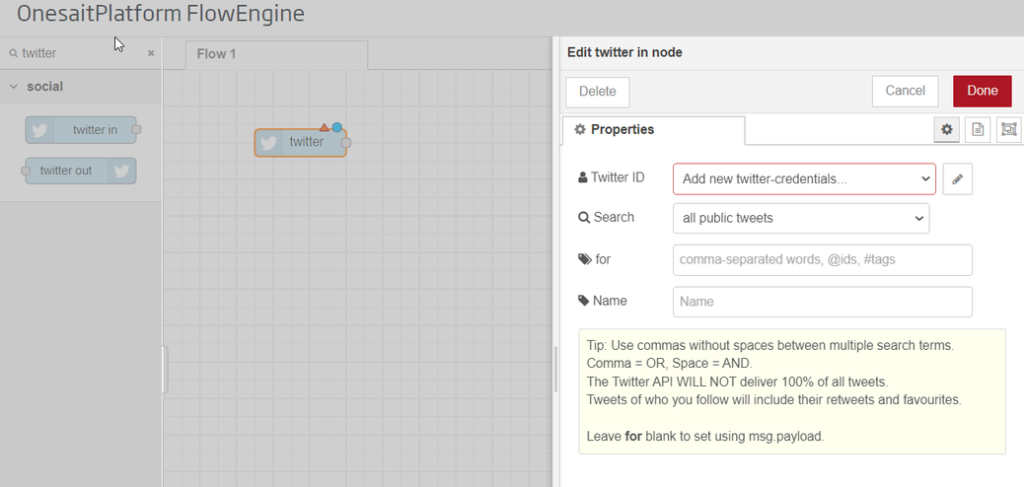
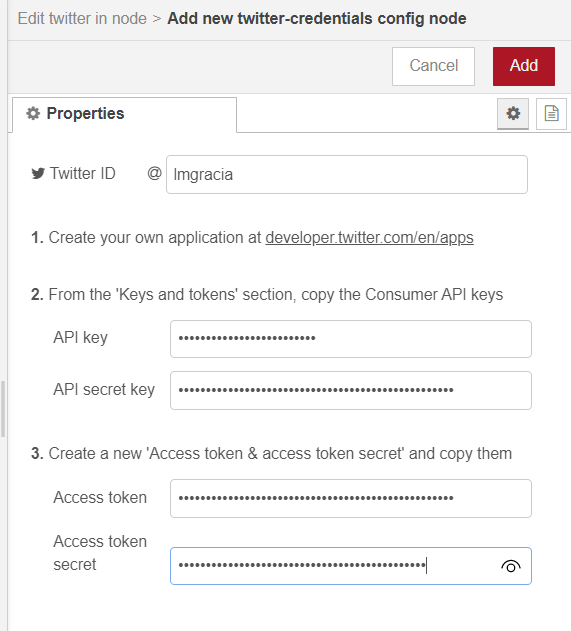
In the side window that will appear, we have to configure the Twitter credentials that we obtained at the beginning of this post (the API key and private key, as well as the token and private token).
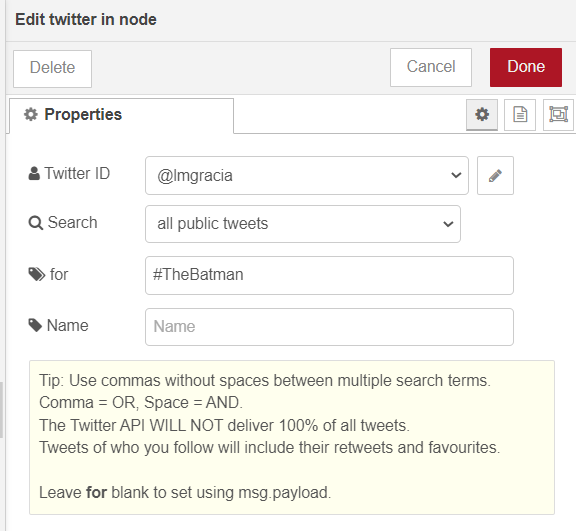
After this, we can now configure what we want to «hear», such as a trend like #TheBatman on the day of its premiere in Spain:
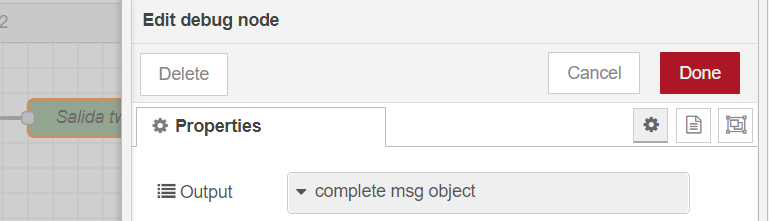
Next, we will configure the debug node to debug what comes to us by console:
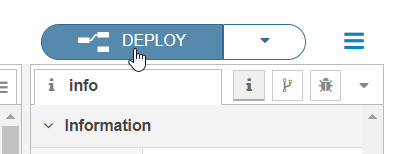
To test that everything works correctly, we will simply click on «DEPLOY» and see what happens:
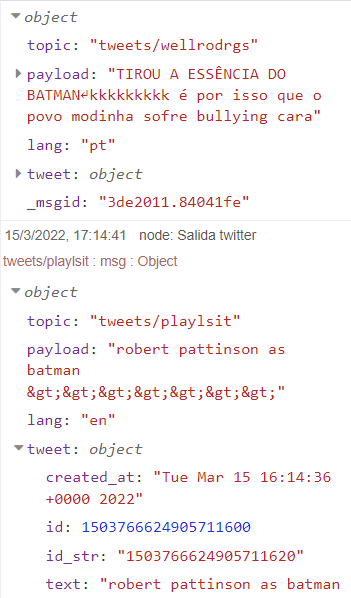
In the side window, the tweets about the #TheBatman hashtag should appear:
To stop the streaming of data that is coming out, we can remove the search criteria.
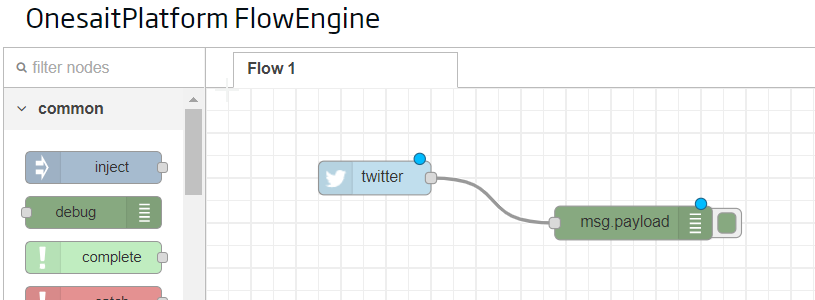
With this we have received data from Twitter, so now we will see how to send data to Twitter, for which we will use the «Twitter Out» component:

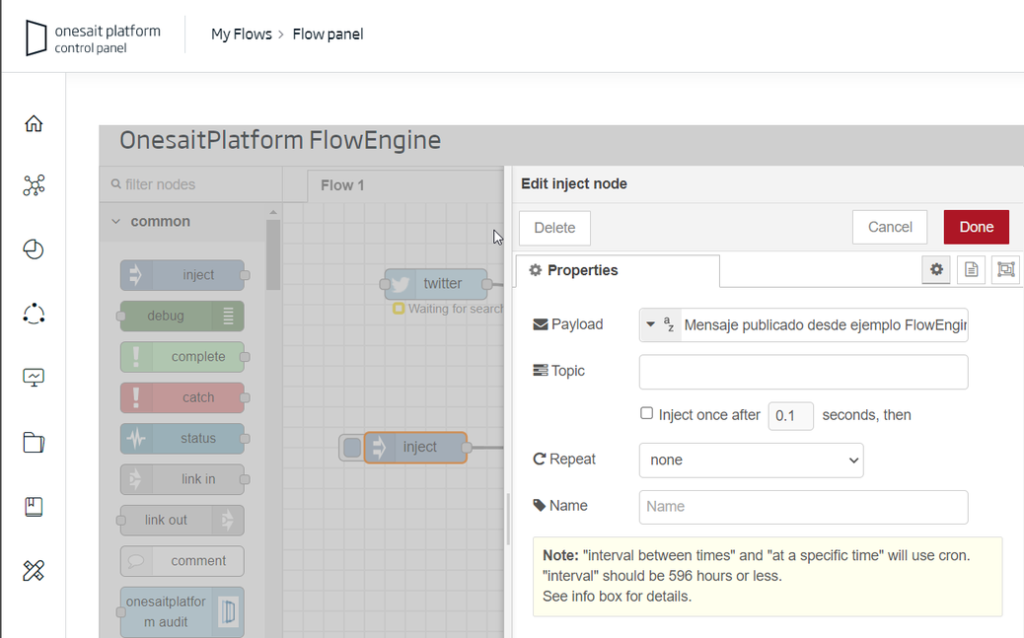
In the FlowEngine, it is very easy to compose a business logic so that, before certain events (such as the arrival of an event to an Entity/Ontology), a message is composed to be published automatically. In this simple example, we will simply post some text, for which we will use the «Inject» component configured to inject some text.

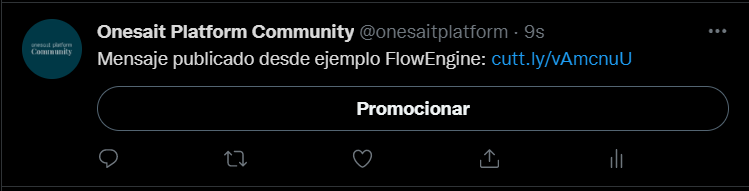
After this, we will make the deployment and press the button of the «Inject» component. If we go to Twitter, we will see that it is published without problems.
Step 3: store tweet information in a Platform Entity
If we go back to the example where we were listening to what was being said about Batman:

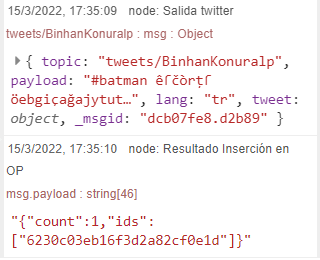
If we put a debug component configured to remove the entire object from the msg:
We will then see a structure like this in the debug tab:
To insert this extra data in the Platform, we can create an Entity in which to store the data, and that has these attributes:
- topic
- payload
- lang
- tweet
Another possibility is to use the capacity of the Platform to create an Entity from a JSON, a much simpler method when we start from a JSON as it is in this case.
From the Debug tab. we can select one of the objects with the «Copy value» button:
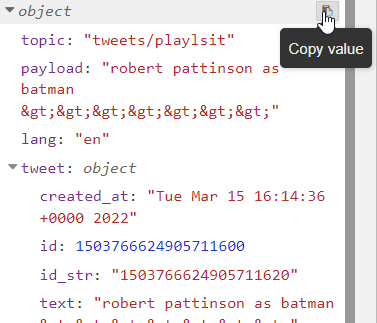
If we paste the content in an editor, we will see something similar to this:
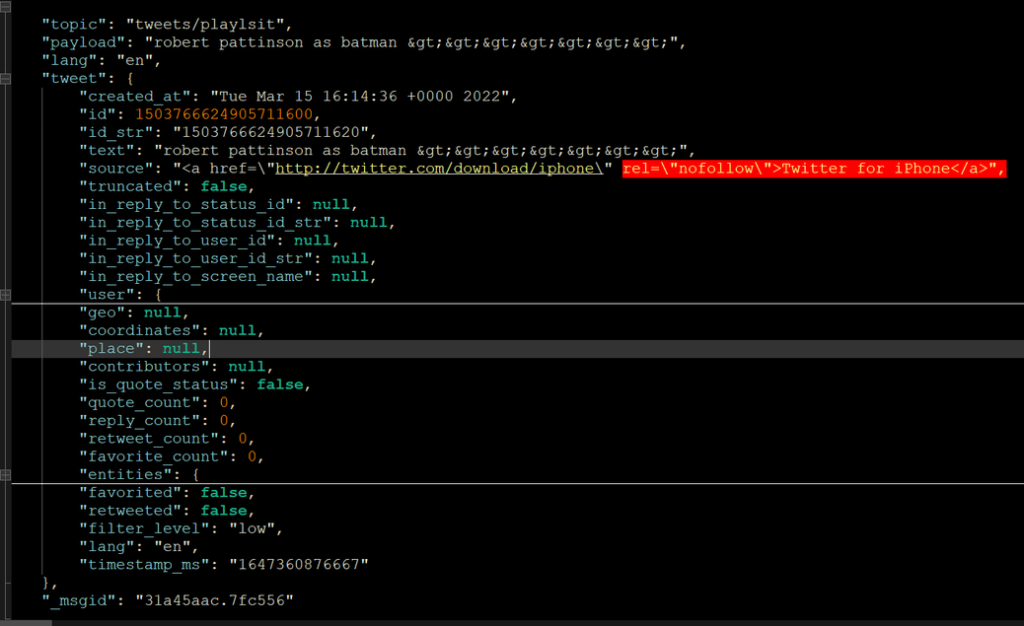
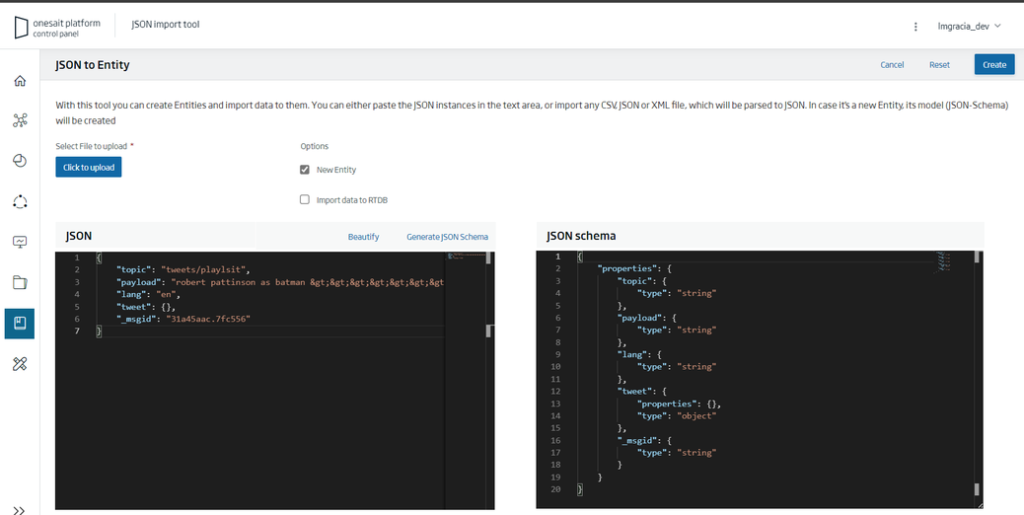
Since we want to use this JSON as an example to create the Entity, we can remove the attributes inside the tweet, leaving a JSON structure like this one:
{
"topic": "tweets/playlsit",
"payload": "robert pattinson as batman >>>>>>>",
"lang": "en",
"tweet": {},
"_msgid": "31a45aac.7fc556"
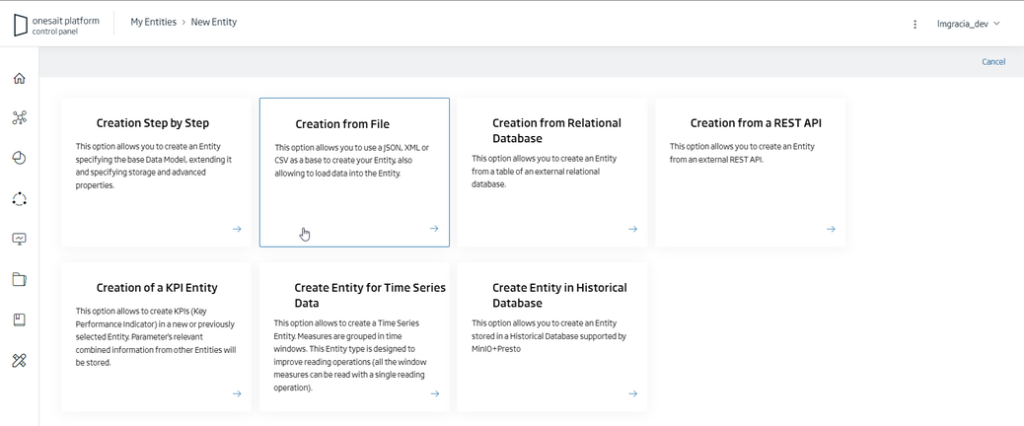
}Next, we will navigate to the Development > My Entities menu in the Control Panel, and click on the + button to create a new Entity:

Several available options will appear, but for this case we are interested in the Create From File option to use the JSON as the basis for creating the Entity:
When selecting it, we can copy the JSON that we have previously defined as a template, and press the Generate JSON-Schema button:
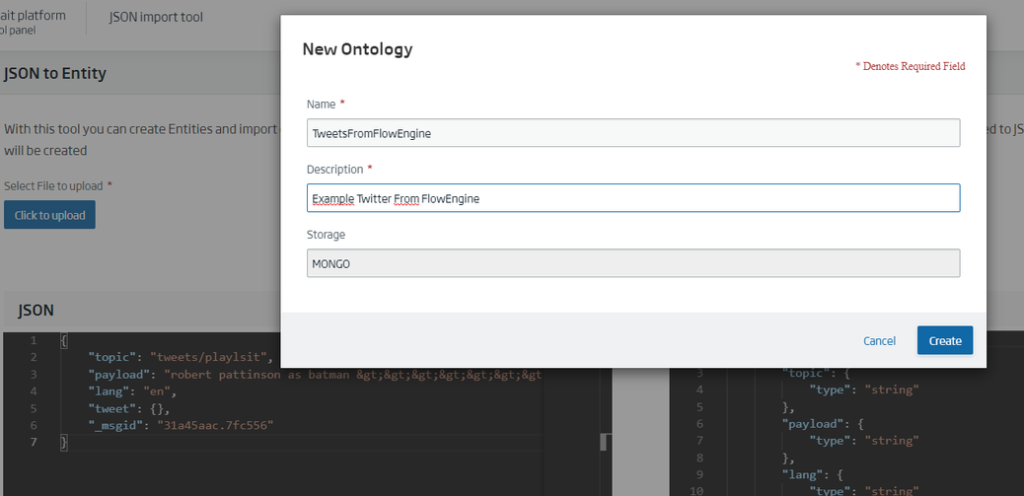
Lastly, we will click on the Create button and complete the data of the Entity.
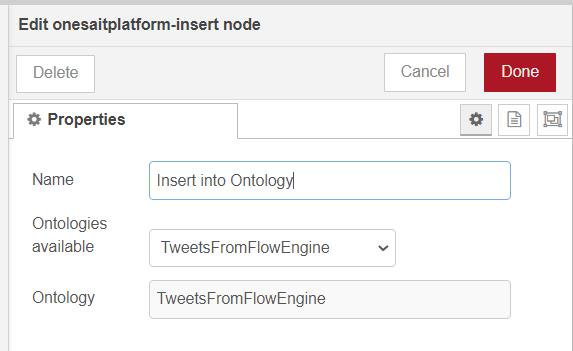
Now, with the Entity created, we return to the FlowEngine to continue working with the flow. We will find a component called onesaitplatform-insert, and drag it to the bottom. Then, we will double click on it to configure it with our Entity.
Notice that, if we connect it directly to the Twitter output and do a debug, in the output we will see that we get an error:
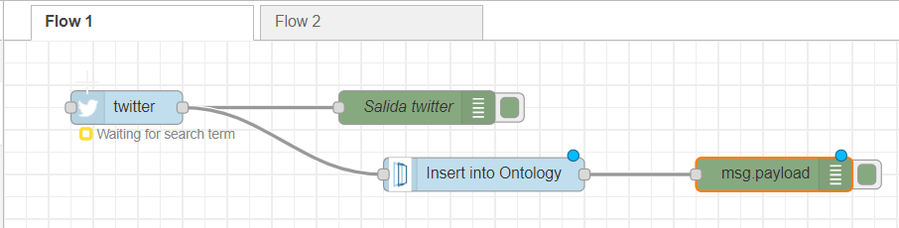
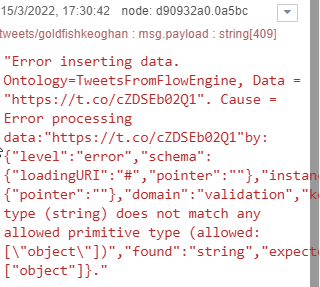
This happens because the output of the components in the FlowEngine is the msg.payload, which in our case is just text:

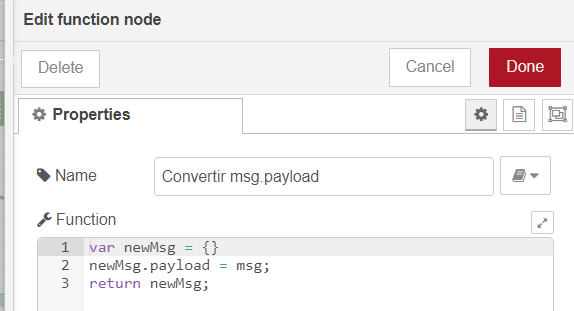
However, the Insert node expects a complete JSON structure as we have defined, since what we are looking for is to store all the information of the tweet, including the user who tweets. The way to solve this is to include a Function node between the two, like this:
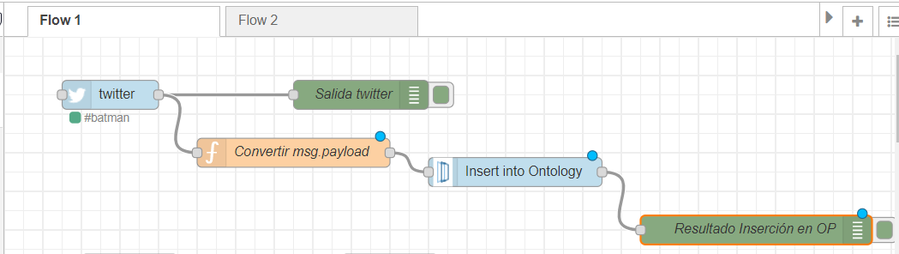
Where the Function node converts the msg to a payload on output:
If we now click on Deploy, we will see that the insertion is now correct:
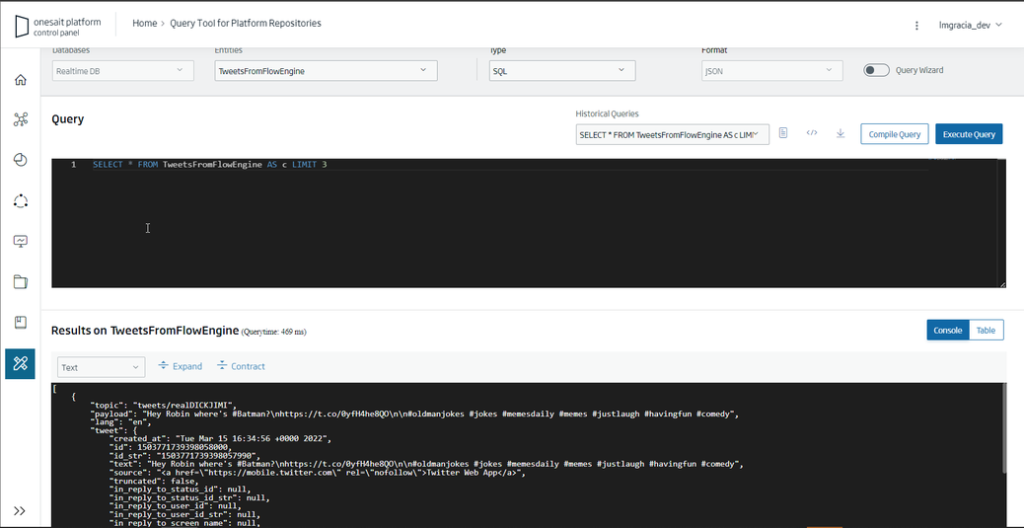
To verify that this information is really being stored in an Entity, we will access the Query Tool in the Tools > Query Tool menu. There, we can consult the stored data, so we will select the Entity where we are storing our data and configure a query (or we use the default query):
Next steps
Well, with this we have completed this short tutorial on how to connect DataFlow with Twitter, and store the information that interests us. And now, what?
Once we have the data stored on the Platform, we can, for example:
- Exploit the data with the Dashboard Engine, for example to show tweets by geographical area, users who tweet the most about a topic, etc.
- Create a model with the Notebooks, doing a sentiment analysis on the tweets, a geographical distribution, etc.
- Publish a REST API with the API Manager, with added information on a specific topic.
As you can see, there are a lot of possibilities, so it all depends on what we want to do.
Header image by Chris J. Davis on Unsplash


Pingback: How to exploit Twitter data with Dashboards? – Onesait Platform Community