
Operation Console (Part III): Deploying the Platform
In previous posts, we have learned about the technologies used in the Operation Console and how to create a Project.
Today we are going to see how to deploy the Platform on Openshift, without the user needing to have any knowledge about Openshift or any other technology.
We will also see some other tools that will facilitate the management of a Platform instance that’s already deployed: how to start and stop modules, how monitor it, etc.
Platform Deployment
To perform a deployment, you must first select the environment in which you want to deploy the Platform. To do this, from the project file, go to the list of environments and select the environment you are interested in:
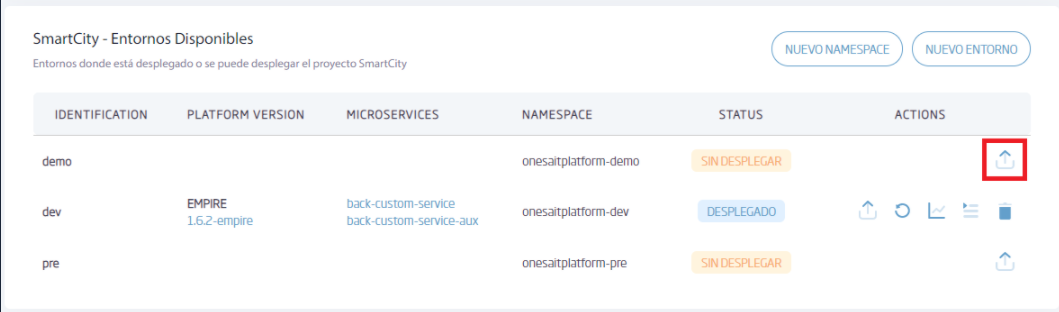
For this example, we are going to select the «demo» environment, which as you can see has the «onesaitplatform-demo» namespace associated with it.
When clicking the button to deploy to the desired environment, the following modal will be shown:
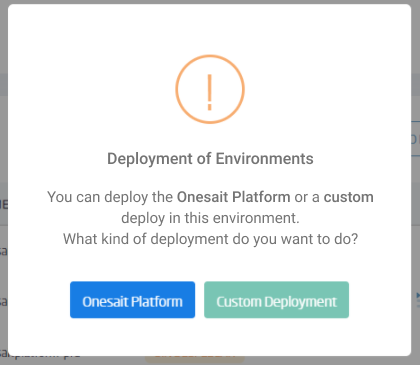
In this case, select Onesait Platform, which will take you to an installation wizard to configure the deployment. Let’s take a quick look at the different stages of this wizard:
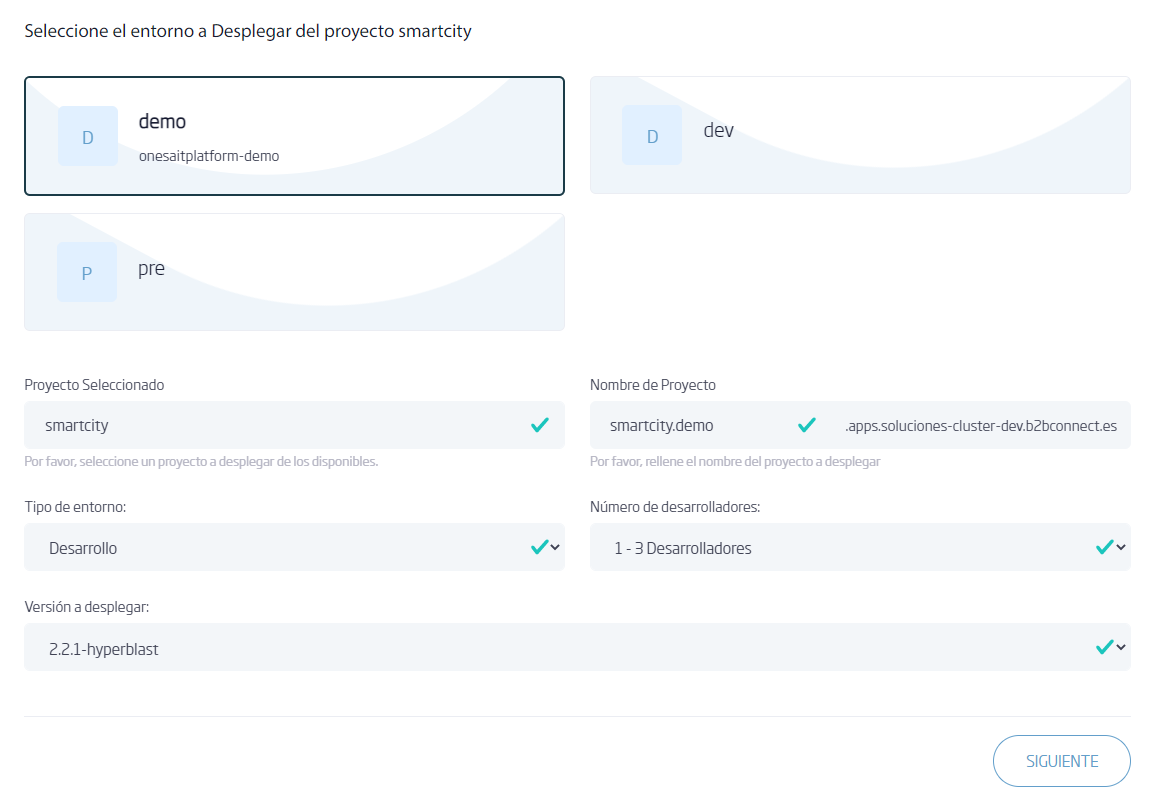
Environment selection
The first step is to confirm the environment in which you want to deploy the Platform, and fill in the information regarding the type of environment you are going to deploy (development or production), the number of developers who are going to use the Platform and the version.
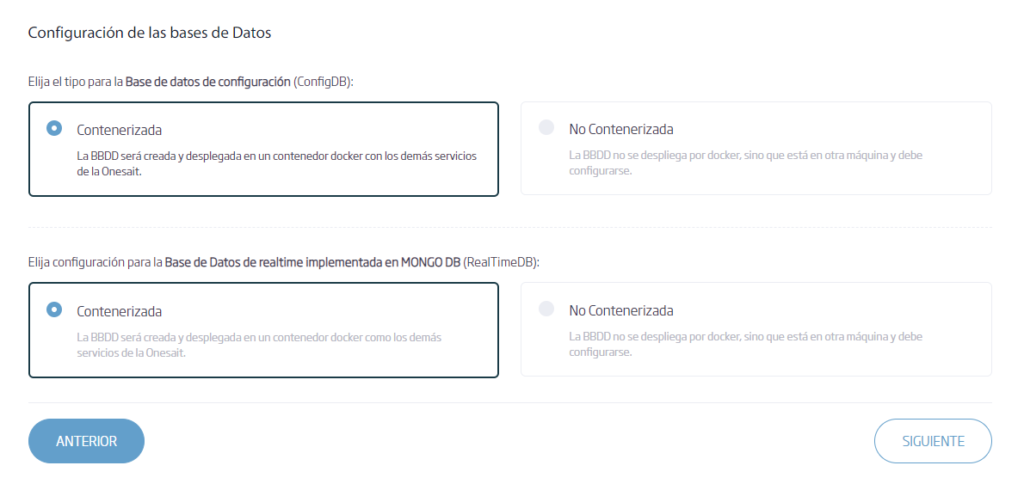
Configuring the Databases
Both ConfigDB and RealTime database can be configured in two modes:
- Containerised: the databases are deployed as Docker containers within the Kubernetes cluster.
- Non-containerised: the databases are located in an external virtual machine, and therefore it is necessary to specify the configuration parameters.
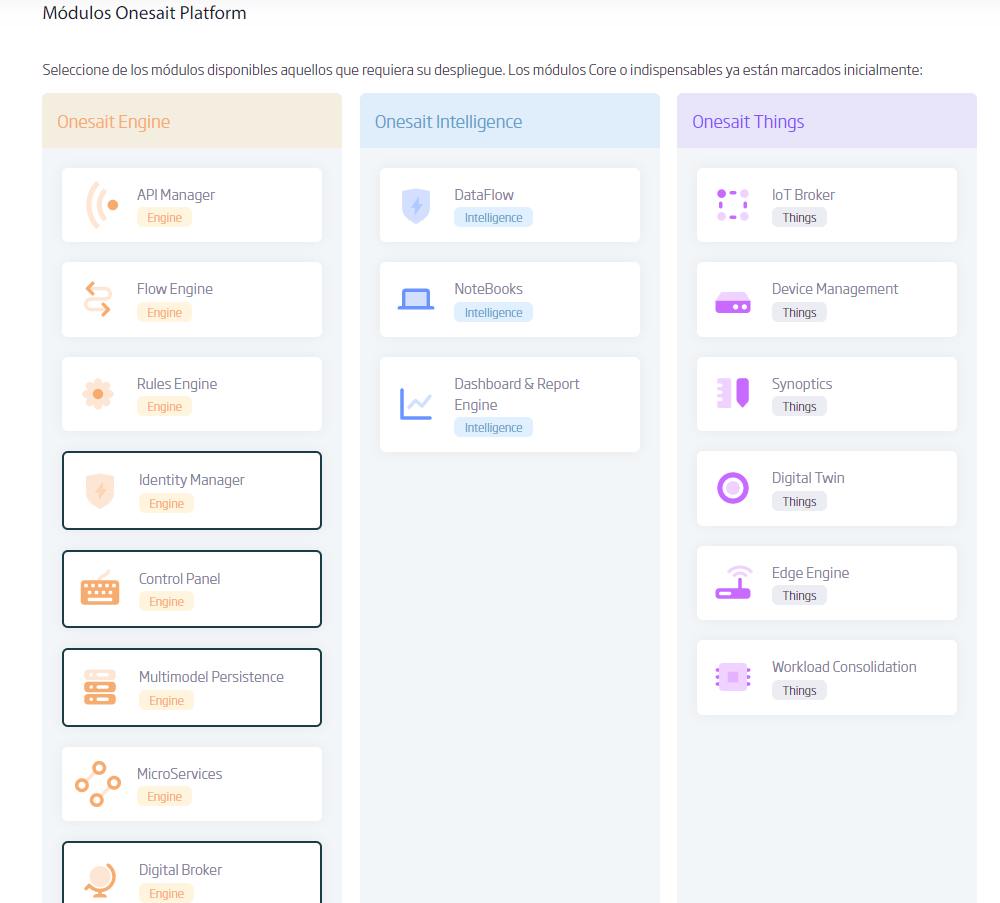
Platform Modules
Next, you will select the Platform modules that you want to deploy initially. Bear in mind that, after the deployment, you will also be able to start and stop modules independently, so this decision is only for a first deployment and we recommend to deploy the basic modules.
The deployment is now launched. A notification will be sent to the contact e-mail when the deployment is finished, because this task can take from 15 to 20 minutes.
Starting and stopping modules
Once you have a Platform instance up in an environment, you can start and stop the modules according to the needs of the project. From the list of environments in the project file, you can access the start and stop of the modules using the following option:
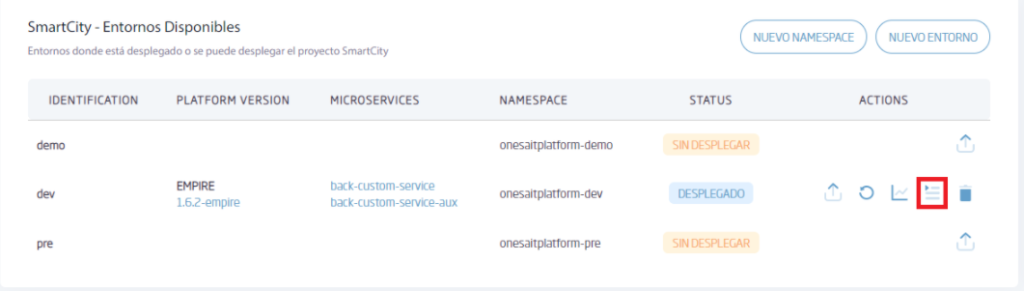
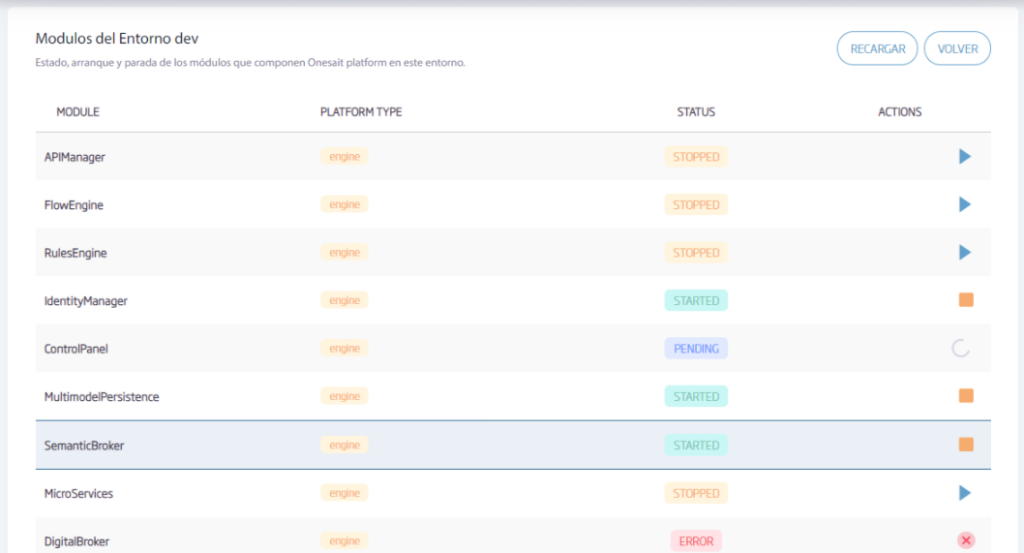
You will then see a list with all the Platform modules and their status, where you’ll be able to stop and start the modules as needed:
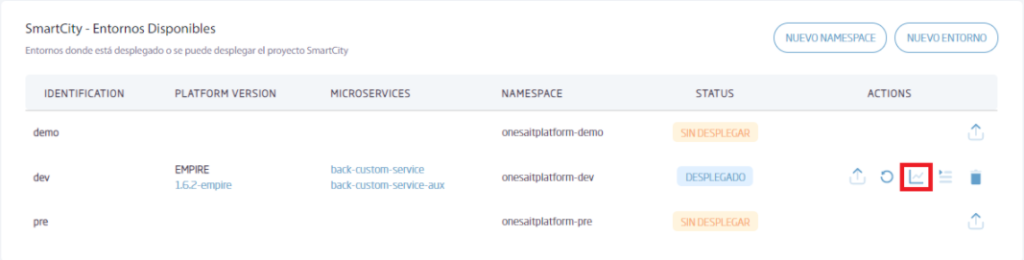
Monitoring
Finally, we can consult the status of the Platform using the Monitoring button from the list of environments:
Conclusions
With the Operation Console, any user working on a project or product can deploy the Platform and manage it in a simple way.
Next, here you have a video tutorial of the whole process:
For more information about this tool, do not hesitate to leave us a comment and visit the rest of the documentation.