Virtual Buckets over S3 in Onesait Platform
In version 6.0.0-Vegas of the Platform we have incorporated a new functionality that will allow a user with an “administrator” role to segment an S3 bucket (either AWS S3 or MinIO) into virtual buckets assigned to different users of the Platform.
In this way, without the need to have different physical buckets, we will be able to use each virtual bucket for a specific topic, having separate uses (Data mart, Staging, etc.).
How to use it?
Next we will see how to configure what we need, create the buckets and operate on them.
Required configuration
To activate this functionality, it is necessary to complete some previous steps:
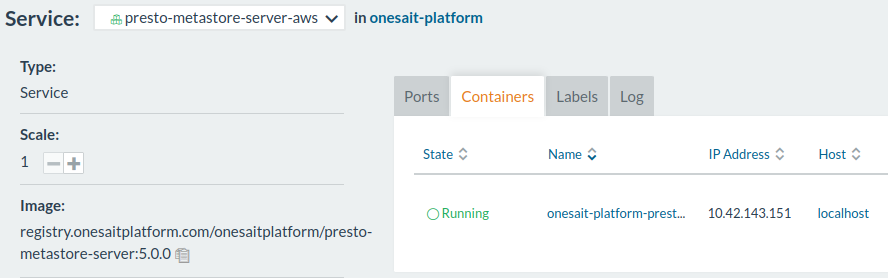
Creation of a new metastorage service pointing to this S3 system.
For this part we can use the image of the metastorage of the MinIO Platform. A new service will be generated that for AWS we will call “presto-metastore-server-aws“. The current version of the image is: presto-metastore-server:5.0.0.
And pointing to AWS with the environment variables, in addition to the service URL:
- MINIO_ROOT_USER: with the Access Key.
- MINIO_ROOT_PASSWORD: with the Secret Key.
- MINIO_SERVER_ENDPOINT: Endpoint http/https of the S3 service.

With this we will have the service running and pointed to AWS:
Configuring the S3 system in the centralized configuration
Within the Platform configuration, in the path “onesaitplatform/env/externals3“.
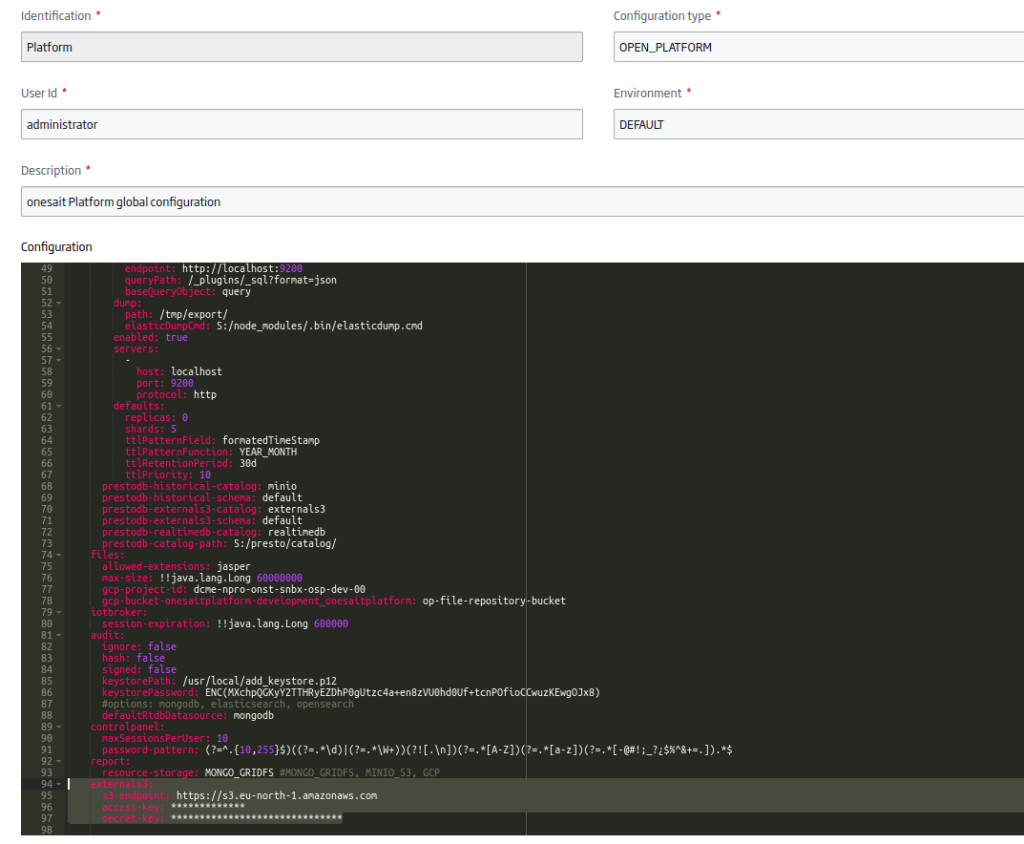
Although with the initial configuration you should already be pointing to the URLs, it will be necessary to check that the paths are:
- onesaitplatform/env/database/prestodb-externals3-catalog: Presto catalog name (default “externals3“).
- onesaitplatform/env/database/prestodb-externals3-schema: Presto schema name (default “default“).
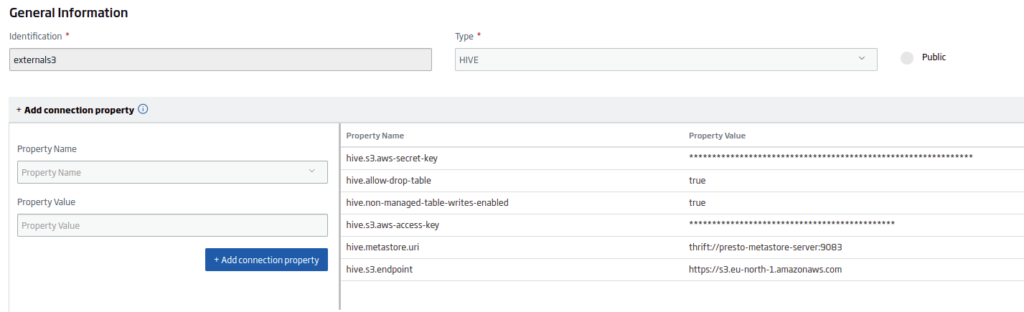
Create a new Presto catalog
Using the name indicated in the previous step in “onesaitplatform/env/database/prestodb-externals3-catalog“, pointing to the previously created metastorage (property “hive.metastorage.url“) with the following properties:
Creation of the S3 Bucket in AWS
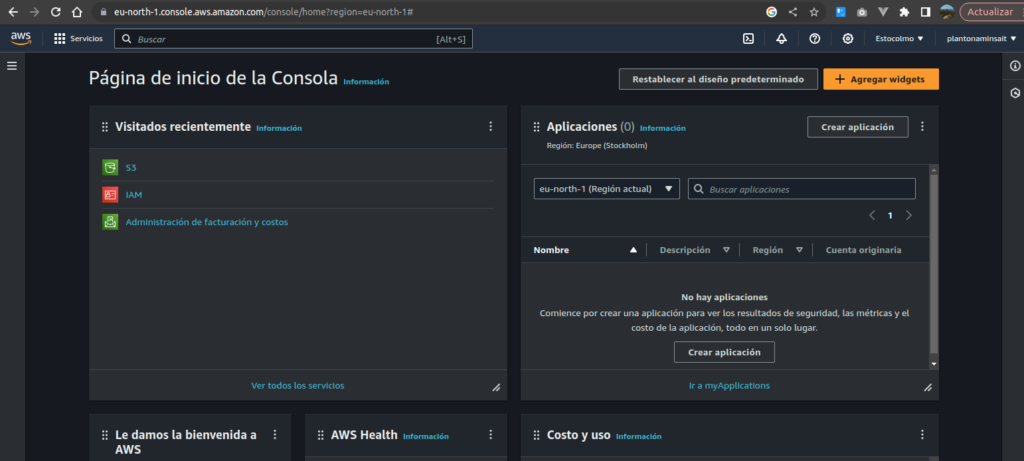
Once the previous steps have been taken, and having correctly configured the credentials for AWS, the first thing to do is to access the AWS console:
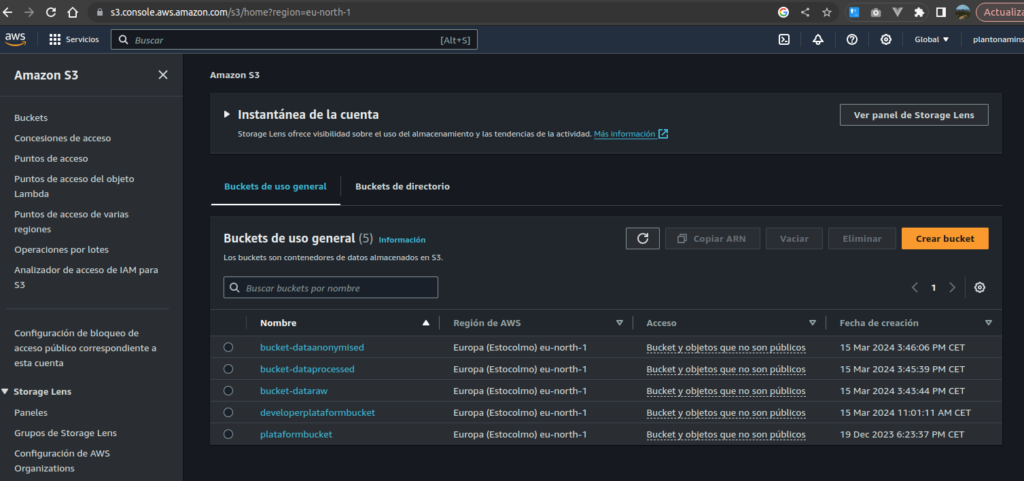
Next, we will access the Amazon S3 section:
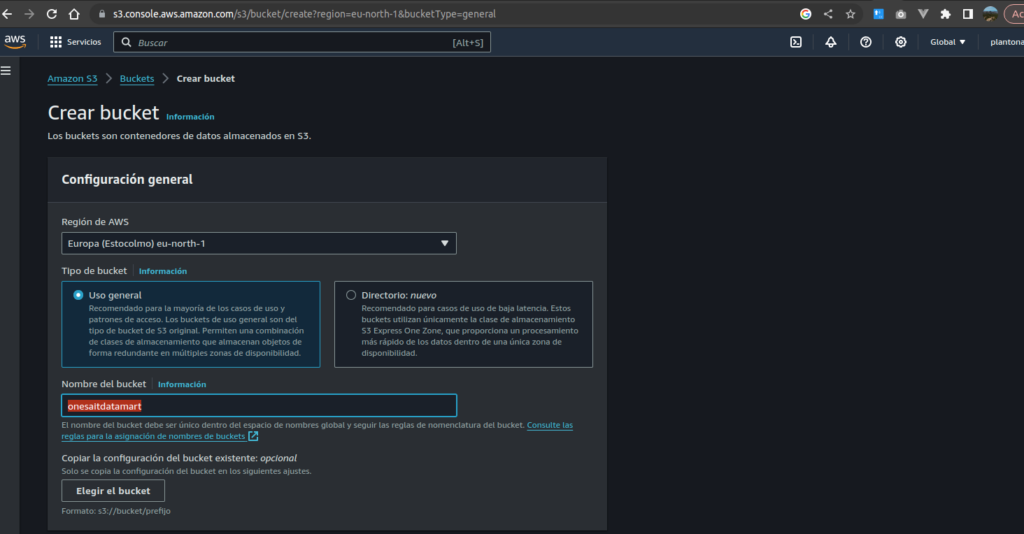
Once accessed, click on the “Create bucket” button to access the creation form. Inside the form, we will fill in the different fields and create our bucket:
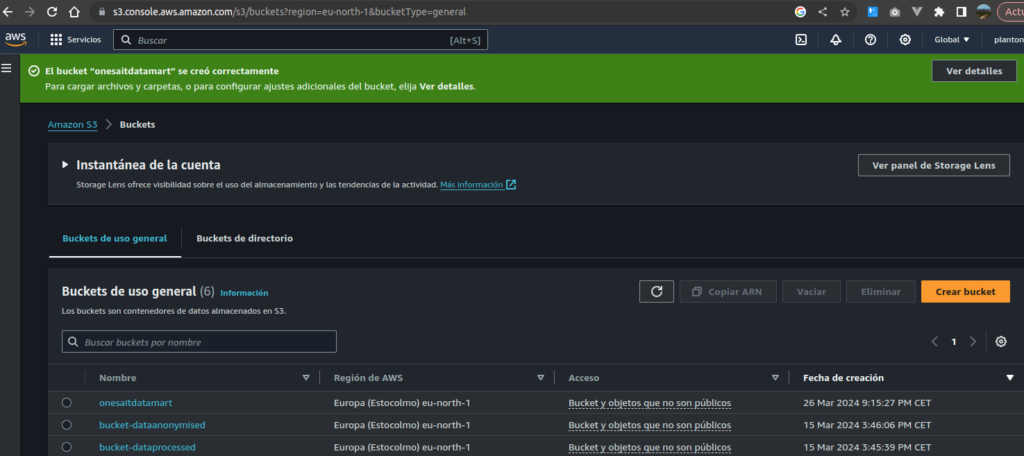
When the bucket is created, we will be notified of its creation and it will appear in the list of available buckets.
Creation of the associated Virtual Bucket in the Platform
In the Platform, we will access with a user with the “administrator” role and navigate to the Virtual Bucket Management.
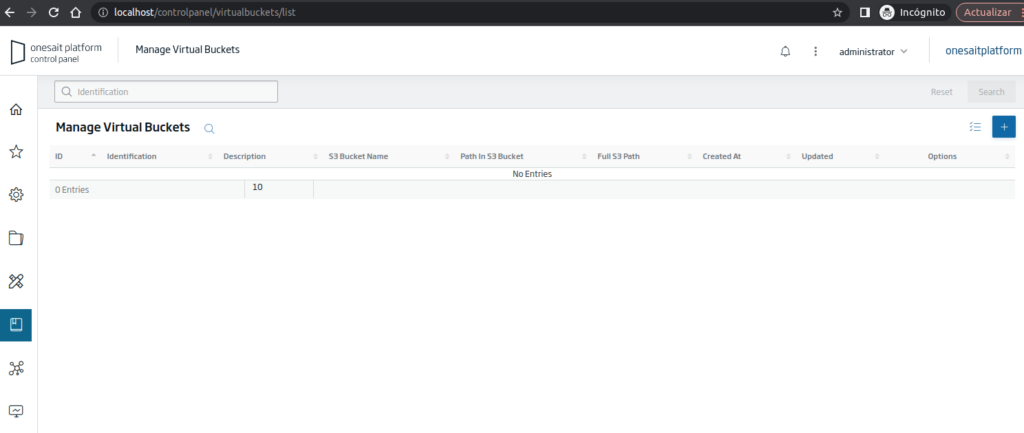
To generate a new bucket, click on the “+” button to launch the “administrator” bucket creation wizard and navigate to the Virtual Bucket Management.
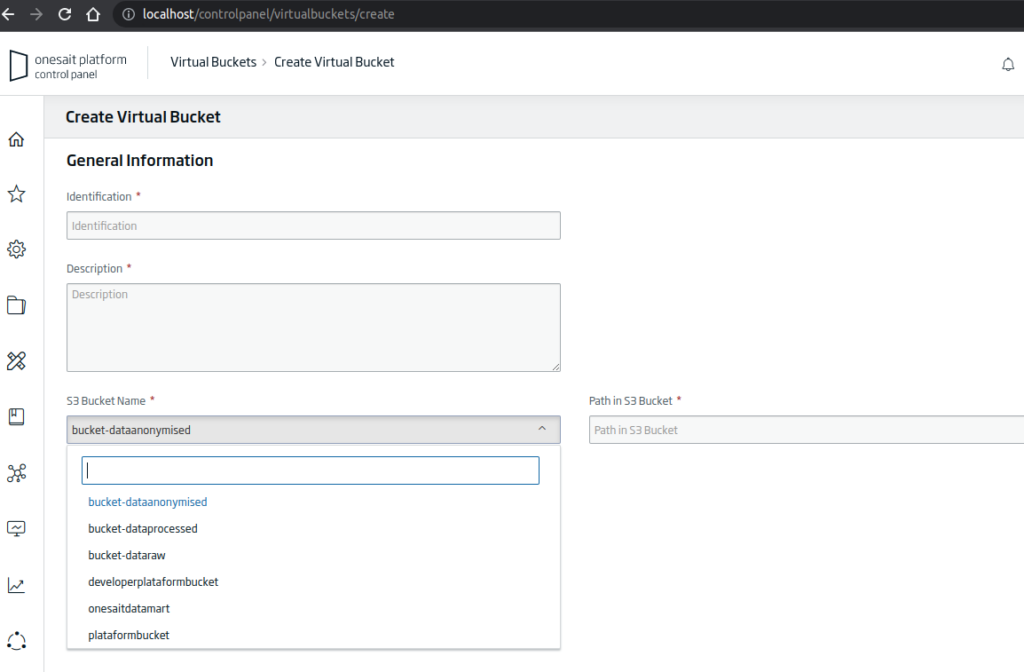
Next, select the new bucket created, and fill in the rest of the fields.
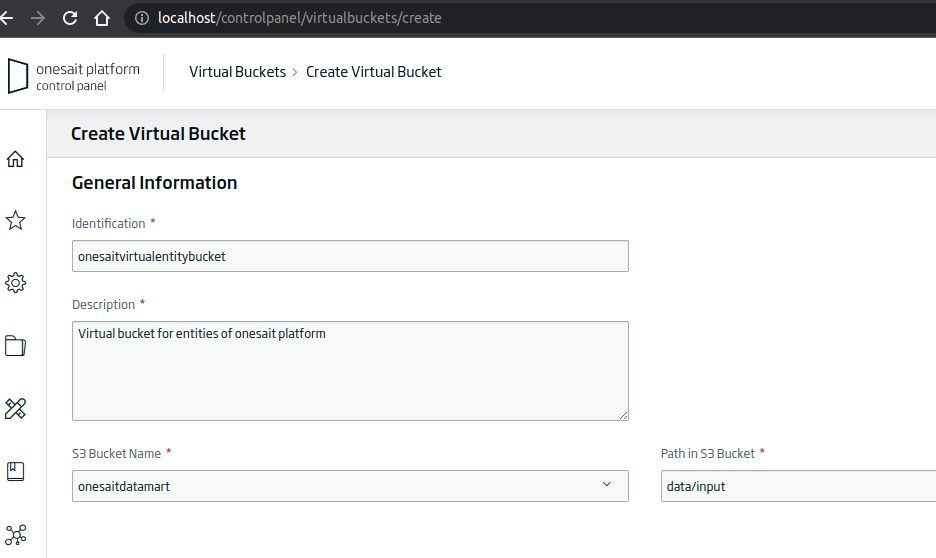
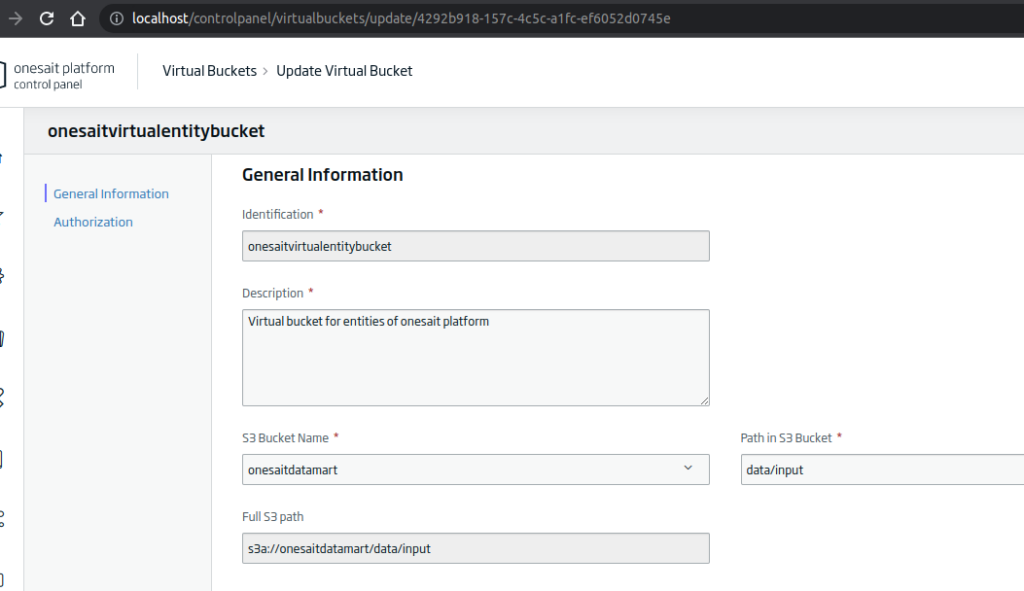
Finally, by clicking on the “Create” button, we will be able to see the summary, as well as the complete path generated.
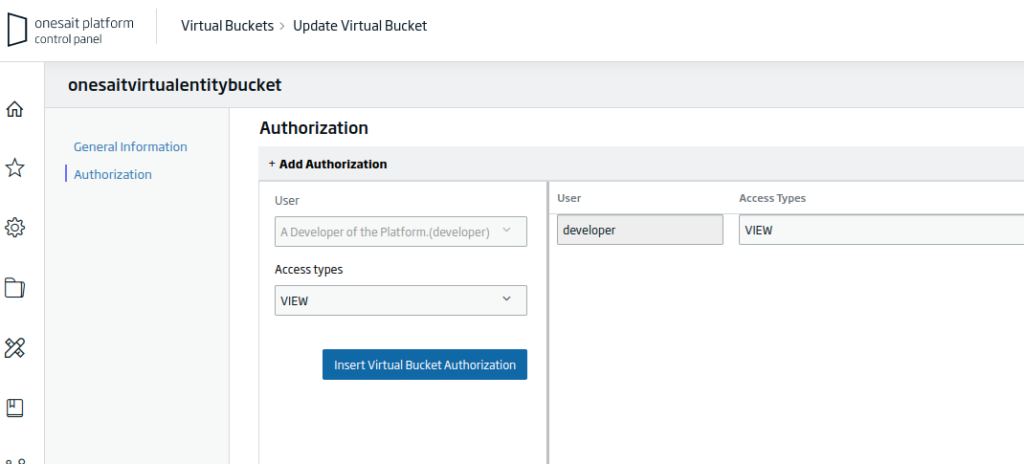
Llegados a este punto, será interesante asignar permisos a los usuarios con rol de «desarrollador» para que puedan crear Entidades sobre este nuevo bucket virtual; es decir, que puedan crear Entidades sobre la carpeta con el path «data/input» en el bucket de AWS «onesaitdatamart».
At this point, it will be interesting to assign permissions to users with the “developer” role so that they can create Entities on this new virtual bucket; that is, they can create Entities on the folder with the path “data/input” in the AWS bucket “onesaitdatamart“.
Creation of the entity in the Virtual Bucket
Finally, we will be able to create an Entity in this Virtual Bucket with the user to whom we have given permission in the previous step.
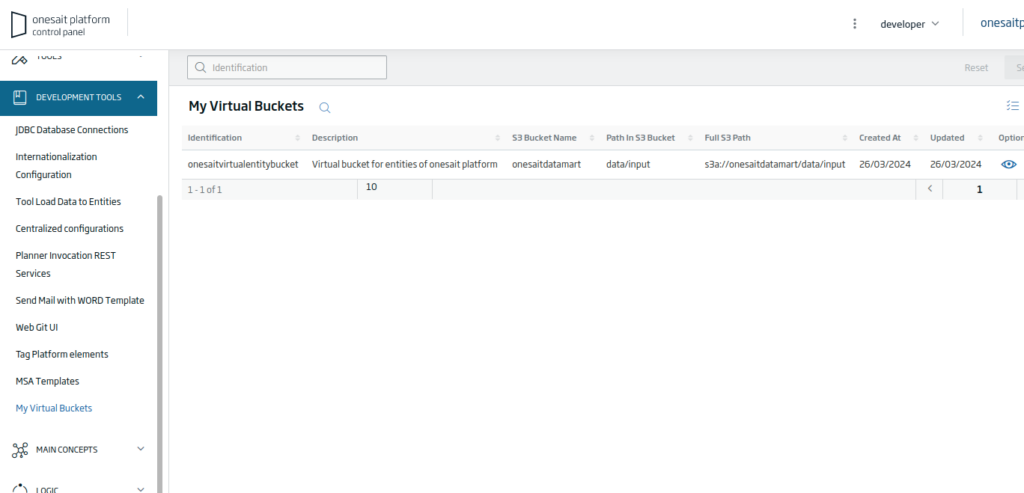
When logging in to the Platform, you will be able to go to the Bucket list that will be shown for information purposes, although you will not have editing or deletion options since they belong to the administrator user.
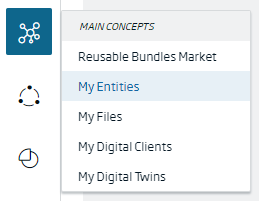
To create a new Entity on this virtual bucket, we are going to create an Entity of historical type. To do so, navigate to the menu Main Concepts > My Entities.
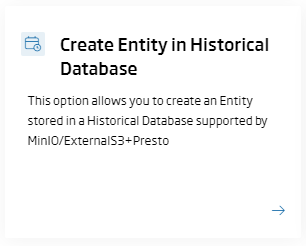
Esto nos mostrará el listado de Entidades disponibles. Para crear una nueva, pulsaremos en el botón de «+», localizado en la parte superior derecha de la pantalla. A continuación, entre las diferentes opciones disponibles, seleccionaremos la de «Create Entity in Historical Database».
Next, we will see a couple of options about the type of Entity to create. We will select the “Create Entity from a Virtual Bucket“.
Similar to the creation of historical Entities, we are going to fill in the form with the different options for the creation of the Entity.
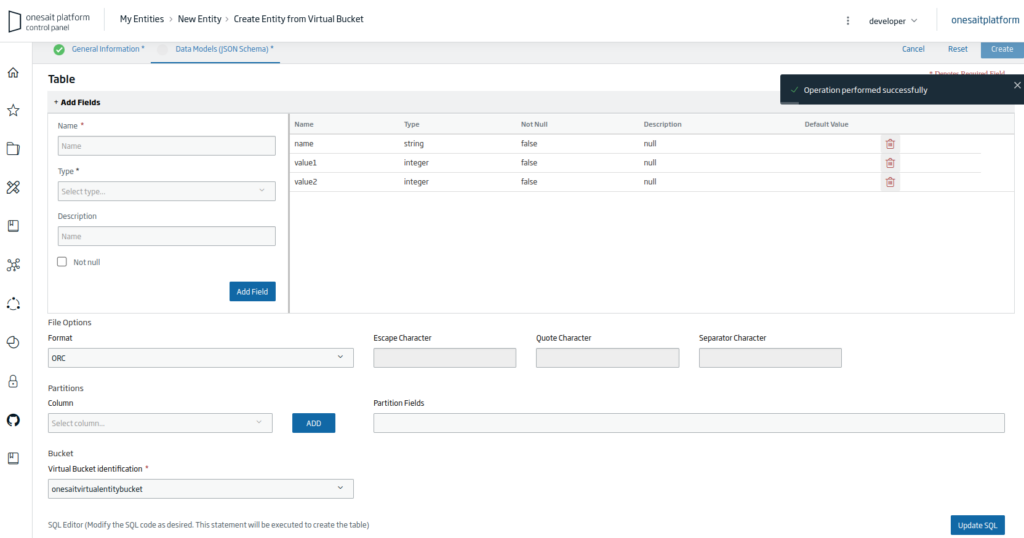
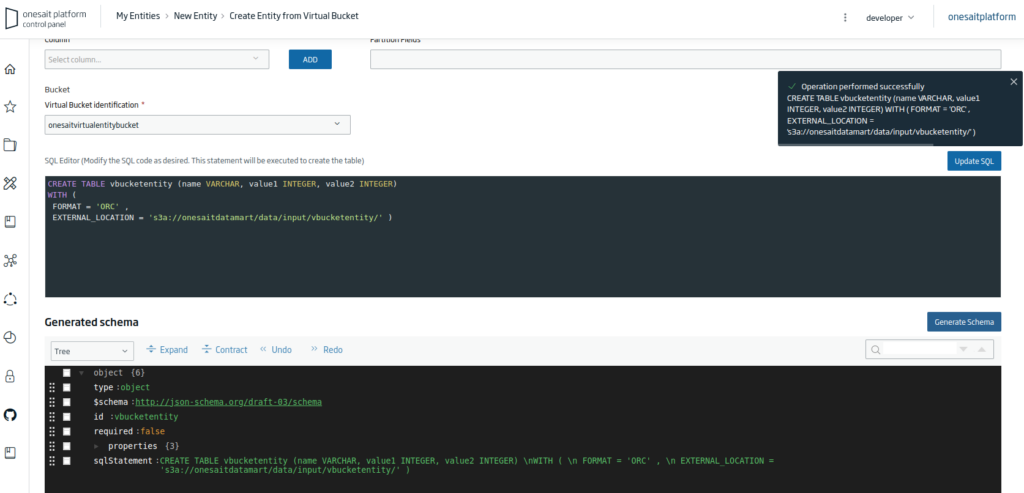
At the bottom, we will be able to select the virtual bucket where we want the Entity to be created. If we update the SQL query (pushing the “Update SQL” button) we will be able to see the complete creation statement pointing to the real AWS bucket in “EXTERNAL_LOCATION”.
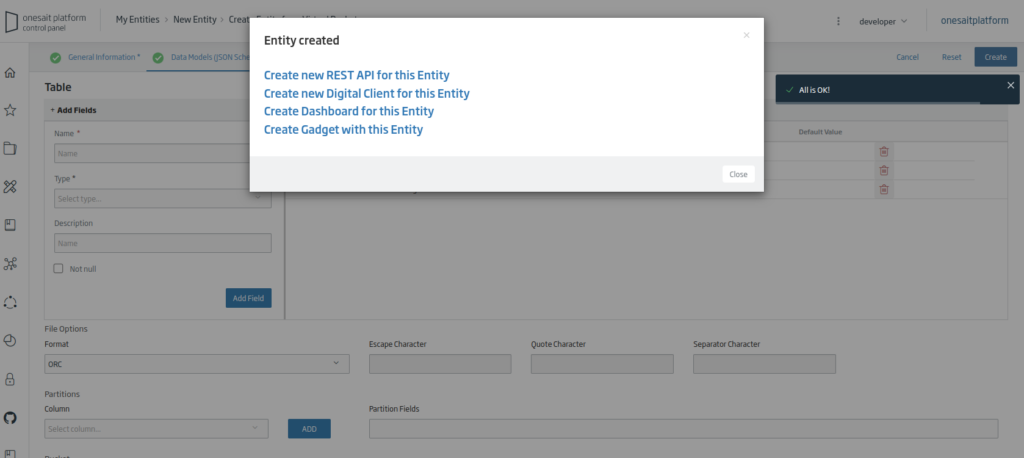
Finally, by clicking on the “Create” button, we will have our new Entity ready. As with most of the other Entities created, a screen will pop up asking us if we want to do anything with it.
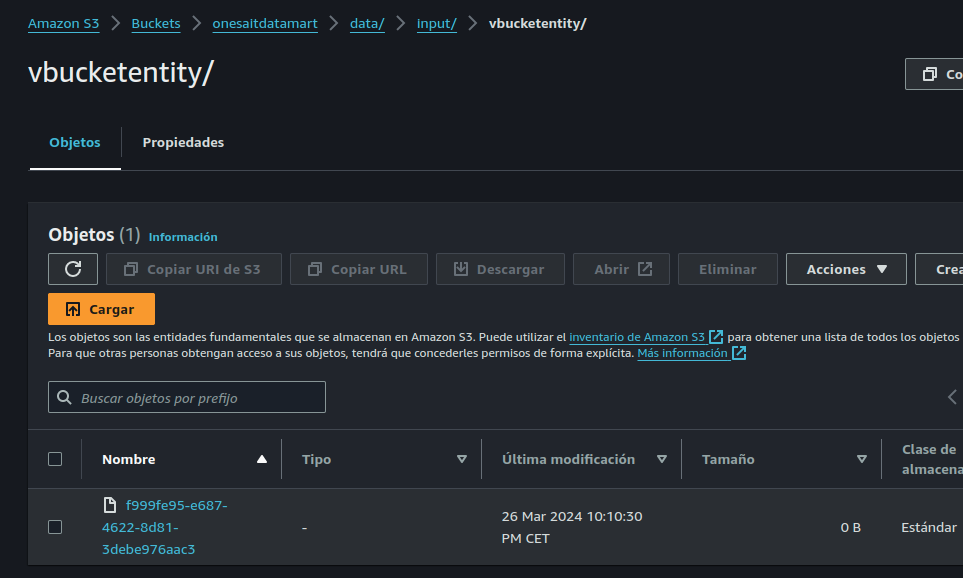
If we navigate to the AWS console, we can see how the complete path of the new Entity we have just created has been created.
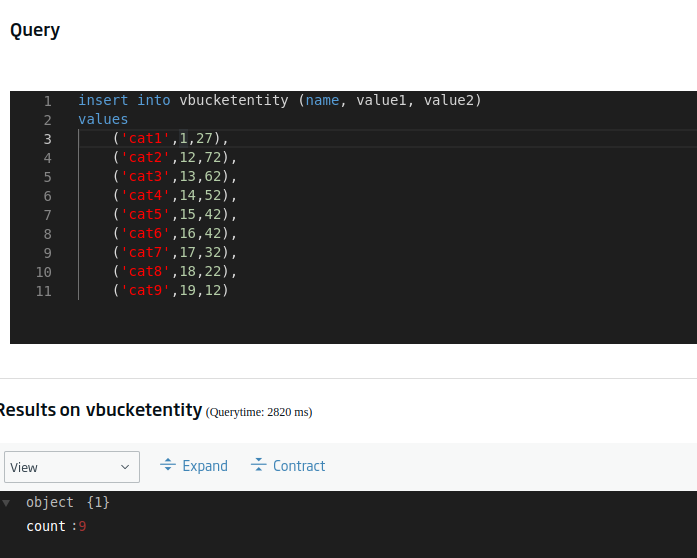
Transactions on the Entity
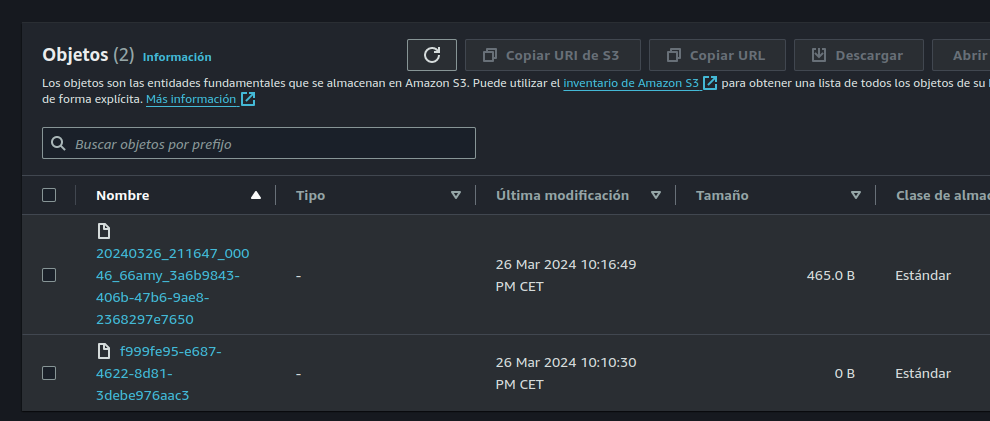
We will be able to insert data in our new Entity, which will appear as new files in the AWS S3.
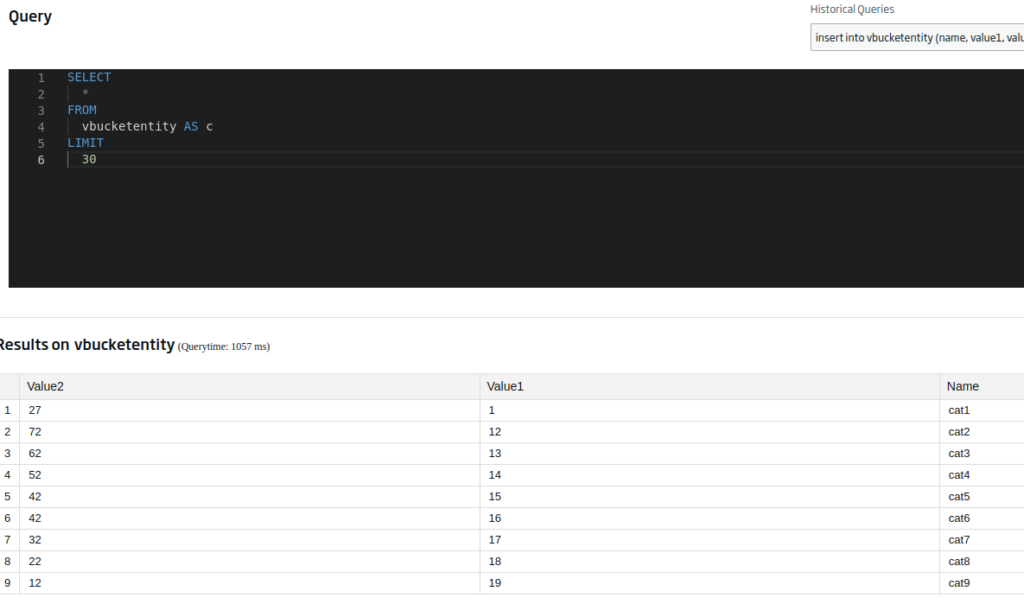
And of course, we will be able to consult them without any problem:
If you are interested in learning more about S3 virtual buckets, feel free to leave us a comment or send us a request on our Onesait Platform support channel.
Header Image: Lucas van Oort at Unsplash.