New Dashboard asset
Many projects and products use Dashboards to represent data. However, the needs do not stop there only, but it is required to be able to create and configure them from the project’s own user interface. With the launch of Onesait Platform version 5.2.0-Topgun, we have incorporated a new asset among those available in the Platform.
This asset consists of a manager for the creation, visualization and management of Dashboards with its own user interface. Using the security and management of Platform Realms, with this manager it is possible to work with the Dashboards from the project’s own user interface, which allows to decouple the construction of Dashboards from the Control Panel (a request that you have made to us a lot).
In this post, we are going to see how to prepare and configure the necessary files to use this asset in your Platform instance.
What files does it consist of?
The Dashboard asset is made up of the following elements:
- A configuration file: which includes the information necessary to configure the web application with the Dashboard manager, such as the Realms and their accesses, colors, resource names, etc.
- One or more internationalization files: que serán archivos JSON con los strings en diferentes idiomas utilizados en nuestra aplicación.
- A Front project in Vue: with the entire web application, as well as the environment files with the global variables that must be configured.
By default, the files come with predefined content, which you will have to modify to adapt it to your needs. Once the files are configured, upload them to the Platform and create the necessary resources.
The steps to follow will be these:
Prepare the configuration file
The first step will be to prepare the asset configuration file. This information will later be used to configure the different components of the Platform, so it will be necessary to be clear about what information is entered and what it is for.
The most important properties to configure are:
- realmId: the name of the Onesait Platform Realm.
- clientId: the name of the Realm client.
- secret: the token to use in the Realm client.
- title: the name you want to give to the project.
- i18n: the name of the language configuration file.
- project: the name of the centralized configuration application.
- productInfo: the project logo’s properties. The main ones are:
- suite: name of the suite. For example: «suite».
- product: name of the product. For example: «product name».
- productModule: name of the product module. For example: «module».
- onesait: if checked, the «product» and «productModule» properties are hidden. By default it is «false».

- appVersion: refers to security layers. By default it is «0».
- customizacion: front-end customization layer.
- To show the language selector, you must set the «user.showLanguage» property to «true».
- To change the color scheme, you can deal with the «styles» CSS properties.
- navigationAllowed: corresponds to the list of access permissions of the different roles regarding the components of the side menu (what each Realm role, not each user, can see).
- navigation: application’s side menu components.
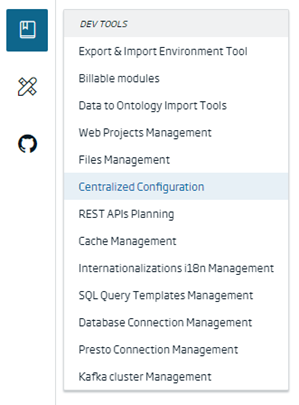
Once the configuration file is prepared, upload it to the centralized configuration of the Platform. You can do this from the Dev Tools > Centralized Configuration menu.
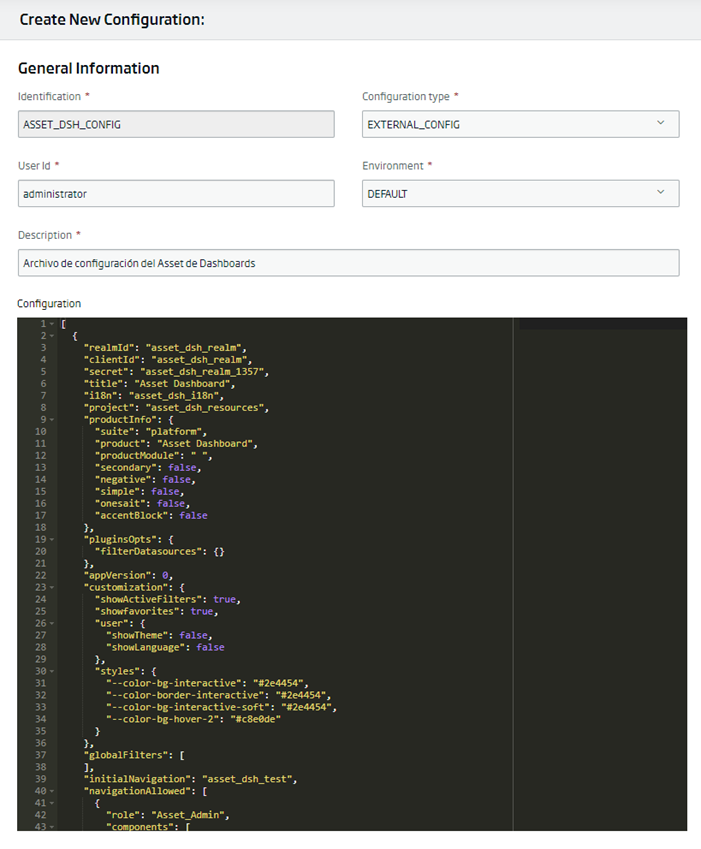
Click on the create a new configuration button, and fill in the following information:
- Identification: indicate the name of the configuration file. In this case: «ASSET_DSH_CONFIG».
- Configuration type: select «EXTERNAL_CONFIG».
- User Id: the name of the user creating the configuration. It can not be changed.
- Environment: select «DEFAULT».
- Description: descriptive text of your configuration file.
Next, enter the code for your configuration in the code window, making sure that there are no tabs for nesting; just spaces.
Once it is in, save the new configuration, which will appear in the list of centralized configurations.
Create the Realm
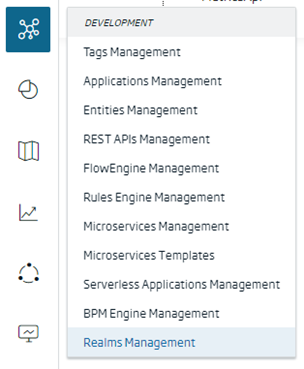
The first resource to generate will be the Realm on the Platform. Here, you will define both the application roles, and which users are assigned to each role. To do this, navigate to the Development > Realms Management menu.
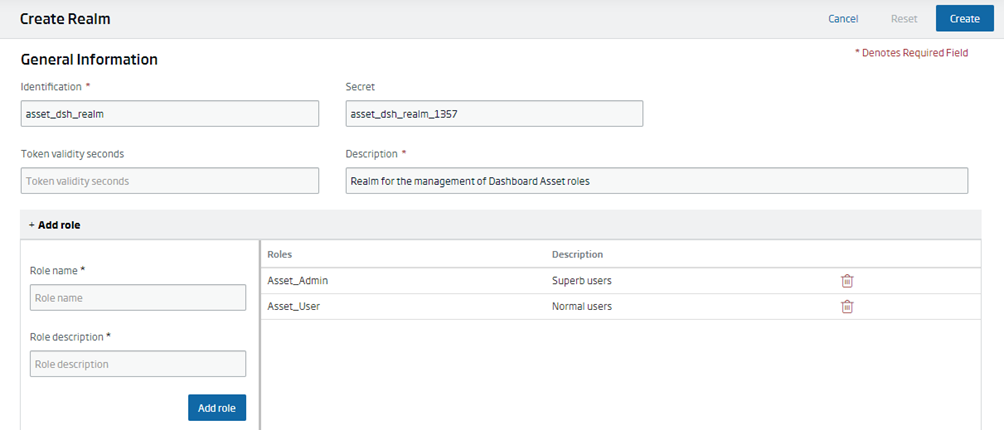
Taking as a reference what is indicated in the example configuration file, uou will create a Realm with the following data:
- Identification: the name you want your Realm to have. In this case: «asset_dsh_realm».
- Secret: the token that you will use to authenticate yourself. In this case: «asset_dsh_realm_1357».
- Description: a short descriptive text about the meaning of the Realm. In this case: «Realm for the management of Dashboard Asset roles».
Additionally, you will create two roles, indicating a description for each one. In this case:
- Asset_Admin: Superb users.
- Asset_User: Normal users.
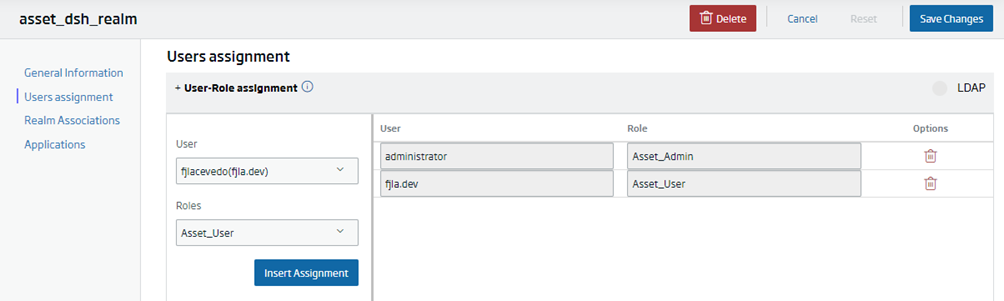
Create the Realm. Next, to assign the users to each role, edit the newly created Realm and navigate to the «User assignment» menu, where you will add the users that you want to each role.
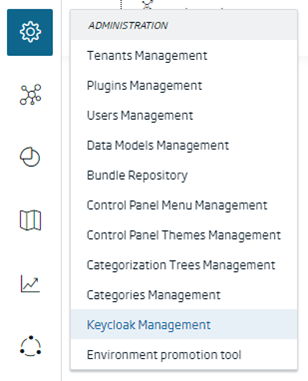
If your environment uses Keycloak, you must also create the Realm in the Keycloak configuration manager, which you can find in the Administrator > Keycloak Management menu.
Once in the manager, select the «Clients» menu and create a new client with the following data (only those that would need to be filled out or modified are indicated):
- Client type: OpenID Connect
- Cliend ID: asset_dsh_realm
- Name: dashboard asset client.
- Description: dashboard asset client.
- Valid redirect URIs: *
- Valid post logout redirect URIs: +
- Web origins: *
- Backchannel logout session required: On
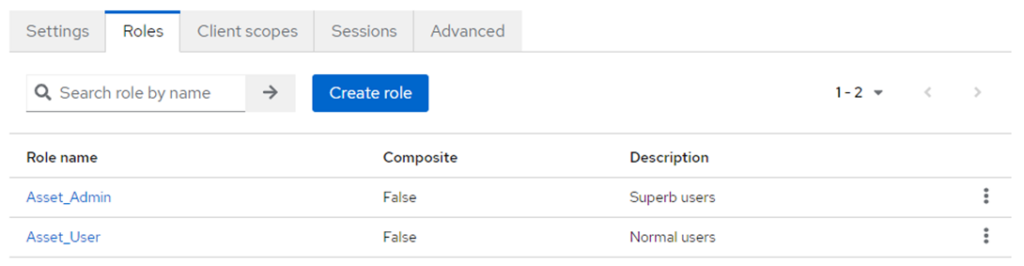
Once created, in the client’s «Roles» tab, add the roles that you indicated in the Realm:
- Asset_Admin: Superb users.
- Asset_User: Normal users.
In the «Client scopes» tab, add a new scope: «openid», as its type «Default».

3. Creation of the internationalization file
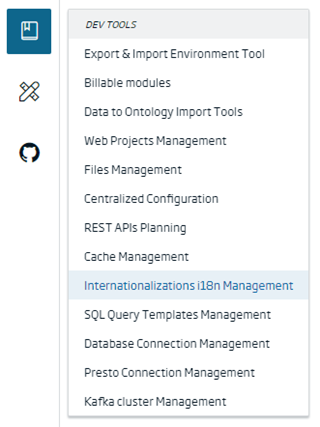
Another aspect that you have to generate is the internationalization file, which will be used to change the language of your Asset. To do this, access the Dev Tools > Internationalizations i18n Management menu.
There, you will create a new internationalization, in which you must indicate the following data:
- Identification: the identifier of the internationalization file. In this case: «asset_dsh_i18n».
- Description: descriptive text of the file.
- Public: checked.
To add a new language, click on the «+ Add Language» button, selecting the one you want to enter. In this case, you will create the English and Spanish languages, loading the attached language JSON in each of them.
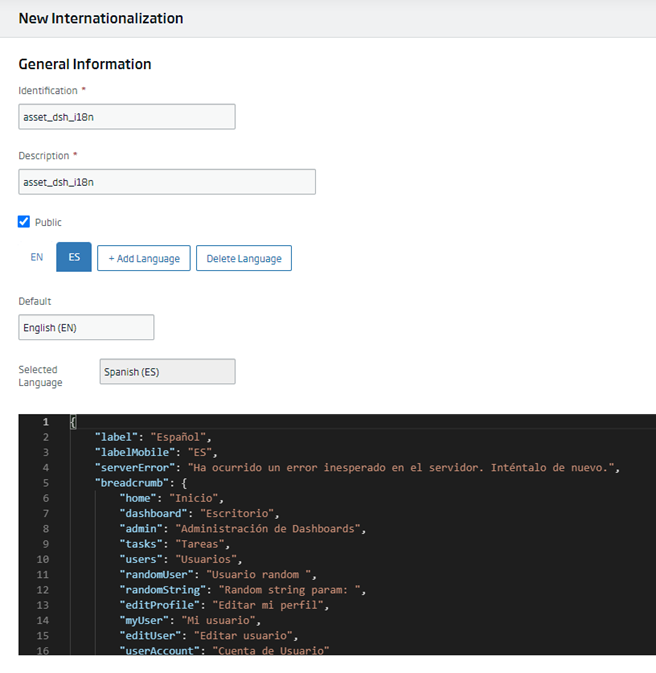
As the default language, choose English: «English (EN)».
4. Associate resources
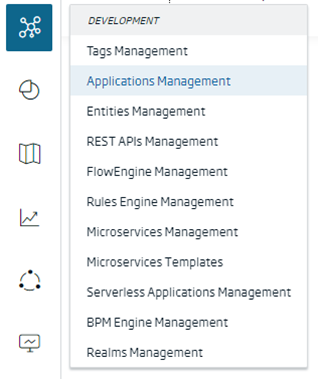
Once all the files are uploaded and prepared on the Platform, you are going to associate them in an application. To do this, navigate to the Development > Applications Management menu.
Once here, create a new application with the following information:
- Name: the name of the application. In this case: «asset_dsh_resources».
- Type: leave it as Engine.
- Description: descriptive text about the application.
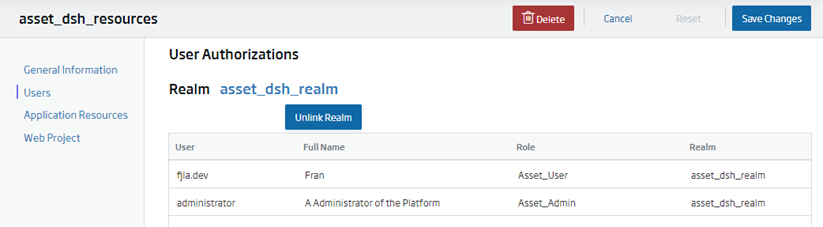
Once created, edit it to add the created and authorized resources. First of all, in the «Users» menu, link the application with the Realm that you have previously created, selecting it from the drop-down list of available Realms. Once linked, you will see both the users and their roles.
Next, in the «Application Resources» menu, include the resources you need. Selecting the «CONFIGURATION» check, click on the «+» button to search for the configuration file that you have created.
As the type of access, choose the «MANAGE» option, and, in roles, select which role you want to have access to the resource. Once selected, click on «Insert Assignment» to add the authorization.
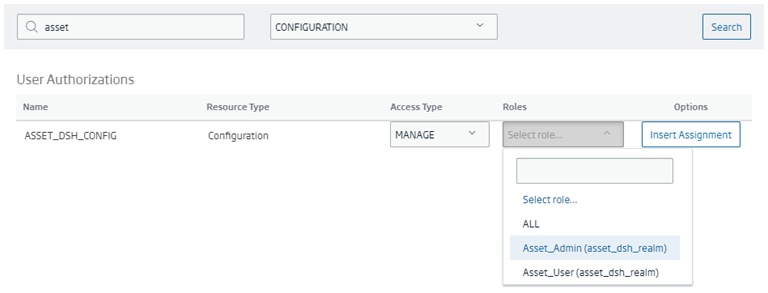
Since you want the authorizations to be for both roles (Asset_Admin and Asset_User), repeat the step so that both roles are authorized.

Repeat the same process, this time to include the Dashboard that you are going to use on the main page. If that Dashboard contains Gadgets, they will be automatically included with access type «VIEW».
About internationalization, it will not be necessary to include it, as it is available at a general level. In the end you will have a list of resources similar to this:
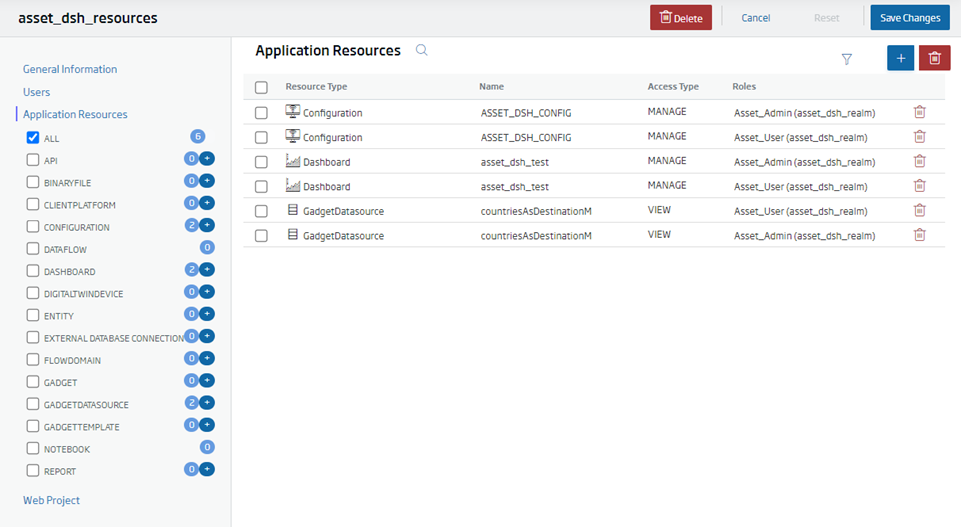
Save the changes to finish configuring the application.
5. Front project configuration
Once everything is ready on the Platform, proceed to set up the Front project. To do this, deploy the Asset file in an IDE, and configure the «env.development.local» and «env.production» files.
In both files, set the following information (leave the rest as is):
- VUE_APP_APPLICATION: the name of the application. In this case: «asset_dsh».
- VUE_APP_PROJECT: the name of the application created on the Platform. In this case: «asset_dsh_resources».
- VUE_APP_PLATFORM: the URL of the Platform you are using.
- VUE_APP_PLATFORM_I18n: the name of the internationalization file. In this case: «asset_dsh_i18n».
- VUE_APP_PLATFORM_CONFIGURATION: the exact name of the configuration file uploaded to the centralized configuration. In this case: ASSET_DSH_CONFIG (be careful with capital letters, they are important).
- VUE_APP_LOGIN_TYPE: the method of accessing the Platform. In this case: «realm»
- VUE_APP_AUTH_TYPE: the way you authenticate yourself on the Platform. If «KEYCLOAK» is not indicated, the default identification of the Platform will be used.
- VUE_APP_KEYCLOAK_REALMID: the ID of the Keycloak Realm (not the Platform), if used. In this case: «onesaitplatform».
- VUE_APP_ KEYCLOAK _CLIENTID: the Keycloak Realm client ID, if used. In this case: «asset_dsh_realm».
- VUE_APP_ APPDS: in this case: «ASSET_DSH_APP_CONFIG».
Once this is done, mount the project’s distributable using (depending on what you use):
npm run buildyarn buildOnce generated, compress the contents of the dist folder in ZIP format, then upload it to the Platform. To do this, navigate to the Dev Tools > Web Projects Management menu:
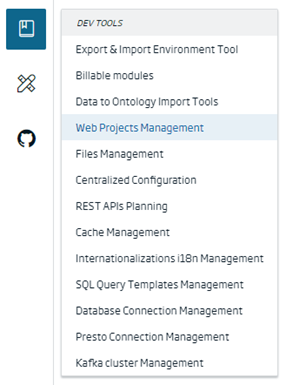
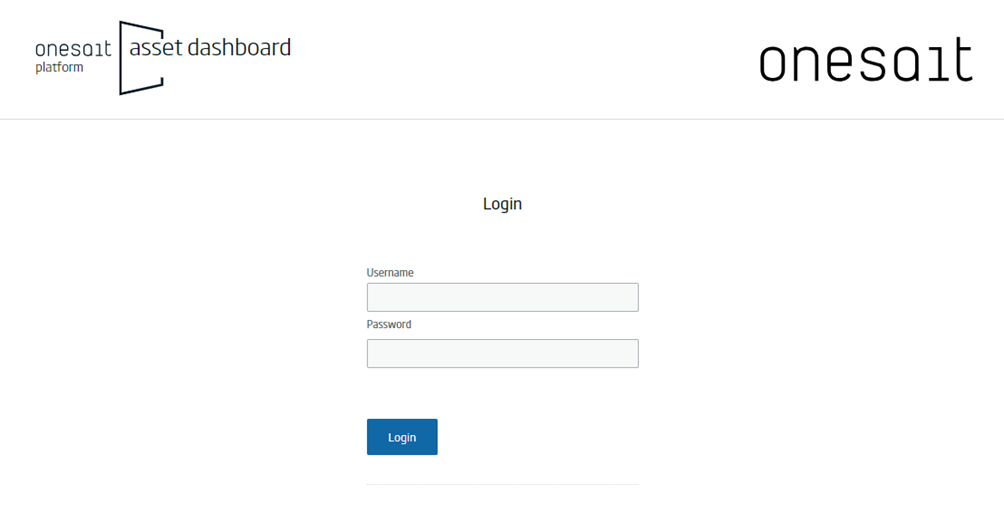
There, create a new web project, uploading the ZIP that you have generated. Once uploaded, by clicking on the eye icon, you can view your asset.

If you are interested in learning more about this new functionality or in seeing a demo of how it works, do not hesitate to leave us a comment or send us a note on our Onesait Platform support channel.
Header image: Mediamodifier at Unsplash.
Header icon: Design Circle.