
New connectors for the BPM Engine
In this 6.0.0-Vegas release of Onesait Platform, we have incorporated a connector for the Platform’s BPM Engine, which will allow you to interact with the rest of the Platform’s elements in an easy and simple way.
This connector will allow us to perform different tasks, which we will explain below.
How does it work?
The connector is based on Camunda templates, which allows us to use them in a Camunda BPMN diagram. Below, we explain how the templates work.
When creating a Camunda diagram, an option will appear in the side menu “Template” when selecting an element.
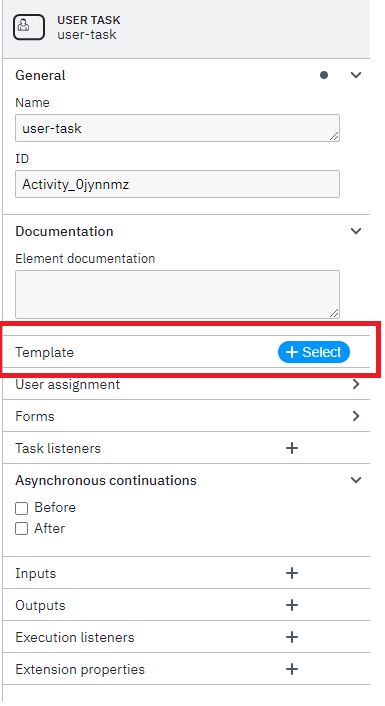
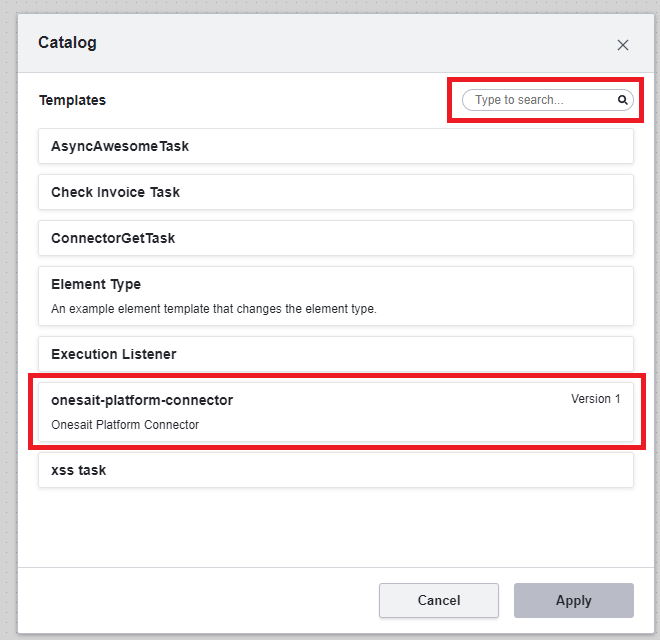
By selecting the “+ Select” button, a list will appear with the available templates for that type of element. In this list will appear the different connectors with the Platform, which will allow us:
- Make queries about Entities.
- Perform insertions on Entities.
- Invoke APIs published in the API Manager.
- Invoke Dataflows.
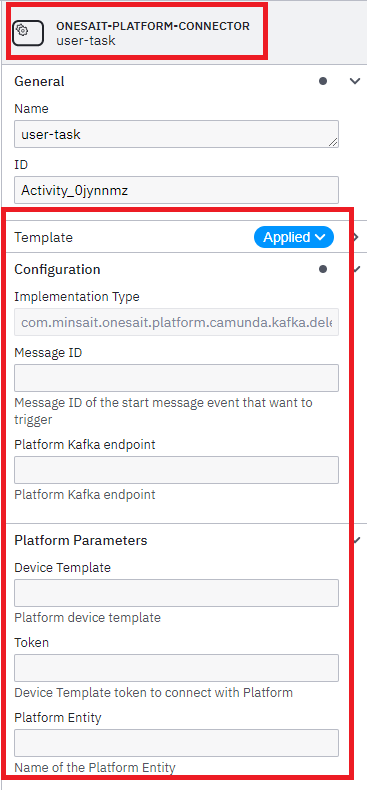
Once we have selected the corresponding template, the properties that this element needs to connect to the Platform will be automatically loaded, and the user will have to fill in for the correct operation:
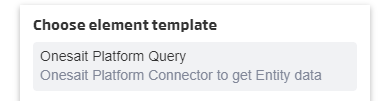
How to consult data of an Entity?
In order to be able to consult an Entity, you must have previously created one and associated it to a Digital Client of the Platform in order to obtain a token with which to access the data.
To query the data of an Entity, we have to select the “Onesait Platform Query” template:
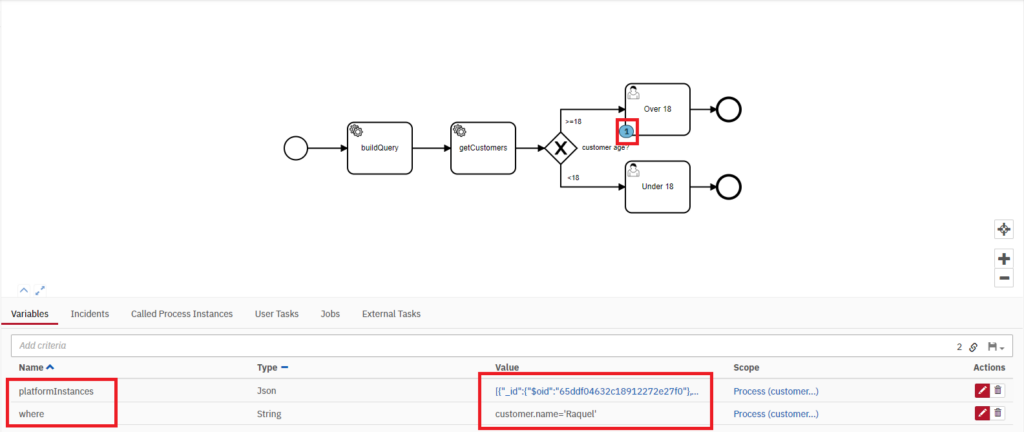
Let’s see how this template works with the following example:
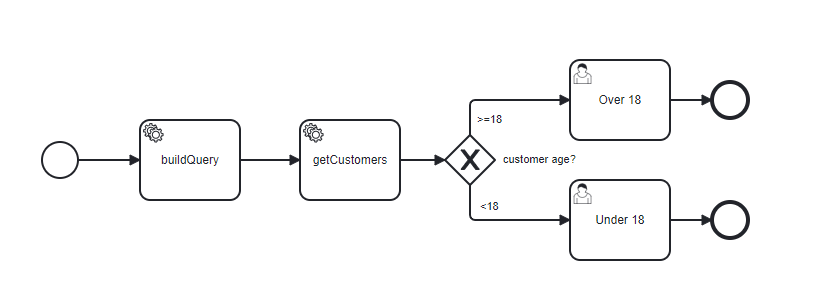
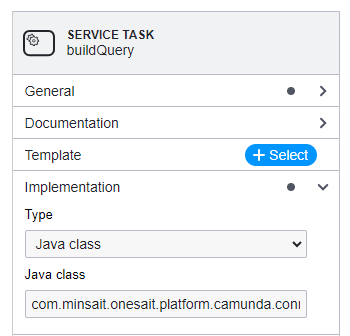
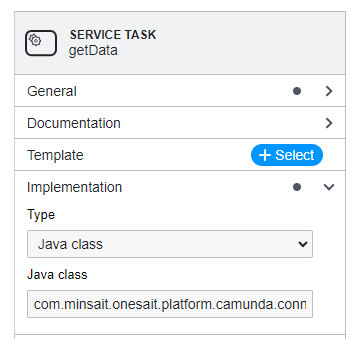
- buildQuery: Java class Service Task that dynamically builds the where clause of the query that we are going to launch against the Entity and stores it in the where variable.
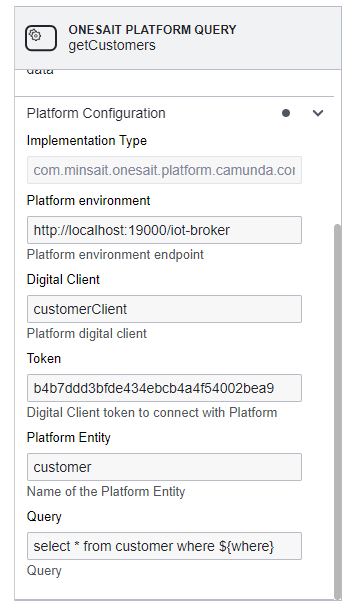
- getCustomers: Service Task that implements the Onesait Platform Query template and performs the query against the desired Entity. There are several things to note in the configuration:
- As the where variable is collected in the Query field in a parameterized way, which allows to launch dynamic queries. In the case of wanting a static query, it is enough to enter the query without further ado.
- The “Platform enviornment” field is optional, if not specified, the endpoint of the environment in which the process is deployed will be used.
- The result of the query is stored in the variable “platformInstances” and will generally always be a JSON array.
- customerAge: evaluates the variable “platformInstances” and checks the “age” field with the following expression.
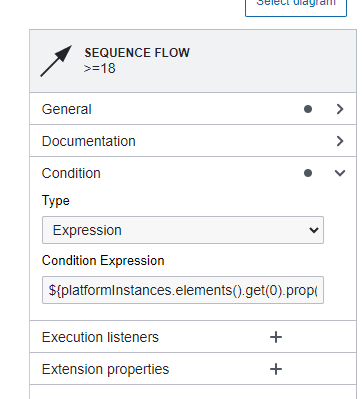
${platformInstances.elements().get(0).prop("customer").prop("age").numberValue() >= 18}- over/under 18: User Task that waits for an action from the user.
Visualize the execution of the process
Once the process is deployed in the BPM Engine, we can launch it and we will see the following:
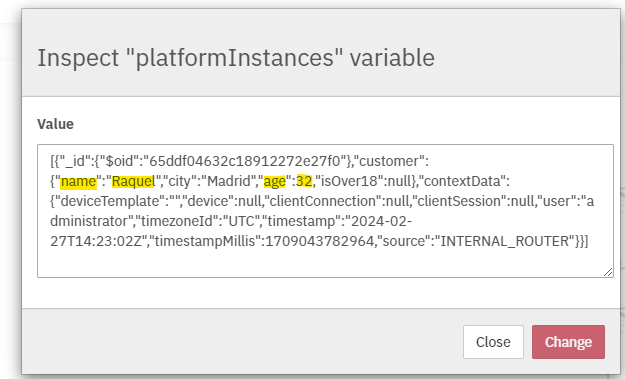
- The Entity query data appears in the “platformInstances” variable in JSON format.
- The dynamically created where clause is stored in the “where” variable.
- By inspecting the platformInstances variable we can verify that the data matching the where clause has indeed been fetched.
- The JSON has been evaluated and the process is stopped in over 18, which matches the data obtained from the entity.
If you are interested, in this link you can find the BPMN we used in the example.
How to insert data in an Entity?
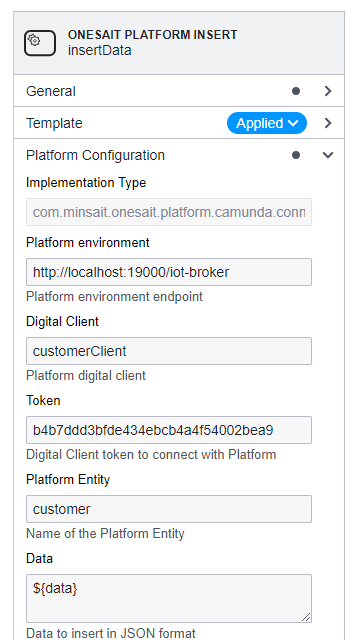
To insert data from an Entity (which will have to exist previously, of course), we will have to select the “Onesait Platform Insert” template:

Let’s see how this template works with the following example:
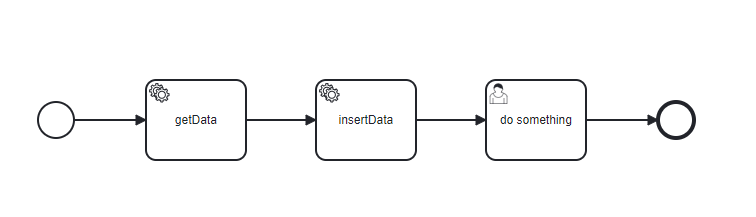
- getData: Service Task of Java class type that dynamically constructs the data to be inserted in the entity in JSON format and stores them in the variable “data“.
- insertTask: Service Task that implements the Onesait Platform Insert template and inserts the data into the desired Entity. There are several things to note in the configuration:
- How the variable data is collected in the Data field in a parameterized way, which allows to launch dynamic insertions. In case you want a static data insertion, just put the JSON in this field.
- The field “Platform enviornment” is optional, in case of not specifying it, the endpoint of the environment where the process has been deployed will be used.
- The result of the insertion is stored in the variable “platformIds“, where we will have the identifiers of the inserted instances.
- doSomething: User Task that waits for an action from the user.
Visualize the execution of the process
Once the process is deployed in the BPM Engine, we can launch it and we will see the following:
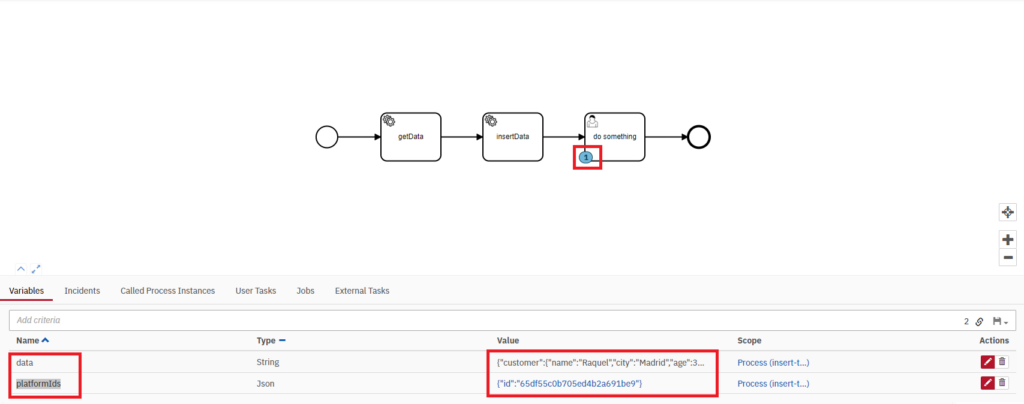
- The data of the insertion in the Entity appears in the variable “platformIds” in JSON format.
- The dynamically created data stored in the variable “data“.
As in the previous case, if you are interested in this link we leave you the BPMN that we use in the example.
How to launch a DataFlow?
As in the previous cases, we will have to have generated a previous DataFlow. To launch it, we have to select the “Onesait Platform Dataflow” template:

Let’s see how this template works with the following example:
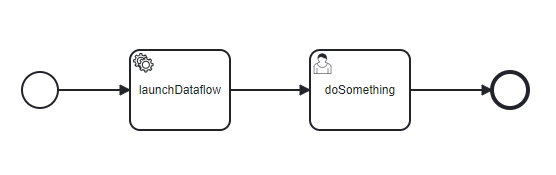
- launchDataflow: Service Task that implements the “Onesait Platform Dataflow” template and launches the desired DataFlow. There are several things to note in the configuration:
- The “Platform enviornment” field is optional, in case it is not specified, the endpoint of the environment where the process has been deployed will be used.
- The “parameters” field is optional, in case the DataFlow to be launched requires some parameter it can be indicated to the BPM in this field in JSON format. It can also be parameterized with the nomenclature ${parameters} if we want the data to be dynamically mounted.
- The result of the DataFlow execution is stored in the variable “dataflowResponse“.

- doSomething: User Task that waits for an action from the user.
Visualize the execution of the process
Once the process is deployed in BPM Engine, we can launch it and we will see the following:

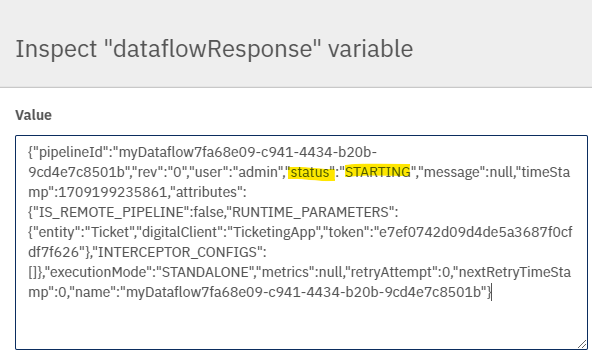
- The result of the DataFlow execution is stored in the variable “dataflowResponse” in JSON format.
- If we inspect the variable “dataflowResponse” we can see that the DataFlow has been successfully started.
As in previous cases, in this link we have prepared the BPMN of the example.
How to invoke a Platform API?
To launch an API, first of all we will have to have previously created an API. Once we have it, we will have to select the “Onesait Platform API” template:

Let’s see how this template works with the following example:
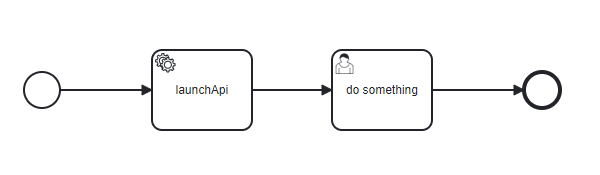
- launchAPI: Service Task that implements the “Onesait Platform API” template and launches the desired API. There are several things to note in the configuration:
- The “Platform enviornment” field is optional, in the case of not specifying it, the endpoint of the environment where the process has been deployed will be used.
- The “API Path” field must follow the following nomenclature /<version>/<api_identification>/<operation_path> in the example we see how part of the path is parameterized with the expression ${name}
- The “Body” field is optional, in case you want to launch an operation with a body you can indicate it to the BPM in this field in JSON format. It can also be parameterized with the nomenclature ${body} if we want the data to be dynamically mounted.
- The result of the DataFlow execution is stored in the variable “apiResponse“.
- doSomething: User Task that waits for a user action.
Visualize the execution of the process
Once the process is deployed in the BPM Engine, we can launch it and we will see the following:

- The result of the DataFlow execution is stored in the variable “apiResponse” in JSON format..
Finally, here is the link to the BPMN of the example.
If you are interested in learning more about these connectors for the BPM Engine, feel free to leave us a comment or send us an inquiry on our Onesait Platform support channel..
Header image: Vincent Botta at Unsplash.