Demonstrator: Migration to Cloud with Center
In this Onesait Platform Center demonstrator, we are going to show how you can quickly and easily perform a migration to the Cloud over Kubernetes of a legacy application deployed in a traditional way.
Let’s go.
Creating a project in the Center
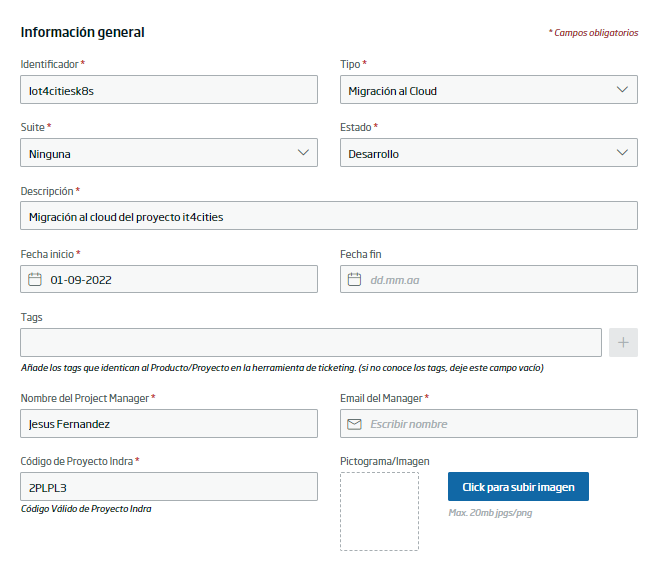
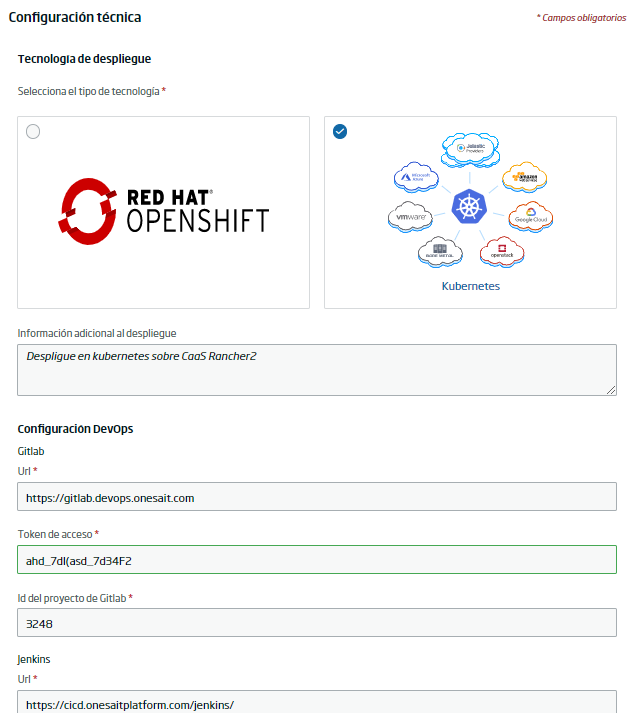
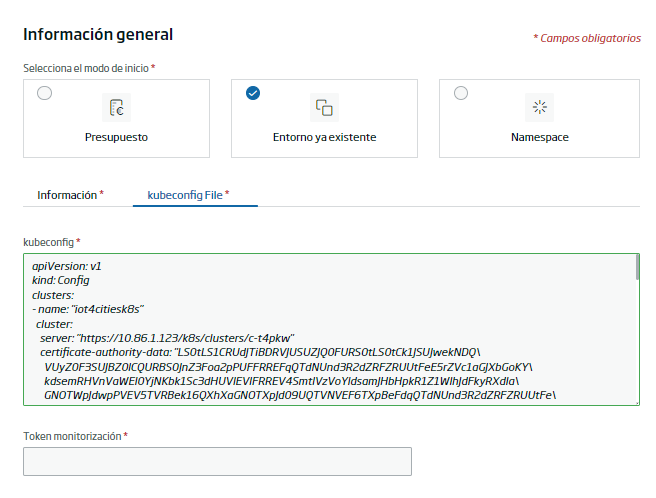
For startes, from the Center, you are going to create the migration project, assigning the following information in its configuration:
Management information and users associated with the project
DevOps configuration (Gitlab, Jenkins, etc.)
Kubernetes environments where the solution will be deployed in the Cloud
Carrying out the Assessment of the legacy application
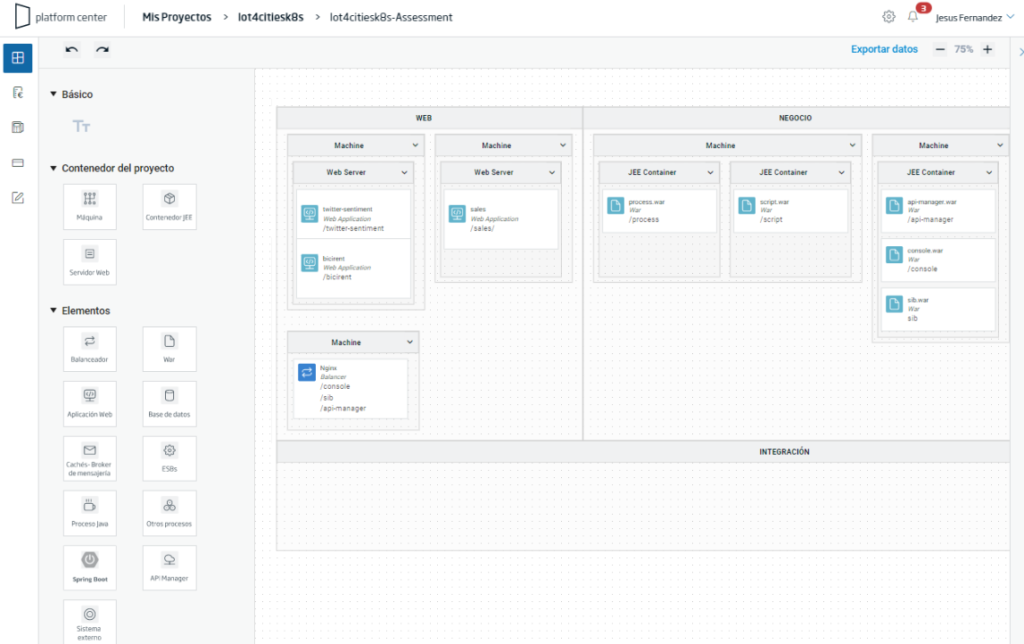
Once the project is created, the next step will be to identify the elements that make up the legacy application to migrate to the Cloud. For this, you need to carry out an Assessment; that is to say, the identification of all the logical elements of the application and their configuration for use in a typical environment.
To do this, using a form (although in the future we intend to have more automatic alternatives), you will identify the following:
- Web frontends of the application.
- Back-End Modules (JEE Servers, Spring Boot Microservices, etc.).
- Databases.
- Batch Processes.
- Middleware ontegration (API Managers, ESBs, messaging brokers, etc.).
- Balancers.
Alternatively to the form, and in a bidirectional way, this information is reflected in an editable Assessment Diagram, that is organized by layers:
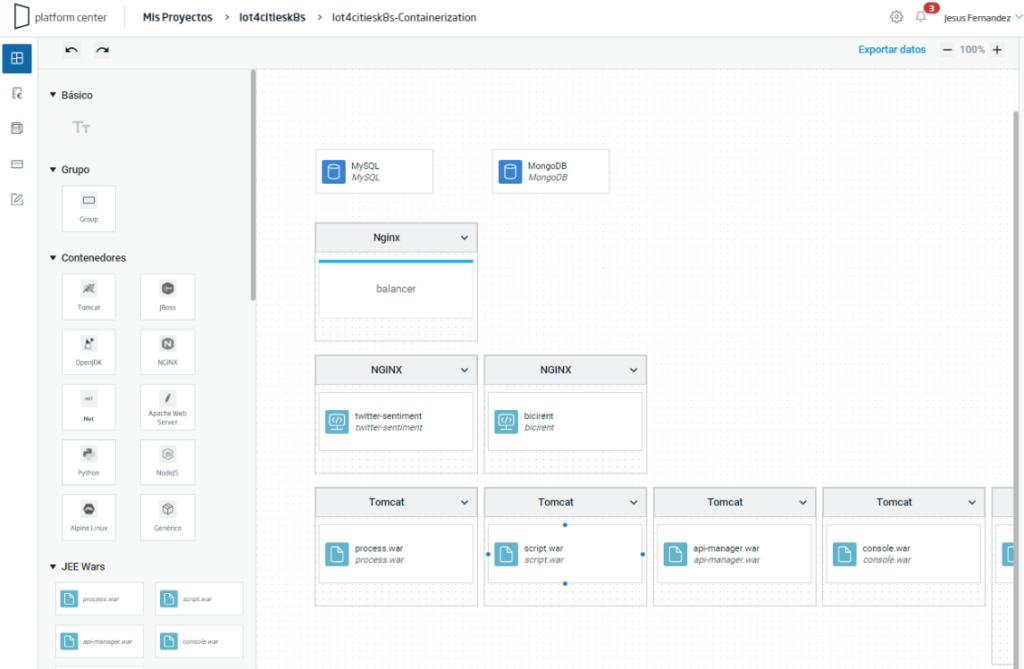
Application containerization
Once the Assessment is complete, the next step towards the Cloud is turning the logical elements identified in the application into deployable containers as Kubernetes workloads.
To do this, for each identified element, a container is created on an editable diagram:
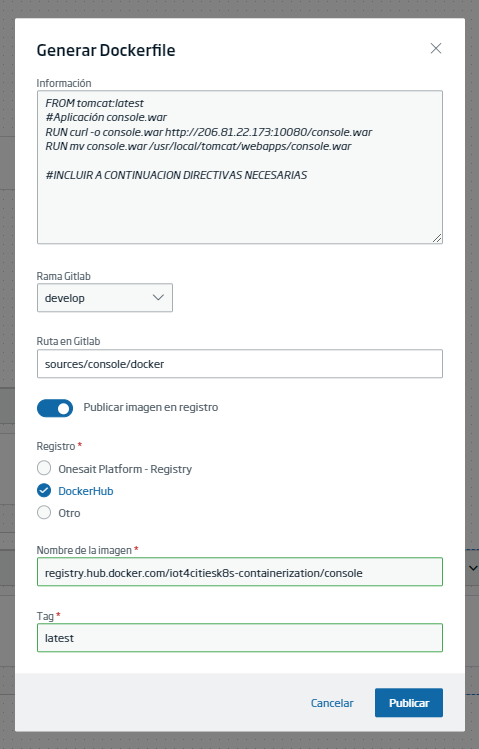
The result of the containerization is reflected in the corresponding Dockerfile descriptors on the project‘s GitLab, as well as in the publication in a registry of the images of the different containers:
App templating with Helm
With the containerization finished, and the relationships between logical components defined in the Assessment, the Center already has an image to infer a proposal for deployment on Kubernetes.
In the next step, this information is used to automatically generate a Helm Chart; a graphical representation of all the Helm descriptors of the application. For this, the following is created automatically:
- A Namespace for the application.
- A Deployment and a Service for each container.
- A Config-map with the configuration of each containerized database.
- A Secret with the credentials of each contained database.
- A PV and a PVC for each database, to provide persistent storage.
- A PV and a general PVC for the rest of the Deployments that are not databases.
- An Ingress with balancing rules towards the Services that had balancing rules in Assessment.
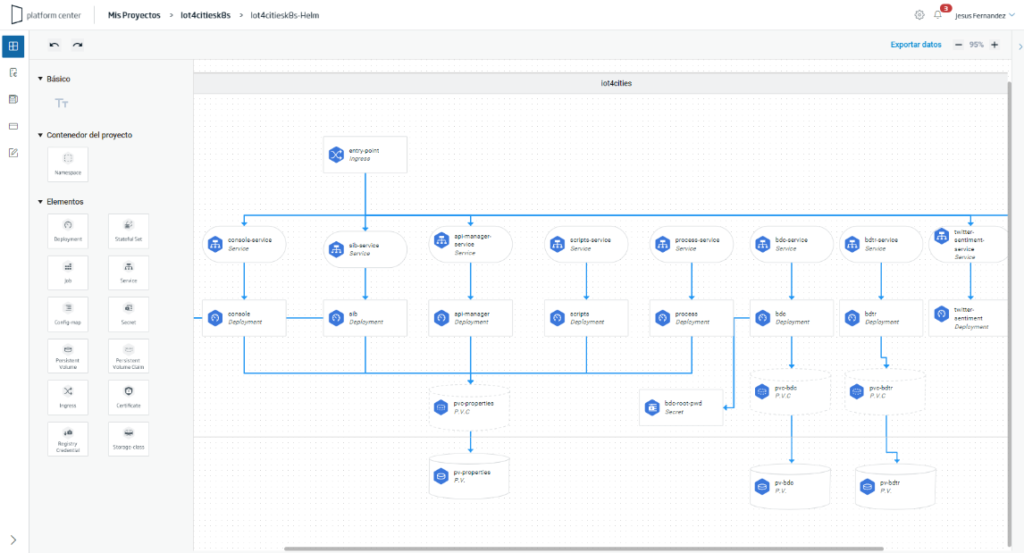
Like the rest of the elements generated by the Center, this diagram is editable for the architect to refine or modify any element.
In short, a Helm diagram represents a graphical abstraction of a Helm Chart, so that an architect without very deep Helm knowledge can build the Charts from it.
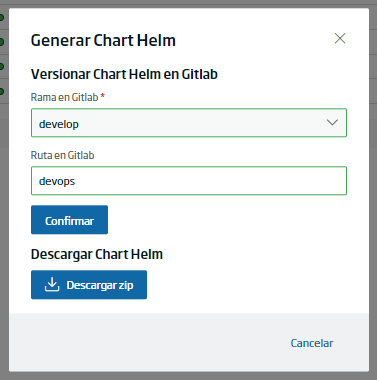
But a Helm diagram ends up materializing in a Helm Chart, with the YAML descriptors and externalized configuration in a «values.yaml» file. These charts can be downloaded or versioned in the project’s GitLab:
Kubernetes deployment
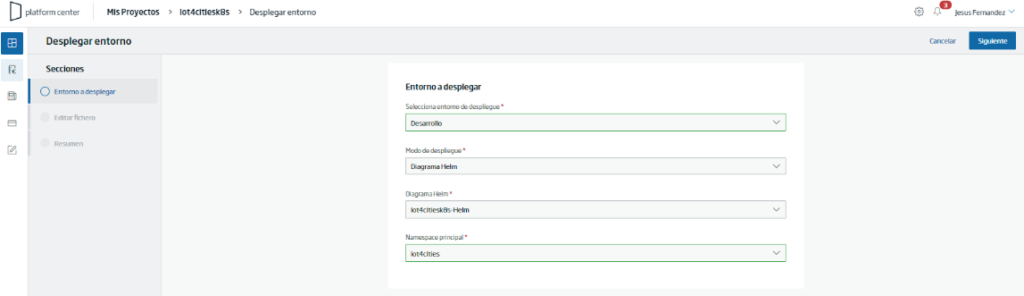
A Helm chart can also be installed on Kubernetes on top of one of the project environments. To do this, selecting the diagram, choose «Deploy Helm Chart»:
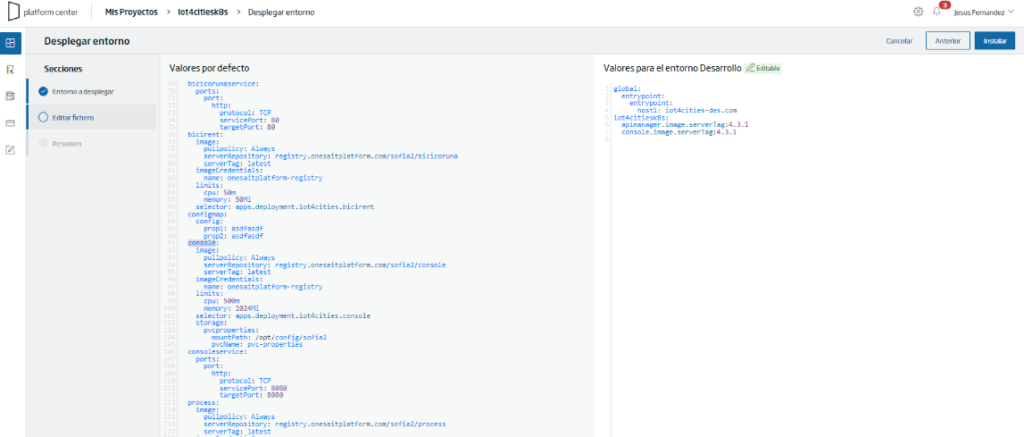
Having externalized the configuration, certain variables can be overwritten for the environment:
The installation ends showing the Helm log:
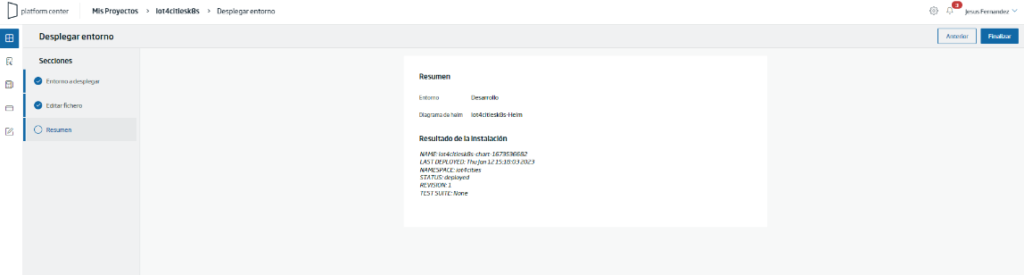
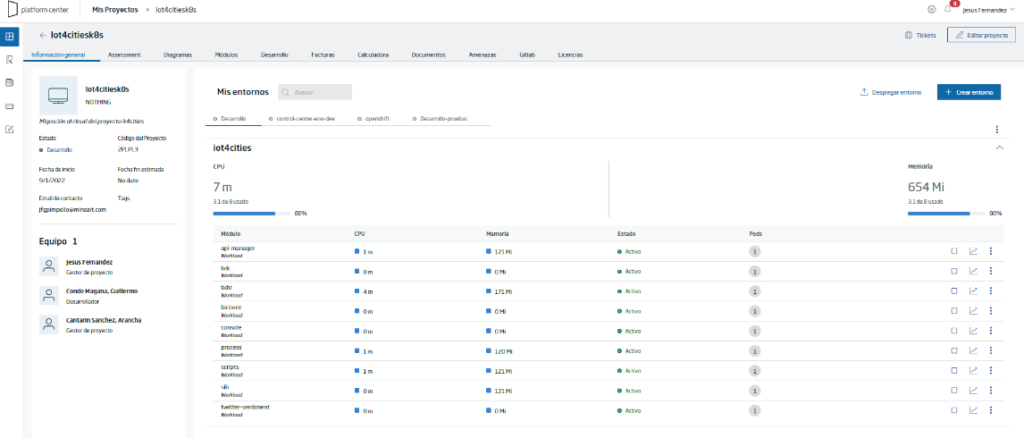
And the application would be deployed in the selected Kubernetes environment:
And with this we finish the demonstrator. We hope you found it interesting, and if you have any questions about it, do not hesitate to leave us a comment. Also, if you are interested in us showing you this demonstration live, do not hesitate to contact us to make an appointment at our contact email contact@onesaitplatform.com.
Header image: Kari Shea at Unsplash.