Operation Console (Part II): First Steps
In a previous post, we presented the Operation Console as a tool where everything related to a project or product is centralised in a single point: its deployments, updates, monitoring, invoicing, etc.
In this entry we are going to start working with this tool. We will see how to register for the first time and how to create projects and then start working with them.
Access to the tool
The tool is available from this link.
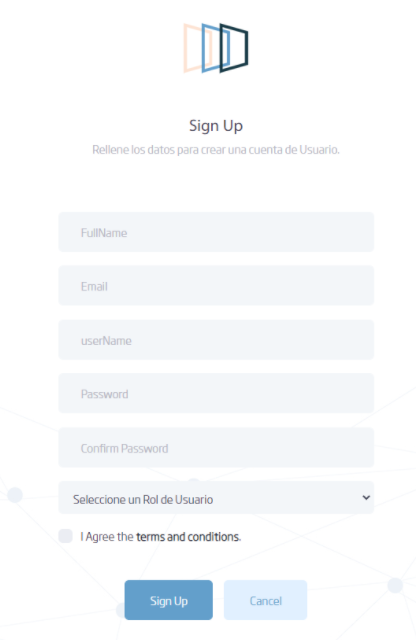
From the start of the tool, you can access the user creation form, through the «Sign Up» button.
Create a Project
Please note that only «Administrator» roles will be able to create a Project, and assign other users to that Project so that they can operate with it.
The Projects are the foundation of this tool. Within each Project we will be able to manage the environments, deployments, invoicing, etc.
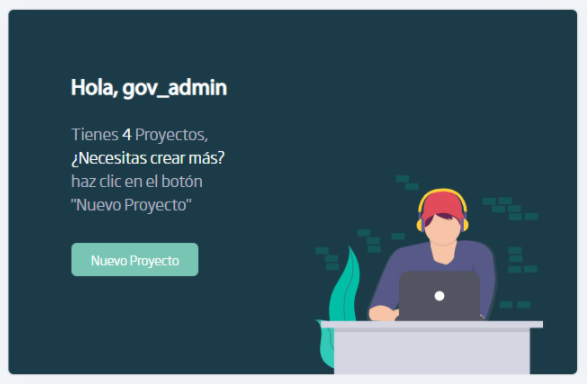
To register a new Project, enter the tool with an Administrator role and select the «New Project» option:
A form will then appear where you will have to register the following information:
- Identifier: name of the project. We recommended not to use strange characters, except for hyphens.
- Description: brief description of the project.
- Start date: start date of the project.
- End date: approximate end date of the project (optional).
- Email: contact e-mail address.
- Project Code: code to which the costs derived from certain operations will be charged (the cost of the operation will always be notified before it is carried out).
- Type of Technology: for the moment, we are only working with Openshift.
- URL of the Openshift cluster where we are going to perform the deployments.
- Openshift user.
- Openshift user’s password.
- Team: list of people who will have access to the Project and will be able to perform tasks on it.
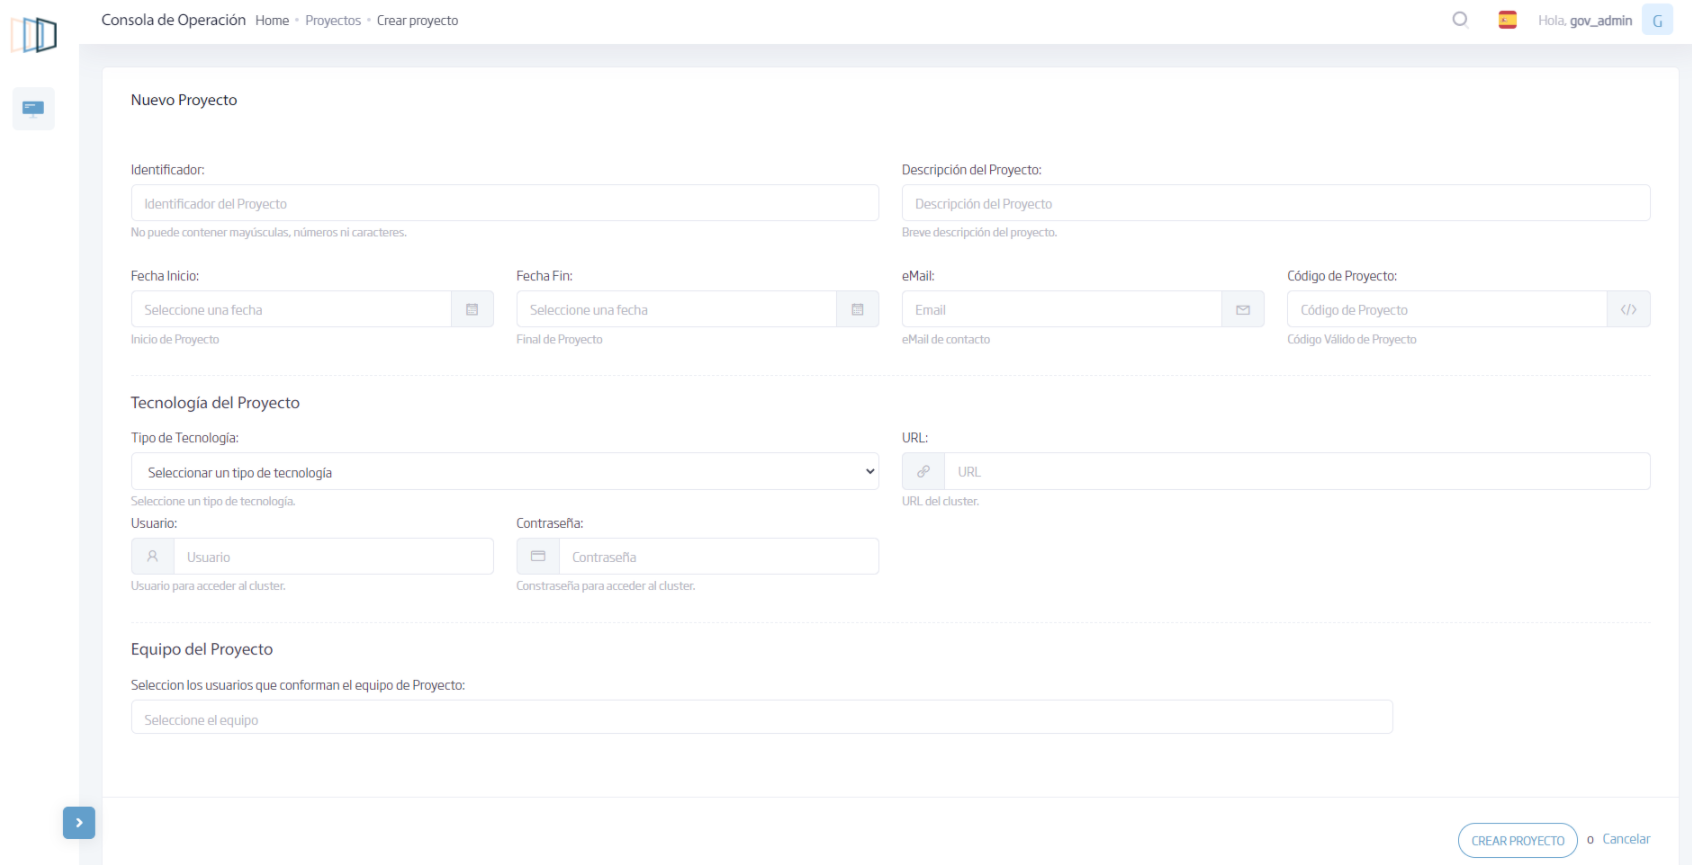
Once the form is completed, select «Create Project» and, if everything went well, you will be redirected to the main screen of the Operation Console.
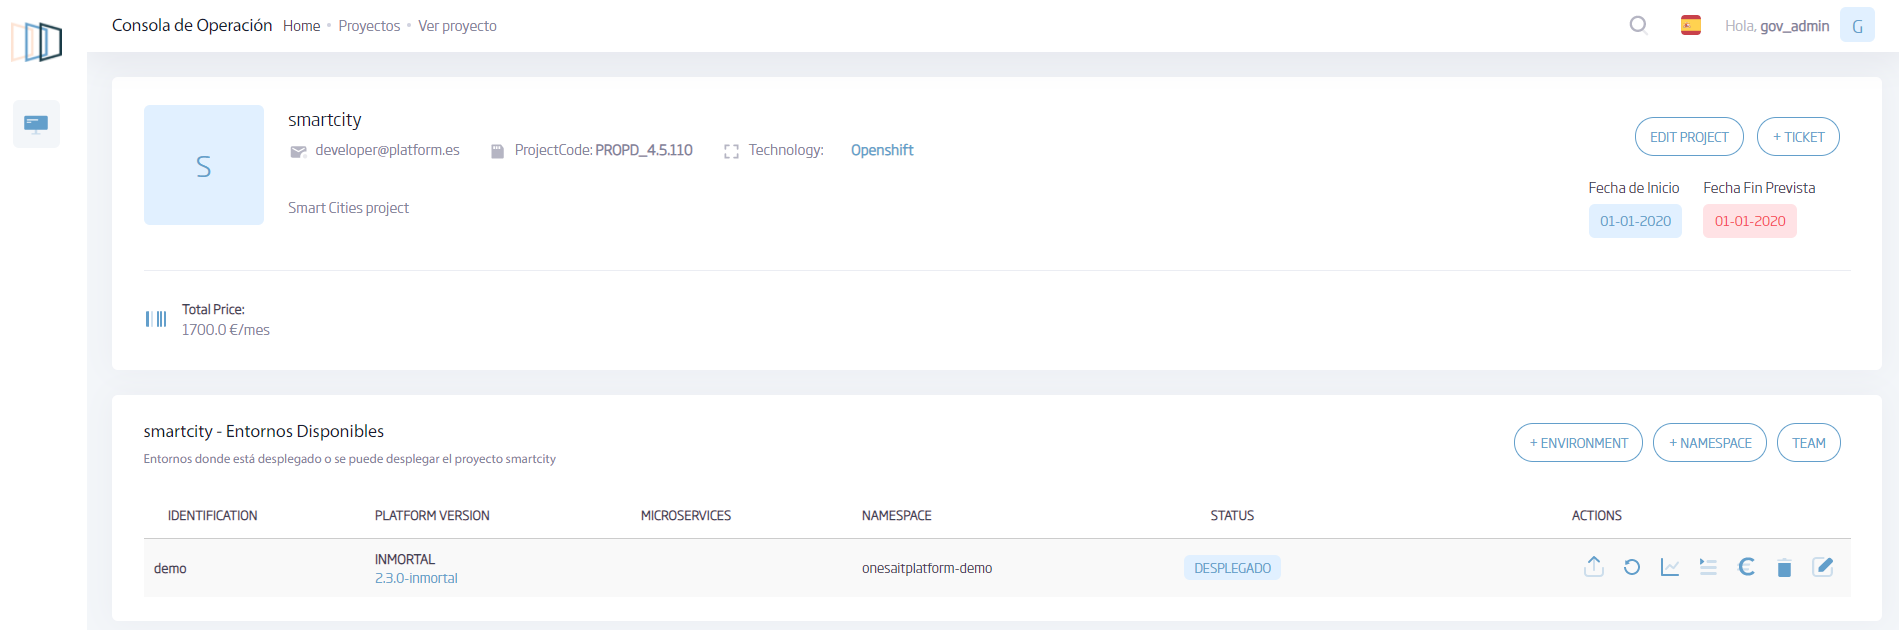
Once a Project has been created, the next step is to register the environments. To do this, access the Project display, either from the menu or from the main screen, and go to the «Available Environments» section:

Here we see the available environments.
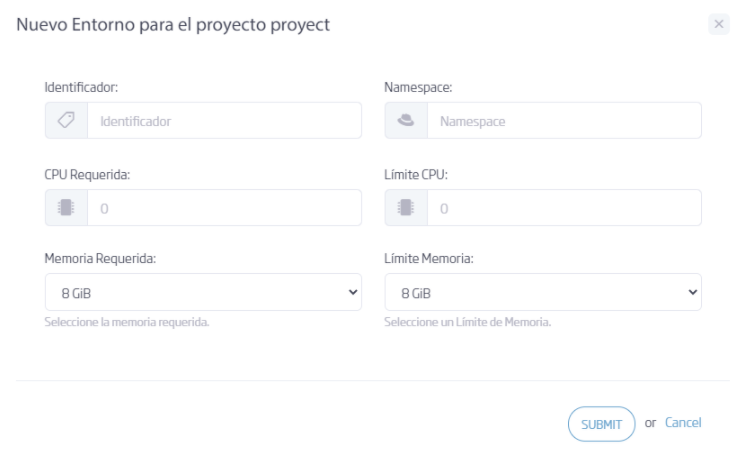
By clicking on the «+ Environment» button, a form will appear with the following information:
- Identifier: name of the environment (once the environment has been created, this field cannot be modified).
- Namespace associated to this environment in Openshift (optional; if the namespace does not exist, its creation can be requested).
- Required CPU of the Openshift namespace (optional).
- CPU limit of the Openshift namespace (optional).
- Openshift namespace memory requirement (optional).
- Openshift namespace memory limit (optional).
Please bear in mind that the Operation Console performs the deployments on Openshift, and that it is necessary for each project environment to have an associated namespace where both the Platform and the services associated to it will be deployed.
From the Operation Console you can request a new namespace using the +Namespace button:
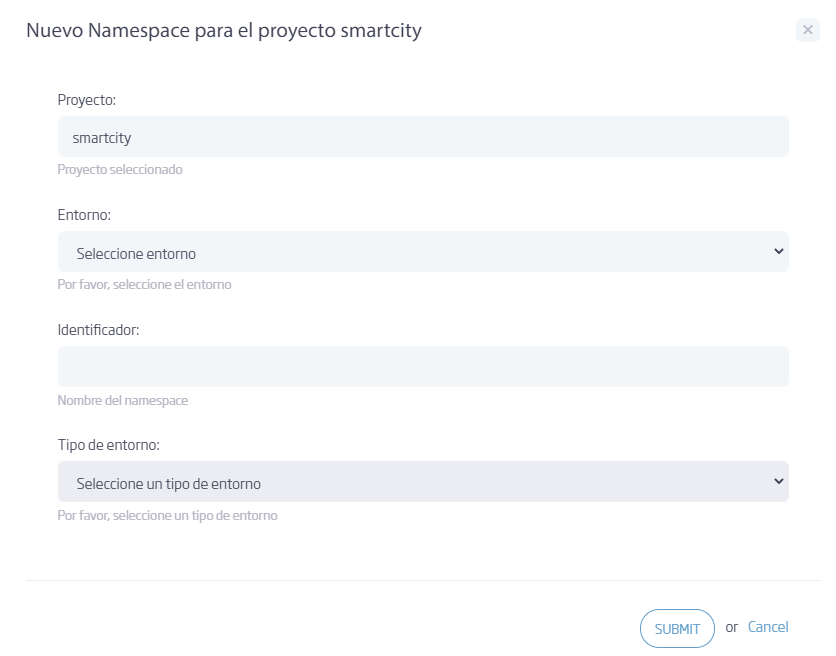
Through this form, we can request a namespace for a Project environment. When you request a namespace, your request will be sent to the Platform support team, and the support team will notify you when the namespace is created so that you can start deploying.
Conclusions
Now we have everything ready to start managing our environments, make deployments and control which modules of the Platform we want to start or stop in each moment.
In the next post we will see how to deploy the Platform using the Operation Console.
For more information do not hesitate to leave a comment or visit our tutorials.