IoT for around the house: Connecting a sensor with the Onesait Platform (part I)
The good thing about summertime is that it gives you time for inventiveness (or maybe for boredom), so this year I decided to carry out a personal project that I had been thinking about for some time: measuring the temperature at home.
It wasn’t really the newest among ideas, or one of those world-changing ones, because a couple of years ago, I was measuring it with with a Raspberry Pi and a thermometer, and displaying the information on a LCD screen. It was very cute and stuff, but there was no historical record nor could I see the information beyond that screen or anything.
So during the summer heat wave and with mercury rising Bruce Willis-like (here’s a nerd ref), I decided to build a small system of sensors around home so they’d collect the temperature and humidity of a couple rooms (just as a test) and send the information to an ontology of the Platform using a POST method of a REST API service and, throughout a Dashboard, I represented visually the measurements’ information, also including a graph with the evolution in time.
As usual, the image above is not a screenshot but a functional Dashboard of the Platform, so feel free to tangle with it and see the temperature I am having at home.
As you can see, it is a simple but effective thing, right? Well, if you’re interested in doing something like this, come with me in this short tutorial where I’ll explain how to set up the whole idea.
In this first entry, I will tell you the materials you will need, which platform environment to use and how to generate the ontology and REST API service to populate the ontology; and in the second part of the tutorial I will explain how to connect everything, generate the sensor code and send the information to the ontology. In a third entry, I will explain you how to show the information in a great-looking gadget to put it in a dashboard in the platform.
The ingredients
In this section we will see the junk that we will need for our project. As I have mentioned, the idea is to measure the temperature of a room and send it to an ontology. Nothing too fancy,
Say that you don’t already have any panels or sensors around home. I would then recommend the following (although you can use whatever you like):
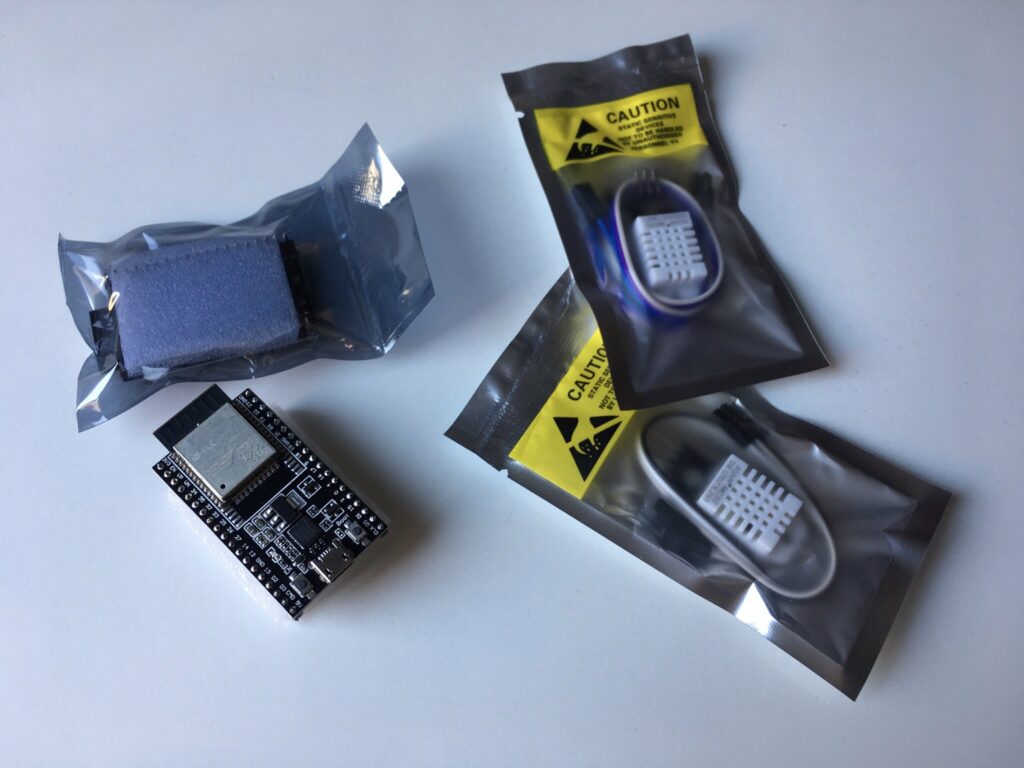
- ESP32-WROOM-32D Module: this plate will be the so-called brain of the beast. It is a developer’s board including WiFi (and Bluetooth) by default, as well as 38 pins. The 32U version is exactly the same, but it also incorporates an adapter to attach a WiFi antenna instead of its antenna. Price: around 3.50€, AliExpress.
- DHT22 Module: it measures temperature and humidity simultaneously. Its features include a temperature measurement range between -40 and 80ºC (with an accuracy of ±0.5ºC); a humidity measurement range between 0 and 100% (with an accuracy of 2 to 5%), and it is capable of measuring every two seconds. It differs from the sensor in that it has a capacitor filter and a built-in resistance, and it only has three legs instead of four. Price: around 2.50€, AliExpress.
- Cables: to connect the sensor to the board. If you are using the DHT22 module (which is not a sensor), you will only need three female-female cables.
- Power supply: to configure the board, we will connected it to the computer through a USB port that will serve as its power supply but, to have it powered independently, we will need a 5V USB charger. It can be powered by batteries, but that’s up to you.
- Conexión WiFi: Yeah, so funny, but there’s little you can do without it. Since we are going to use non-encrypted «private» data, it’s better to connect to our own network and not to the neighbour’s
Just because, I’ve got a couple of each (in case any of them fails, I won’t be left adrift).
Note: I have recommended AliExpress because of its low prices and because the components work without problems, but you can buy those in any other shop, either physical or online. As a curiosity, it took me a couple of days to think about it, half a day to program it and three weeks to wait for the components.
The Platform’s environment
Surely we’re eager to start connecting stuff, but we’ll instead start at the foundation: choosing the working environment; that is to say, where we’re going to have our database, the REST API service and the Dashboard.
As we tend to do in these cases, we are going to use the Onesait Platform CloudLab, the free experimental environment where all the Platform’s capabilities can be tested without limitation. Another option is to download and install locally the Onesait Platform Community Edition, the free, open source version that anyone can download and use to create a complete solution on top of it.
Whichever version you choose, the steps in this tutorial will all be the same, so don’t worry about that.
Creating the ontology
Creating an ontology is nothing new around here, because we are using those all the time for anything we want – although maybe for the purpose we have here, a timeseries ontology would be better. As we want to do something simple here, let’s not over do it, for now.
To create an ontology, you know, go to the menu Development > Ontology Management, and select the option «Creation step by step».
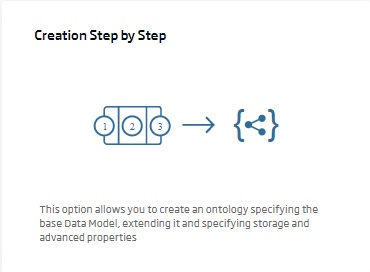
Once the option has been selected, the ontology creation wizard will appear, and you will have to enter some basic information.
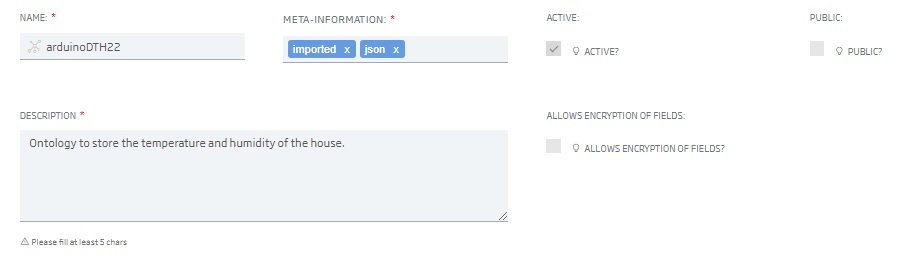
Let’s start by inputing the ontology’s name and properties:
- Name: the name of the ontology to be created. For this tutorial, I’m using «arduinoDHT22». Remember that the ontology’s names cannot be repeated, so I recommend a variation of the name (the same followed by an underscore and your user, for example).
- Meta-information: the informative labels.
- Active: this will be checked, so it can be used.
- Public: this is your choice. I created it hidden to develop it slowly, but when this tutorial is published, it will probably be already public.
- Description: a short text telling what your ontology is about.
- Allows encryption of fields: you can leave it unchecked.
Having done this, select the ontology template to be used. Although in CloudLab there are predefined templates for IoT, in our case we are going to simplify things and create our own template.
To do this, select the template from General > EMPTYBASE, and create the following properties:
- deviceId: STRING type, it will store my sensor’s ID.
- location: STRING type, to store where in the house is the sensor located.
- temperature: NUMBER type, it will store the temperature.
- humidity: NUMBER type, which will store… the humidity. D’oh!

Having done this, update the ontology scheme, generate an instance to check that everything is going well, and then you can register the ontology.
Creating the REST API service
Once we have the ontology, we are now going to build the system to populate it with data, because writing down the temperature every minute and ingesting it manually isn’t by far the optimal process.
As you can imagine, we are going to use the REST API tools available in the Platform to create a service that allows us to ingest and query the ontology’s data.
We will do this from the menu Development > My APIs. The first thing we will do is go to «User Tokens» and write down the alphanumeric long string that appears, or generate a new one if we want it exclusively for this purpose.
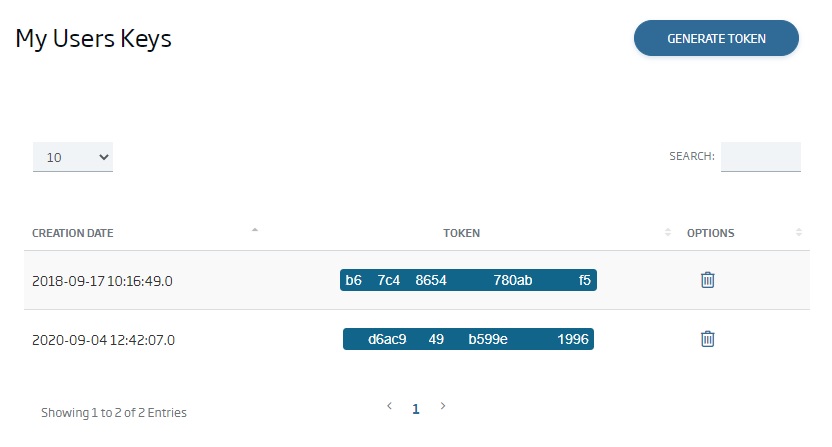
By using this token, we will be able to identify ourselves when using the REST API, so let’s keep the code in an accessible but safe place (don’t upload it to any Git repository or advertise it around, come on, we will not be responsible if you do).
Going back to the list of APIs, we will create a new REST API, specifying the following information:
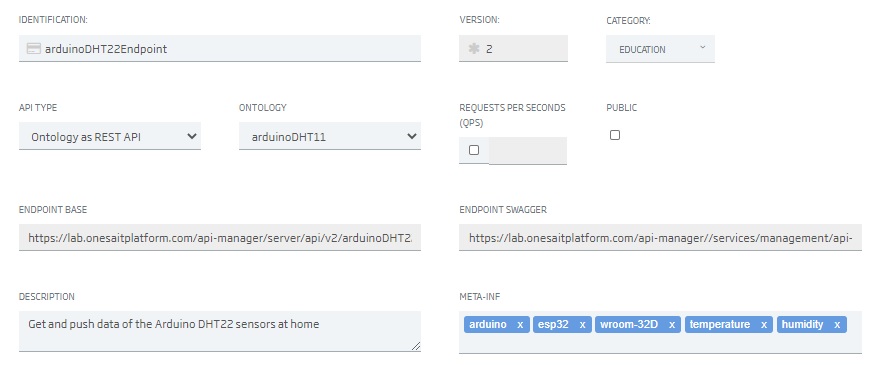
- Identification: our API’s name. For my project, I have chosen «arduinoDHT22Endpoint», so, as you did for the ontology, use variations of the name.
- Category: here I said «Education», because it was for this tutorial, but you can put whatever you want.
- API type: here you must select «Ontology as REST API».
- Ontology: the ontology where you will ingest and read data; in my case it is «arduinoDHT22».
- Requests per seconds: in my case, I have not limited the requests, but if you want to have a limit, you can specify it here.
- Public: like with the ontology, this is up to you.
- Description: a descriptive text about what your API is about.
- Meta-information: informative labels, similar to those of the ontology.
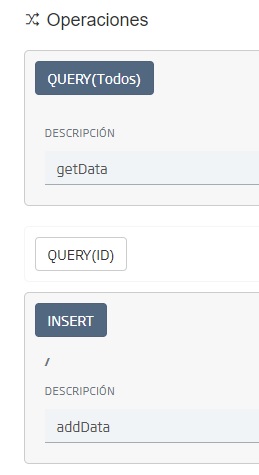
Now you’ll have to define which operations are going to be available in our REST API. Initially I only needed to ingest data (INSERT) and read them (QUERY), because I will not update or delete any record, so I will include a description only in the ones I’m interested in.
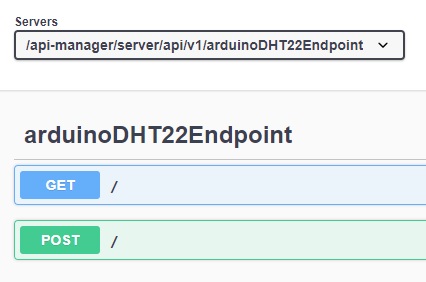
That would be it. We can now create the service and test it on the Swagger. To do it, from the list of APIs, look for your own, and select the corresponding icon: </>
The Swagger assistant will start, and thn we will be able to see the two options we have defined when creating our REST API service: GET and POST.
As the ontology is empty, GET does not make sense, so we are going to do a test intake, to check that everything works correctly.
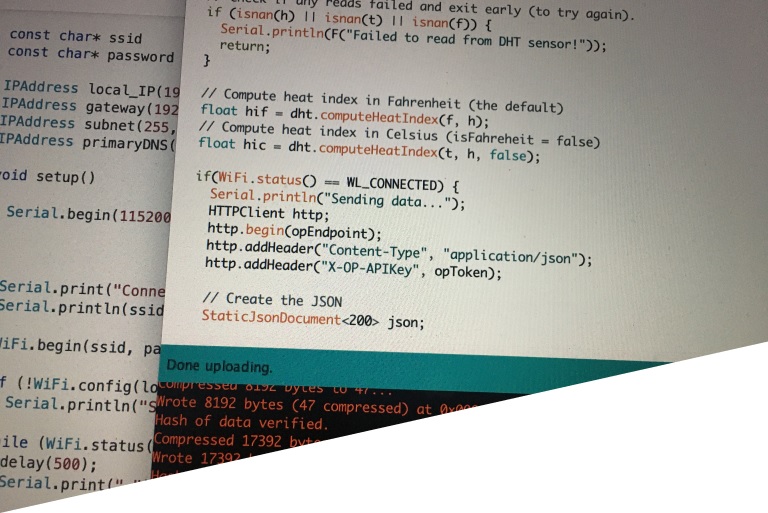
Select the POST option, then click on the «Try it out» button and insert the token (that alphanumeric long string we said you should have accessible but safe) in the «X-OP-APIKey» box. Then, in the «Request body» box, include a JSON similar to the one that will come from our IoT tech thingy.
Which object to include, and with what structure? Well, it is as easy as going to our ontology and doing a CRUD: in the output box to the right, you can see the JSON scheme of the data to be entered:
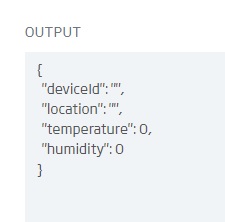
If you are using the same structure that I have defined, the following object should work for you:
{
  "deviceId": "swagger_device",
  "location": "computer",
  "temperature": 25.4,
  "humidity": 41.7
}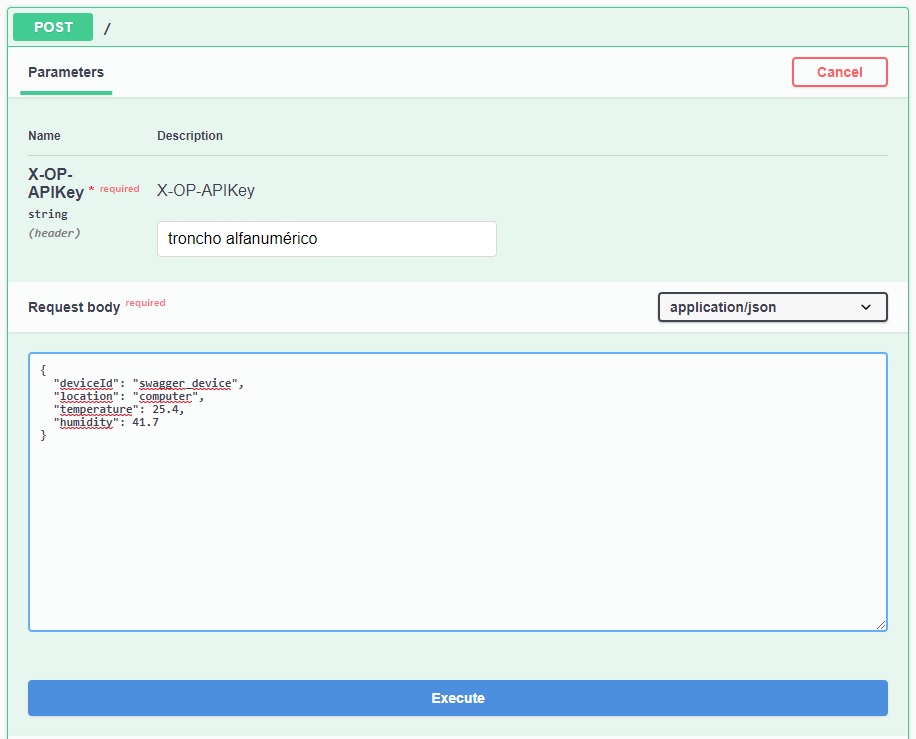
Once this object has been introduced in the Swagger, click on «Execute» and if everything went right, the ontology will have ingested the data. You can check this from the ontology’s CRUD, which should show the new record, or using the «Queries» from the menu Tools > Query tool (which is just perfect for that, and exactly what it’s for).
Well, with this we have already prepared everything to start receiving data. In the next entry, we will see how to connect the board and the sensor, program them to start collecting information, and configure it to send the information to the ontology that we have created, using the REST API we have generated.
Once we have achieved all that, we will create a small Dashboard like the one I have shown you at the beginning, where we can visualize the information received in a so nice way you can boast about it.
I hope that you have found it interesting, and any doubt or question that you have, leave us a comment.


Pingback: IoT for around the house: Connecting a sensor with the Onesait Platform (part 2) – Onesait Platform Blog
Pingback: IoT for around the house: Connecting a sensor with the Onesait Platform (part III) – Onesait Platform Blog
Pingback: Creating Ontologies from Time Series – Onesait Platform Blog
Where do you put units of measure – like temperature in °C, °F or °K?
Hi, Neil.
If you want to add the units in the ontology, just create another field as string, so you can add there the value of your units.
In this tutorial, I’ll only use Celsius degrees, so that’s why I don’t attach the units in the ontology, but you can create an object to store the value and unit of each temperature type.
Cheers.
Pingback: IoT MQTT connect in Onesait Platform – Onesait Platform Blog
Pingback: What can we expect from the IoT in 2022? – Onesait Platform Blog