How to create a microservice in Onesait Platform?
From the Platform, you can create microservices and manage their complete life cycle – from code compilation, to CaaS deployment.
In this post, we are going to see how to create one from scratch and see how everything works.
Creating the microservice
To create a microservice, navigate to the Development > My Microservices menu.
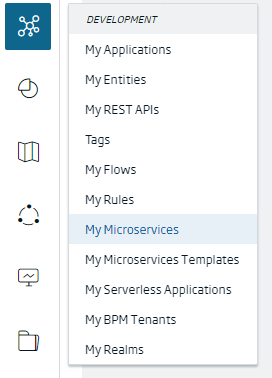
This will open the list of microservices that you have available as a user. To create a new microservice, click on the + button located in the upper right.

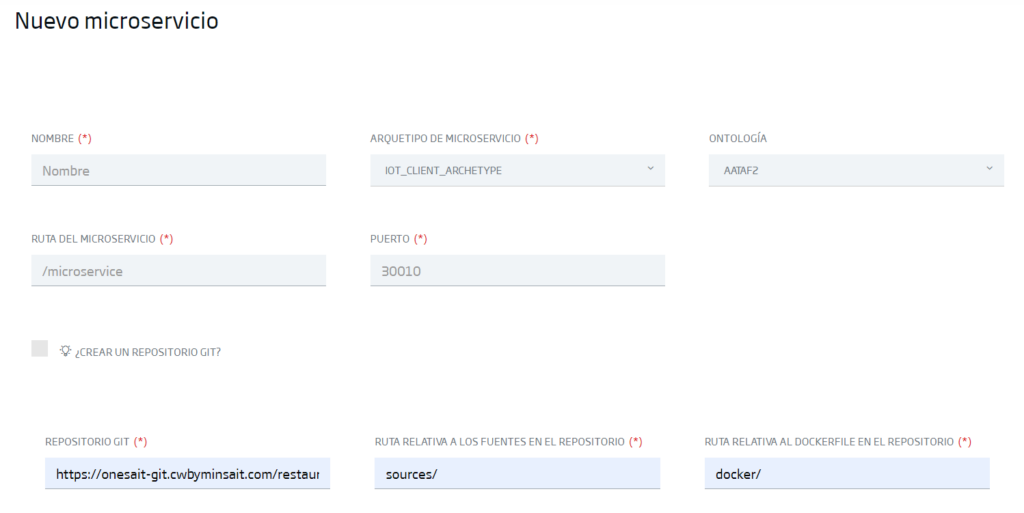
With this, the microservice creation manager will appear.
Creating the project in GitLab
If you are creating the project from scratch, you will be able to choose an archetype, which will generate a project in GitLab with a code base on which to start working.
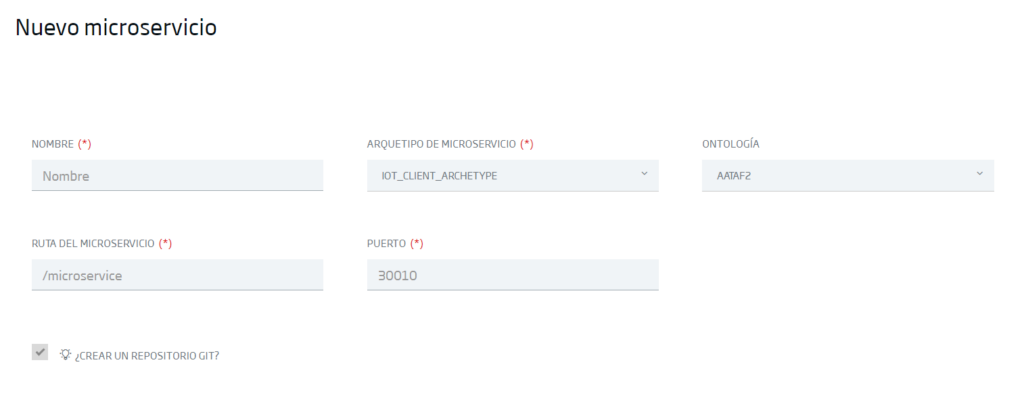
Depending on the type of project, you can select one archetype or another. For example, the IoT Client archetype comes preconfigured to communicate with the Platform Broker and perform query operations on an Entity.
Creation with an existing Git project
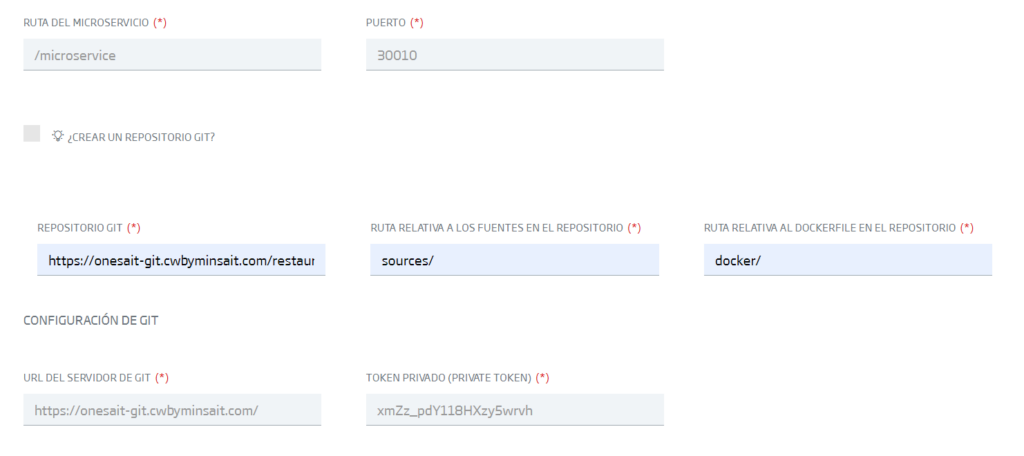
If the code already exists in a Git repository and you only want to manage the entire life cycle from the Platform, you can indicate that you do not want to create the Git repository (by unchecking the ‘CREATE GIT REPOSITORY’ checkbox), and configure the existing Git repository.
Context and port
It is important to specify the context path defined in your application, as well as the port, in order to later generate the correct paths in the microservices gateway.


Settings
It is necessary to configure the Git, Jenkins, and CaaS (in this case Rancher) credentials.
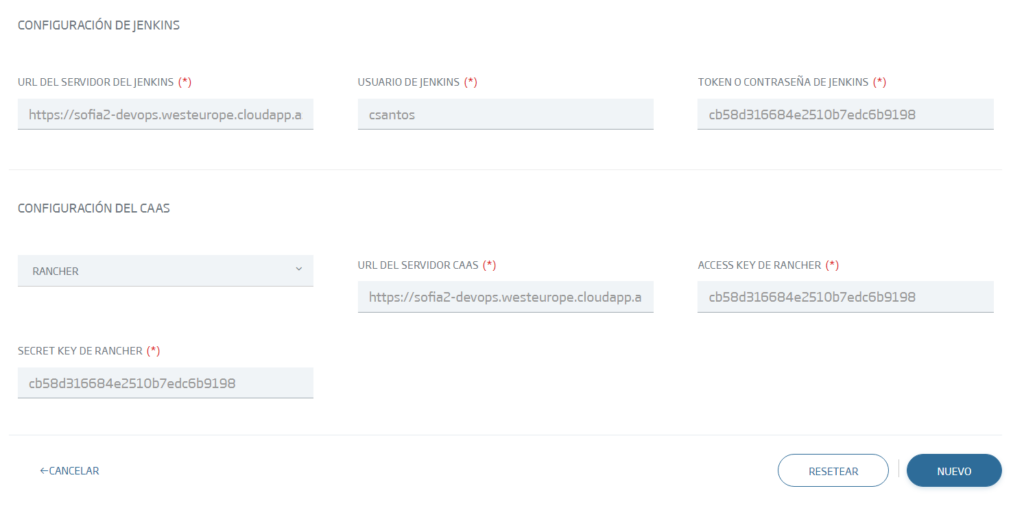
Once everything is configured, you can create the microservice. If you have selected the option to create a repository in Git, this action may take a few seconds.
As soon as the microservice appears in the list, you can see and manage your microservice from the previous list:

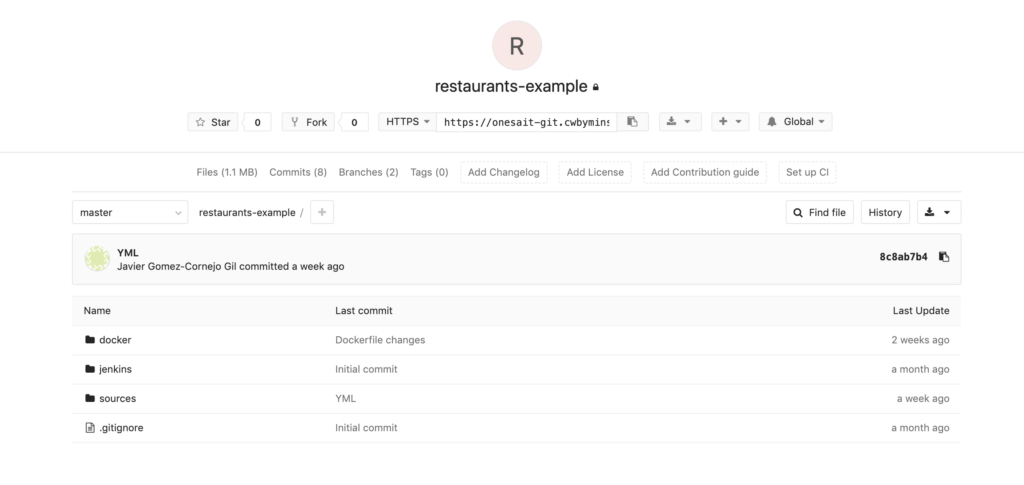
Now you can clone the repository and start working on the project.
Note: The user token for both GitLab and Jenkins must have the necessary permissions to be able to create Git projects and continuous integration pipelines.
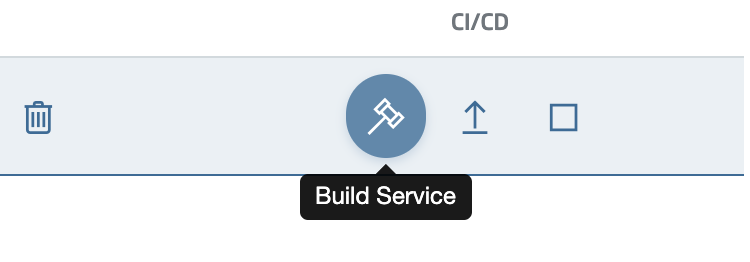
Compiling and Docker image generation
At any time, through the auto-generated pipeline in Jenkins, it will be possible for you to compile any Git branch of the repository and generate new Docker images. To do this, you just have to click on the Build service (hammer icon):
A pop-up window will then appear, asking you for the input parameters of the pipeline:
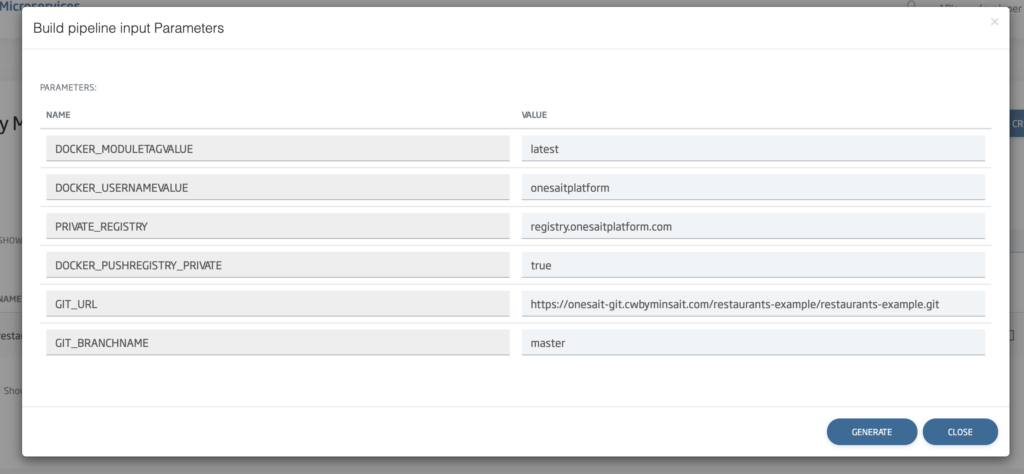
Once entered, click on the ‘Generate’ button and wait for the process to finish.

Once the process is finished, the spinner will disappear from the registry and you can proceed to deploy it.
Deployment in CaaS
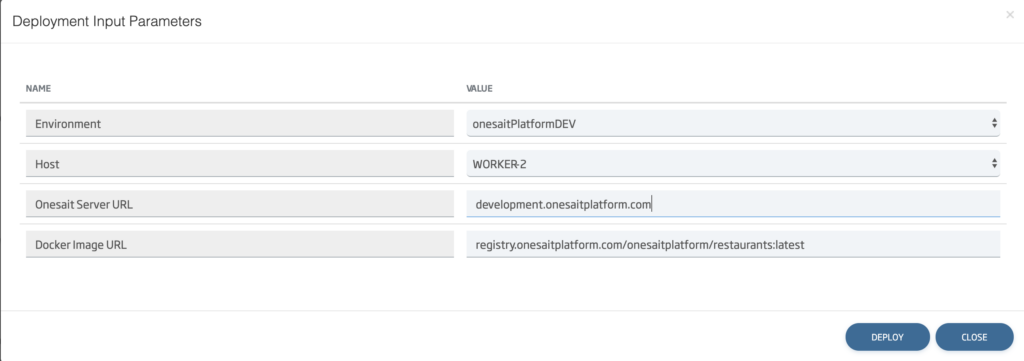
Once the images are generated, you can proceed to deploy the microservice. To do this, click on the ‘Deploy’ button (rocket icon):

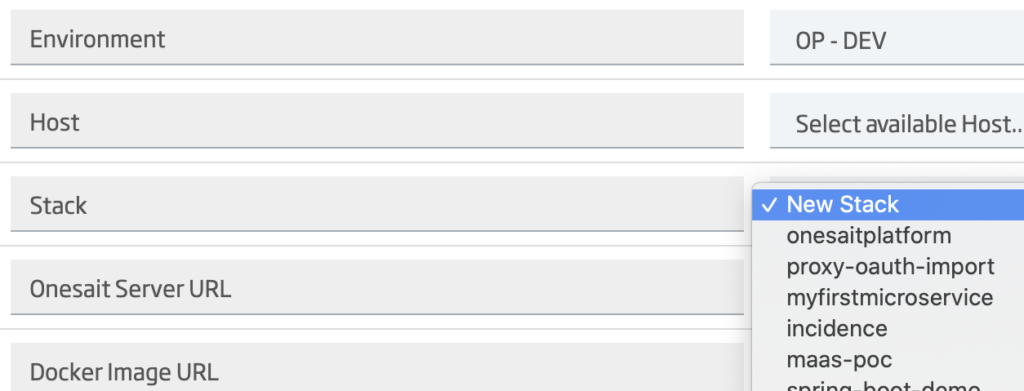
Once this is done, a pop-up window will open where you will have to select from a drop-down menu the environment and the host, as well as the DNS where said microservice will be deployed:
Besides, once the environment is selected, a drop-down menu will appear in which you can choose the stack in which to deploy the microservice. This is quite useful in case you want to group several microservices within the same Rancher 1.6 stack.
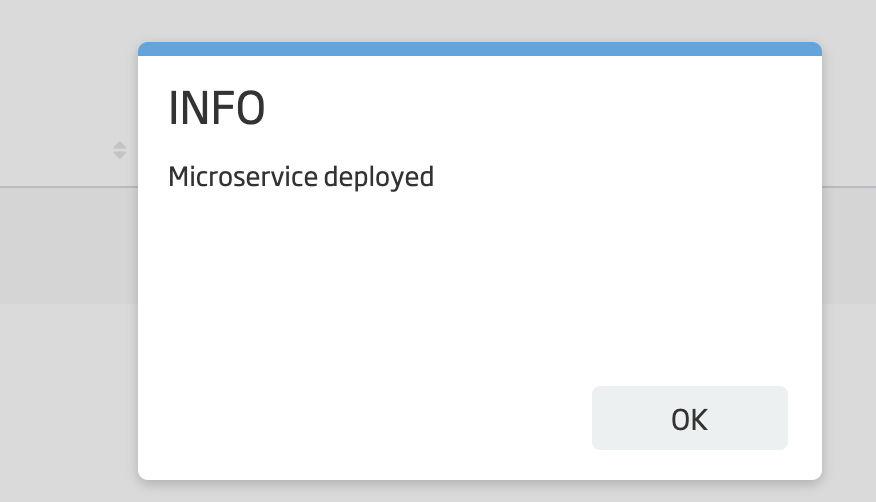
Click on Deploy, and the process will take a few seconds. When it is finished, a modal will appear informing you of it.
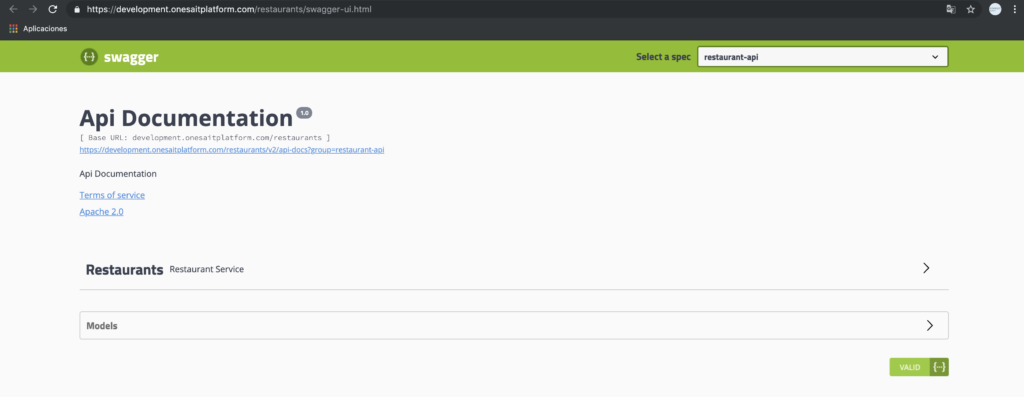
Once deployed, the microservice will be automatically made available to the outside. If it is a web application with visual components, you can navigate to the microservice through the Eye icon:
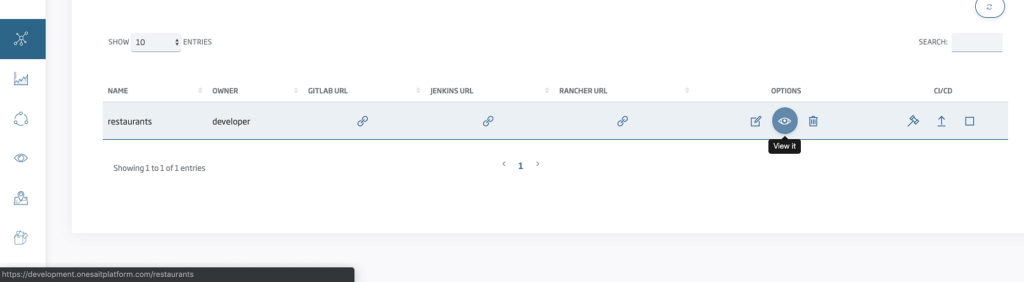
If it is a purely REST service, you can copy the generated URL (in this case https://development.onesaitplatform.com/restaurants/) and make calls from any REST client.
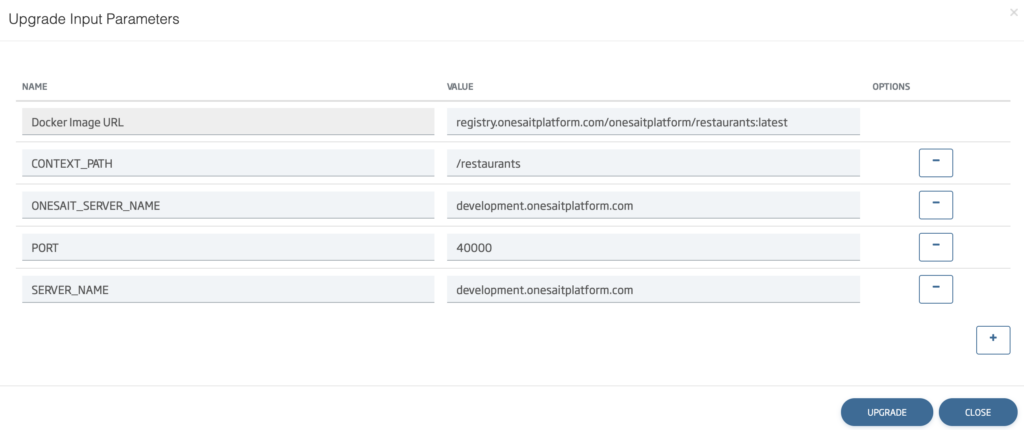
Upgrade of the deployed service
If you want to update the version of the deployed microservice, or overwrite some environment variable, you just have to click on the ‘Upgrade’ button (arrow icon).

A window similar to the one in the display will open, but in this you will be able to indicate environment variables: