Using Dashboard’s DataLink without using DataSources
Dashboards are amongst the most interesting modules in the Platform, since they allow the creation and visualization of powerful control panels operating on the information that the platform manages, which can be consumed from different types of devices and which has analytical and Data Discovery capabilities.
Each Dashboard is made up of different Gadgets that make up the dashboard with the information to be displayed, and you have the possibility of connecting these Gadgets to each other by means of the DataLink.
The connections in the DataLink tend to require that the two Gadgets to be related work on the same assigned DataSource, relating a field between those two Gadgets.
But, what if you want to send a simple data (a text string, a value, etc.)? Do you need to get it into an ontology and generate its corresponding DataSource? It is not necessary.
You can to send a topic directly to the DataLink through the function vm.sendValue(param1,param2), where:
- param1: text string with the topic that identifies the value to be sent. It would be the corresponding SOURCEFIELD value in the DataLink.
- param2: the value to be sent.

This function can be used at any time that is necessary (in a button, an event, etc.)
In every Gadgets, there is a function called vm.receiveValue that receives the information sent by vm.sendValue. It is located in the lower part of JavaScript’s synchronization and compilation window:
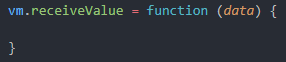
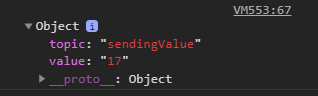
The input parameter ‘data’, corresponds to an object that has the following properties:
- topic: the text string identifying what was sent from sendValue: ‘sendingValue’.
- value: the sent value, which in this case would be ’17’.
This function is executed every time a parameter is sent from the DataLink.
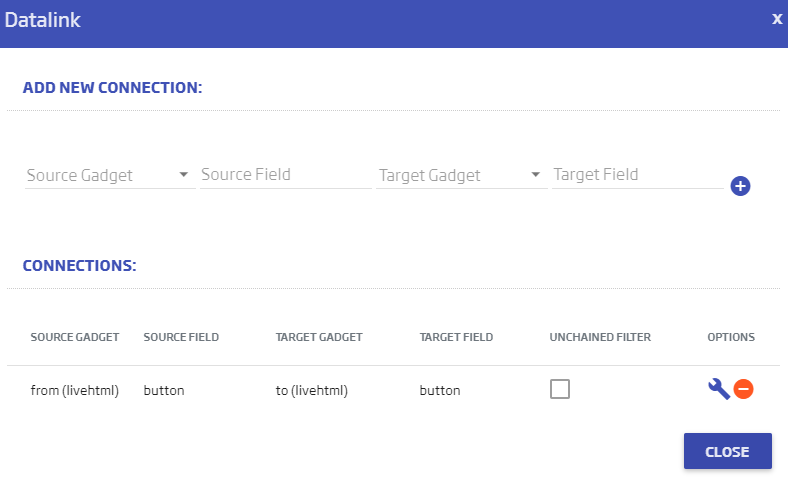
Finally, after configuring the starting Gadget and the receiving Gadget, you need to configure the DataLink:

- Source Gadget: the Gadget from which the value that is sent comes out.
- Source Field: the topic of the value to be sent (‘sendingValue’).
- Target Gadget: the Gadget to which the value is sent.
- Target Field: the topic of the sent value; it must be the same (‘sendingValue’).
Once this is done, the sending of values starts working directly.
If you are interested in messing with the code to see how it works, go to the Dashboard created for this example and clone it.