New centralised configuration component for the BPM Engine
In this version 6.2.0-Xenon of Onesait Platform we have included a new component that will allow to obtain a centralised configuration of the Platform from BPM, so that this information can be used in other BPM tasks.
Operation
To use this new functionality, we will have to access the editing view of our BPM and create a new Task, to which we will indicate the ‘Onesait Platform Centralized Config’ template:
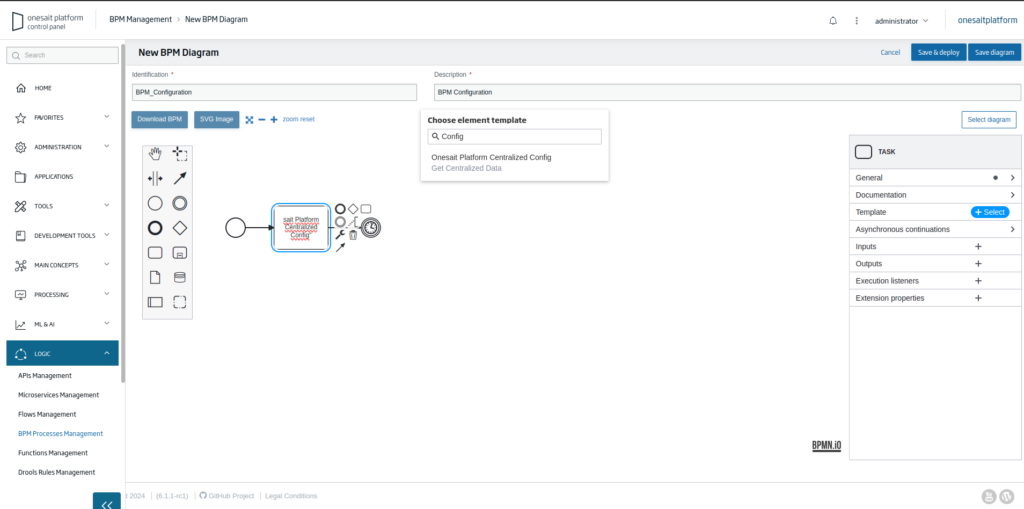
The next step is to configure the task, specifying the following properties:
- Timeout: the time in milliseconds before launching a Timeout.
- Platform Environment: here you will have to indicate the URL of the environment from which you want to obtain the centralised configuration.
- X-OP-APIKey: the X-OP-APIKey of the environment from which the configuration is to be obtained must be added.
- Configuration Identification: the configuration identifier must be indicated.

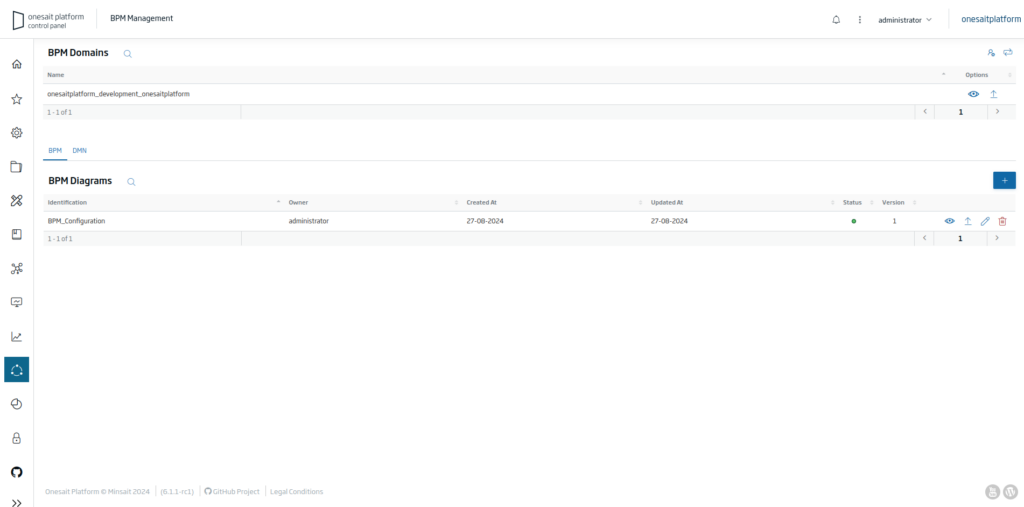
After configuring the task, as well as the rest of the BPM, just save the changes and deploy the model by clicking on the ‘New BPM Deployment’ button:

The BPM Engine is then accessed by clicking on the eye button in the BPM Domains area:
Once inside the BPM Engine, click on the house icon (top right) and then on ‘Tasklist’:
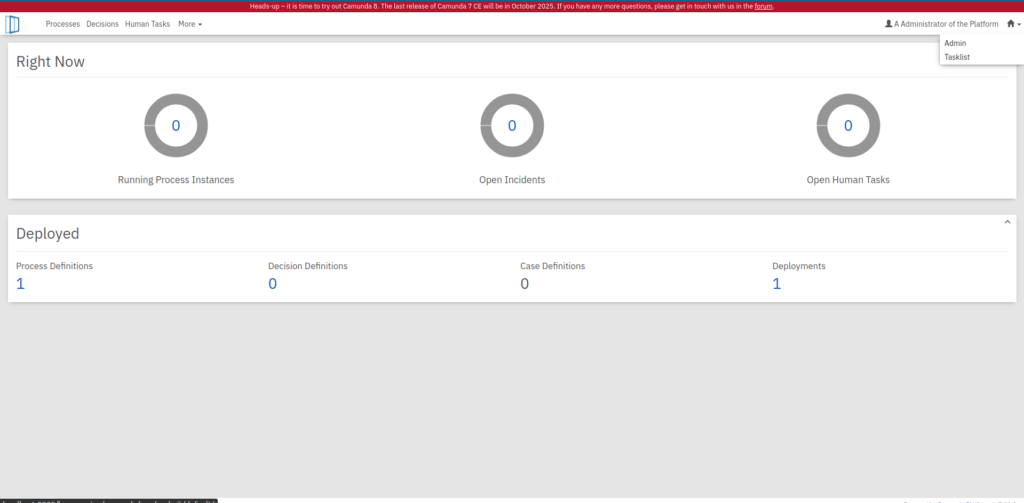
After this, click on ‘Start Process’ on the process assigned to the BPM:

After executing the process, we will be able to see the centralised configuration by clicking on the ‘House icon > Cockpit > Running Process Instances’ and, finally, on the BPM Key.
In the following window you can see the BPM variables, where the configuration selected in the task will be, which can be used to obtain information and use it in other tasks.

Example of use
With the following example we will show how to use the data received from the task. To start with, the following configuration will be used:
{
  "valorString": "String1",
  "valorNumber": 12345,
  "valorBool": false,
  "valorObj": {
    "valor1": "HolaMundo",
    "valor2": 987,
    "valor3": true
  },
  "valorString2": [
    {
      "valorArray1": "array1",
      "valorArray2": "array2"
    },
    {
      "valorArray3": "array3",
      "valorArray4": "array4",
      "valorArray5": {
        "valorObjectArray": "valor5",
        "valorObjectArray2": "valor6",
        "valorObjectArray3": [
          {
            "valorRecondito": "recondito",
            "valorRecondito2": "recondito2"
          }
        ]
      }
    }
  ]
}
The data can be retrieved from a Script Task or from the ‘Outputs’ field.
In the case of retrieving values from a Script Task, the following properties shall be indicated:
- Type: the ‘Inline script’ must be selected.
- Script: the script necessary to obtain the desired value shall be written.
- Result variable: the name of the variable with the data obtained from the script.

In the case of wanting to recover the values from the ‘Outputs’ field, these other options will be introduced:
- Process variable name: name of the variable with the data obtained.
- Assignment type: the type of data to be obtained; ‘String’ should be selected.
- Value: the code used to obtain the data.

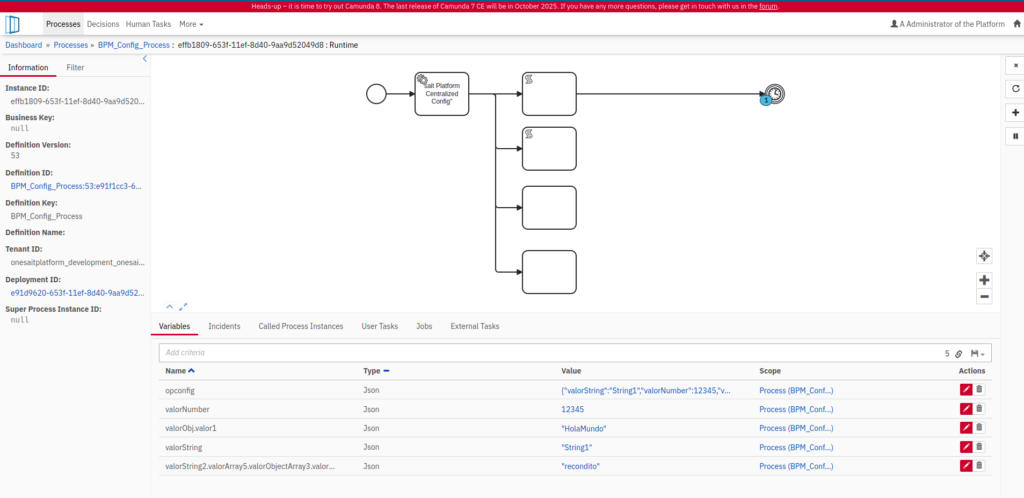
The values obtained in this example would be as follows:
- valorString: ${opconfig.prop(“valorString”)}
- valorNumber: ${opconfig.prop(“valorNumber”)}
- valorObj.valor1: ${opconfig.prop(“valorObj”).prop(“valor1”)}
- valorString2.valorArray5.valorObjectArray3.valorRecondito: ${opconfig.prop(“valorString2”).elements()[1].prop(“valorArray5”).prop(“valorObjectArray3”).elements()[0].prop(“valorRecondito”)}
In the following image we see, from Camunda, how the variables arrive with the data we wanted to obtain:
Header Image: lee attwood at Unsplash.


