Continuous deployment with OpenShift
In today’s post, we want to show you an example of the minimum actions necessary to automate a deployment in an OpenShift cluster.
Before we start
As prerequisites before getting to the subject, we will need to have the following:
- A user with permissions to make changes to the OpenShift namespace.
- Access via web console or via terminal.
- The initial installation and configuration of the Product or Project which we want to automate (deployments, pod, etc.) has been already carried out.
OpenShift previous configuration
In order to carry out continuous deployment in OpenShift, it is necessary to obtain the «.kubeconfig», file, which contains the necessary information on permissions and access to be able to operate on the chosen namespace.
Next we detail a way to create a specific «ServiceAccount» to obtain the «.kubeconfig» that allows us to deploy automatically.
Creating a ServiceAccount
This we can achieve in any of two ways.
Via web console
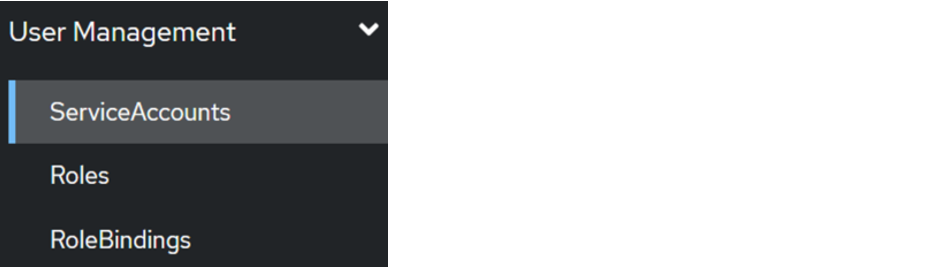
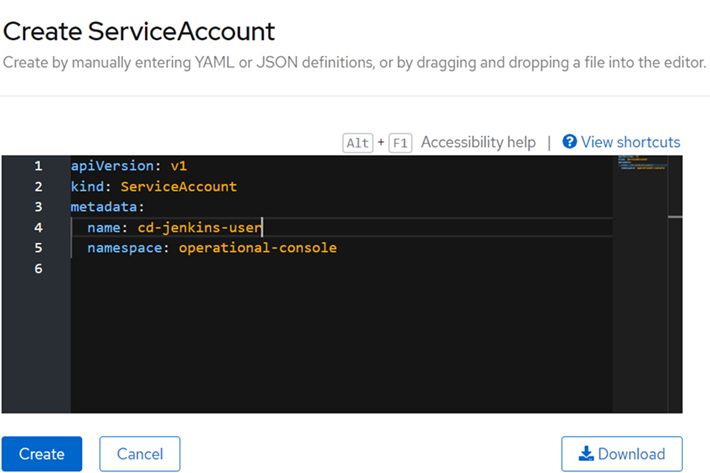
On the side, we select the User Management > ServiceAccount menu.
We click where it says «Create ServiceAccount» and complete the information as follows:
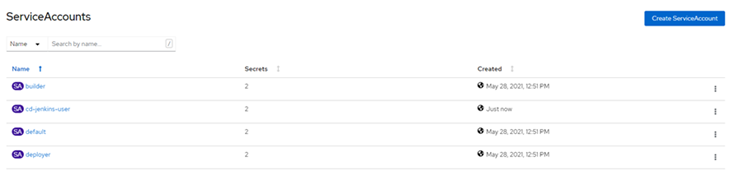
If everything went well, we can see that it has been correctlycreated and it will appear in the initial list:
Via the OpenShift terminal
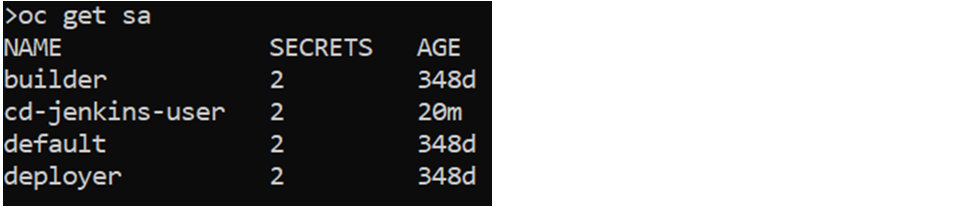
By running the following command:
oc create sa cd-jenkins-user
If we list it, we can see that it has been created correctly:
Creation of a specific Role
In order to control which operations can be carried out, or on which of the existing resources a role can make modifications, it is interesting to create a specific type of role that is limited, so that unwanted actions are not carried out.
This, as in the previous case, we can do it in two possible ways.
Via web console
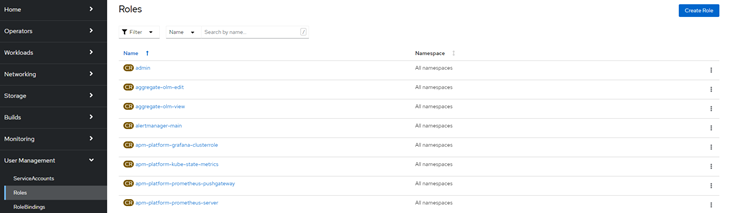
To do this, we go back to the side menu, select the User Management > Roles menu, and click on «Create Role».
We fill in the yaml with the data of the options allowed on the resources that we consider convenient. An example could be:
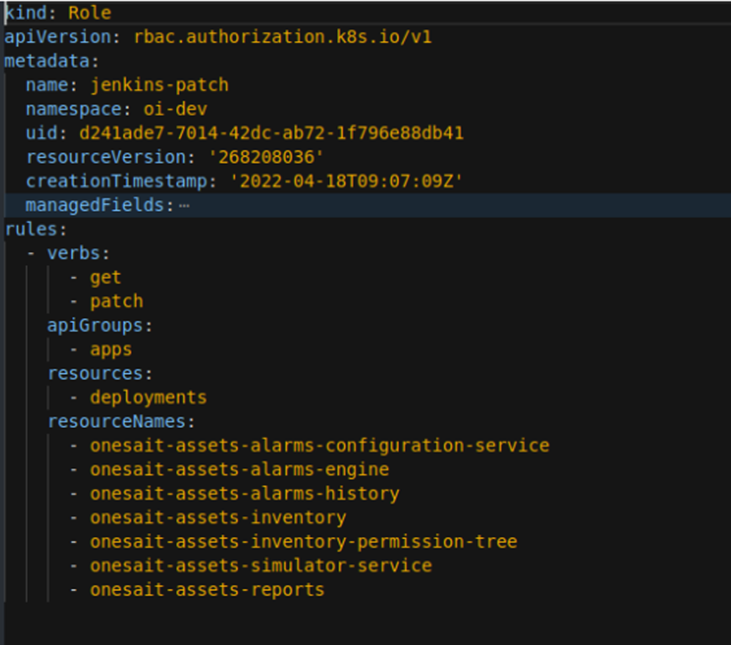
This yaml indicates that you will only be able to perform «get or patch» actions for the apps group. These modifications are only allowed in the deployments and only those listed in «resourceNames».
Via the OpenShift terminal
In this case, we will run the following command with the necessary values:
oc create role deploy-cd --verb=get --verb=patch --resource=deployments -n 
Associate Role to ServiceAccount
In this step, we associate the role that we want our ServiceAccount to have. We could associate any existing role to it, but for this tutorial, we are going to use the role we created in the previous step.
Via web console
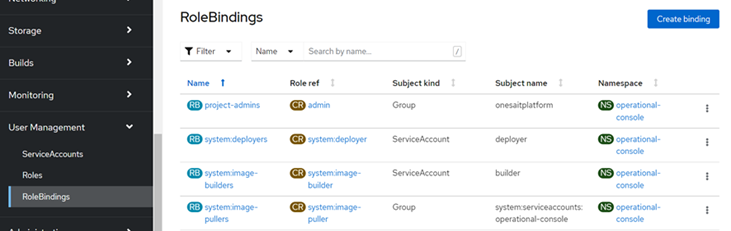
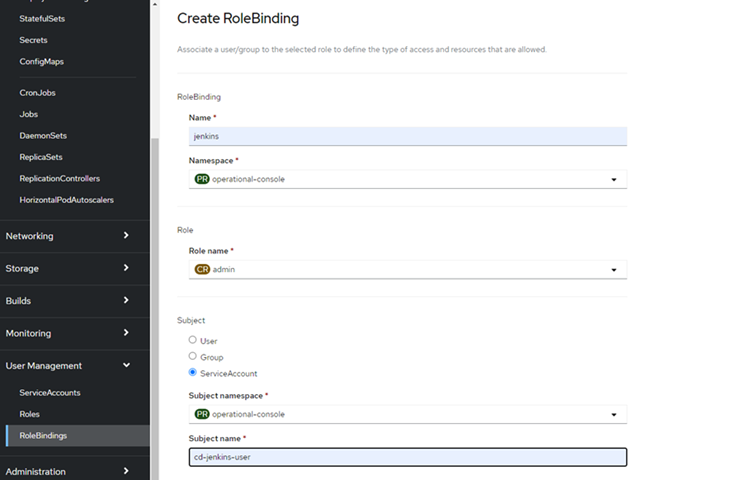
We browse to the User Management > RoleBindings menu option and click on «Create Binding».
We will fill in the form as follows, selecting the ServiceAccount that we have previously created:
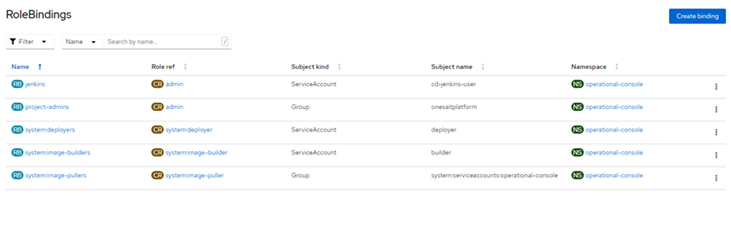
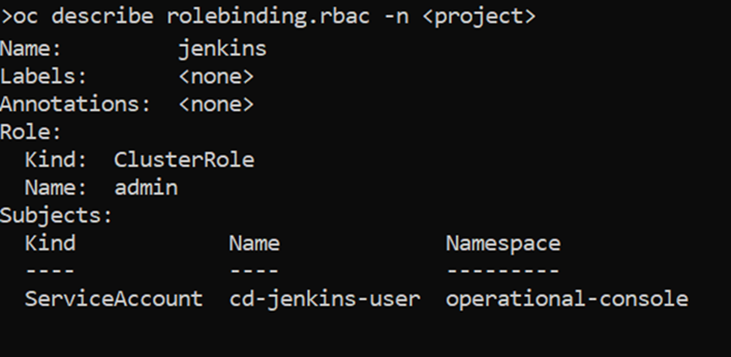
Once created, we can see it in the list.
Via the OpenShift terminal
We will use the following command:
oc policy add-role-to-user admin -z cd-jenkins-user --rolebinding-name=jenkins
Once this is done, we can list it to see that it has been created correctly.
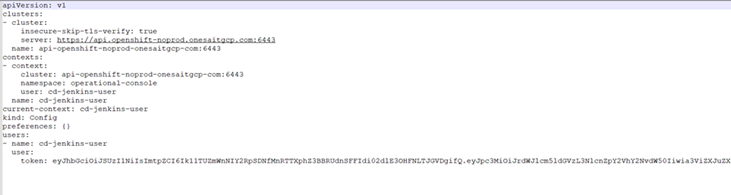
Generate the .kubeconfig file from a ServiceAccount
Now our next step is generating the ServiceAccount .kubeconfig file, which we will later add to the repository of our code that we want to automate.
In the previous steps, we have created a specific ServiceAccount by associating a role to it. These steps are optional since, if we already have a ServiceAccount, it would not be necessary to generate a new one.
Via web console
We browse within the details of the generated ServiceAccount, displaying the «Actions» menu on the right side and selecting «Download kubeconfig file».

Via the OpenShift terminal
To generate it, we will run the following command:
oc serviceaccounts create-kubeconfig cd-jenkins-user > kubeconfig-operational.kubeconfig
Remember that «cd-jenkins-user» is the name of the ServiceAccount that we generated earlier. This generates a file called «kubeconfig-operational.kubeconfig» (we can give it the name we want).

Actions to perform within the project to automate the deployment
Well, now we have everything ready, so next, we are going to carry out a series of actions within our project that allow us to carry out the deployment automation.
Modify the podTemplate.yml file
If we do not have it, we will have to create it. Once located or created, we open it and add the following:
- name: kubectl
   image: lachlanevenson/k8s-kubectl:latest
   command:
      - cat
   tty: true
Modify the JenkinsFile
Where we will have to add the following:
- A variable «def DEPLOYMENT_NAME = “», which will contain the name of the deployment that we want to use for continuous deployment.
- Add the following stage, according to the criteria of the project:
stage('Deploy Application'){
  steps{
    container('kubectl'){
      script {
        datevar = sh(returnStdout: true, script: 'date +%s').trim()
      }
      dir("devops") {
        sh "kubectl patch deploy '${DEPLOYMENT_NAME}' -p '{\"spec\":{\"template\":{\"metadata\":{\"labels\":{\"deployDate\":\"${datevar}\"}}}}}' --kubeconfig=kubeconfig"
      }
    }
  }
}
Incorporate the .kubeconfig file generated in the directory at the discretion of the project
The above script references the «devops» directory.
Result
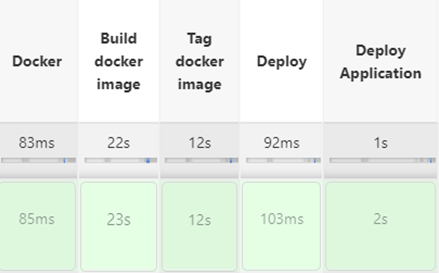
Once the previous steps have been carried out, depending on the configurations of each project, we can see in Jenkins that a Deploy Application step is carried out (the stage that we have added):
We can see the deployment logs:

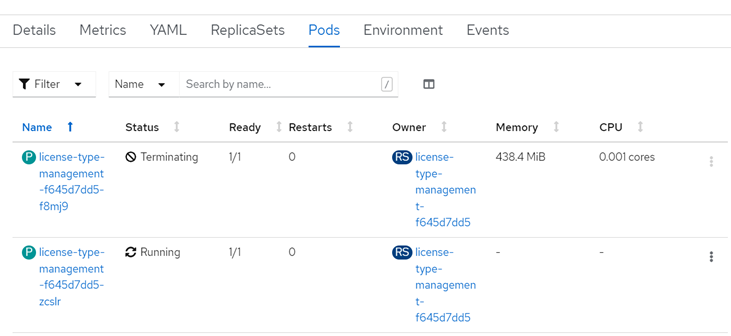
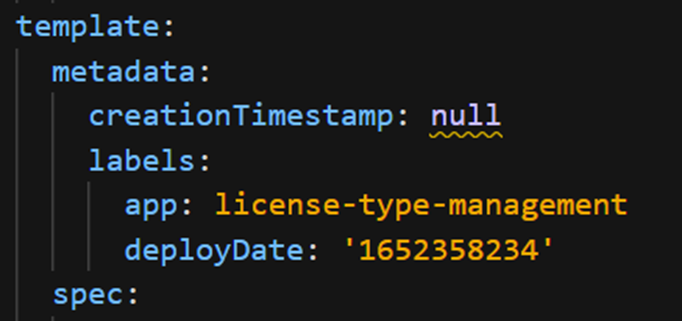
Now, we can enter the OpenShift console and check that the .yaml has been updated in the deployment with the field «deployDate»:
We will also check that the deployment has taken place: