Notebook Orchestration from the Streaming Engine: Image Processing with Onesait Platform
In the Onesait Platform, you have the possibility of orchestrating the execution of notebooks (or even individual paragraphs of them).
With this feature, you can orchestrate processes based on Notebooks and even parallelize them by distributing the workload. You can pass dynamic parameters to these Notebooks, where you can include fixed or flow-generated information on any language used in the Notebooks, and start their execution later.
Same as in the input parameters, the generated data’s output is possible in one or in several paragraphs of a Notebook, including information generated by an analytical process within the flow, and then make decisions based on it.
This tutorial will show how you can do image processing in Notebooks with Python PIL. You will also orchestrate it and make it available as an API from the flow engine. Lastly, you will make a dashboard to launch the process and view the result.
To do this, you will use the following components of the Onesait Platform:
- Notebooks: You will create several notebooks using the PIL image processing library for Python.
- Flow Engine: You will orchestrate the calls to the different Notebooks to be able to process an input image, generate a histogram and apply several filters (Blur, grayscale and combination of both). You will also publish an API that will manage the launch of the image processing.
- Binary Files: You will store both the starting image and the processing results.
- Ontologies: This will store the results of the process, saving the generated images’s IDs, as well as a histogram of the starting image.
- Dashboards: You will create a Dashboard that will allow you to upload an image to the Binary Files and will launch its processing. At the end, you will be able to see the result, showing the images and histogram.
NOTEBOOKS
Let’s start by creating the notebooks that will process the images. You will create the following four Notebooks:
ImageBlur
This Notebook will be in charge of applying a blur filter to an input image. You will create five paragraphs:
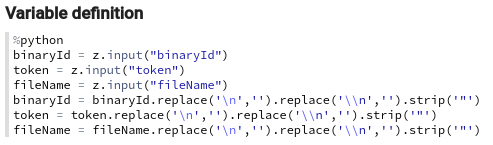
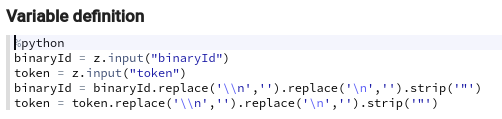
- Variable definition: the entries will be:
- binaryID: input file identifier.
- Token: user’s Oauth token.
- fileName: output file name.
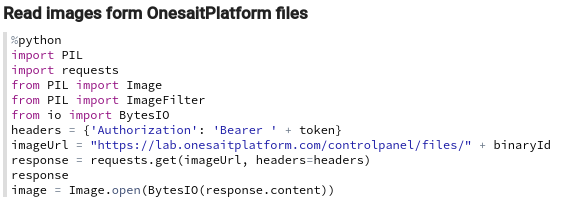
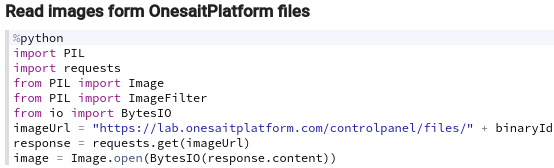
- Reading the image from Binary Files.
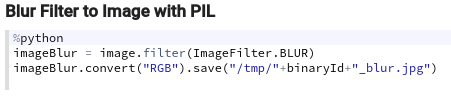
- Apply blur filter.
- Save the filter result in Binary Files.
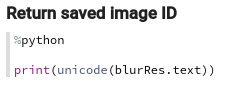
- Return the ID of the newly-generated image.

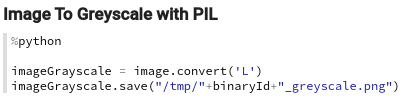
ImgRGBToGreyscale
This Notebook will be in charge of applying a grayscale filter to an input image. It will have five paragraphs like the previous one, changing only the third and fourth paragraph to indicate the new filter and file format:

ImageHistogram
This Notebook will generate a histogram from the input image and is made of three paragraphs:
- Variable definition: the entries will be:
- binaryID: input file identifier.
- Token: user’s Oauth token.
- Reading the image from Binary Files
- Generating the histogram.
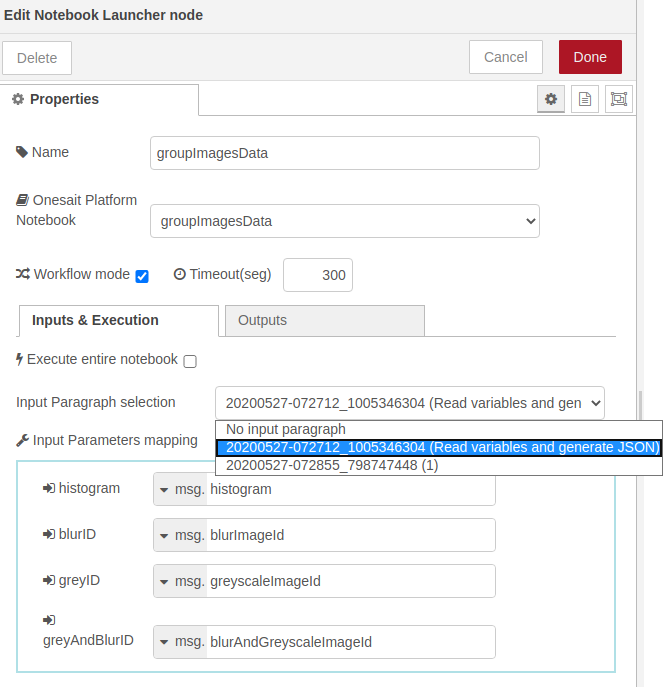
GroupImagesData
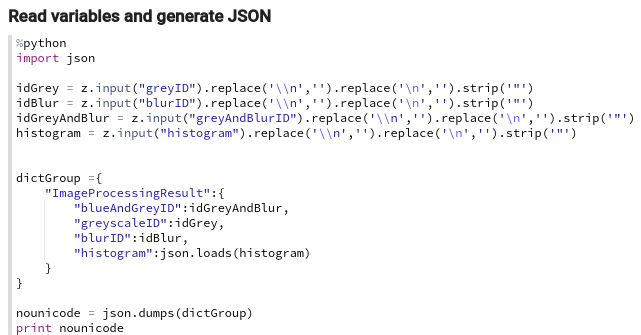
The last Notebook will be in charge of grouping the information generated by the three previous ones, then creating an ontology instance with them so that the generated data can be inserted into the target ontology. It consists of one single paragraph where the input parameters will be read:
- greyID: ID of the file in Binary Files that contains the grayscale image.
- blurID: ID of the file in Binary Files that contains the image with the blur filter.
- greyAndBlurID: ID of the file in Binary Files that contains the image to which both filters have been applied.
- histogram: history of the source image.
ONTOLOGIES
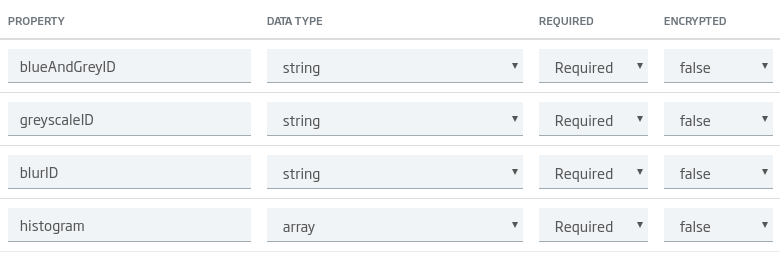
To store the result of the image processing, you will create an ontology with the following structure:
FLOW ENGINE
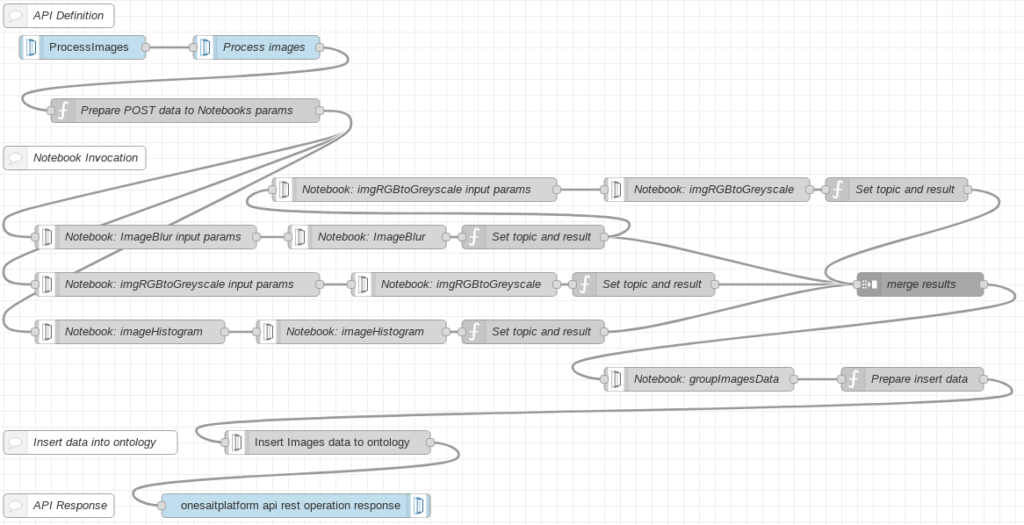
You will divide the flow to be created in three stages: API creation, Notebook orchestration and insertion of the result in the ontology.
API Creation
To create an API, you will use at least three nodes.
- OnesaitPlatform REST API: this node represents the API to be created. The mandatory fields to be filled are the name, description, category and whether you want it to be public or not:

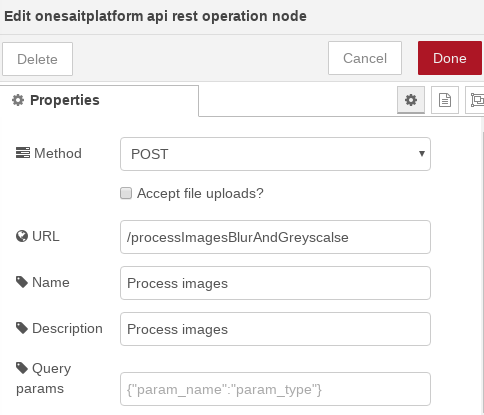
- OnesaitPlatform REST API Operation: this node represents an operation inside the API. The parameters to fill in are:
- Method: operation method: either POST, GET, PUT or DELETE.
- Accepts file uploads?: check that specifies whether you want to accept file uploads or not (only available for POST method).
- URL: operation path.
- Name: name you give to the operation.
- Description: its description.
- Query params: if it is necessary to define query params, a JSON with the format {“param_name”:”param_type”} is accepted.
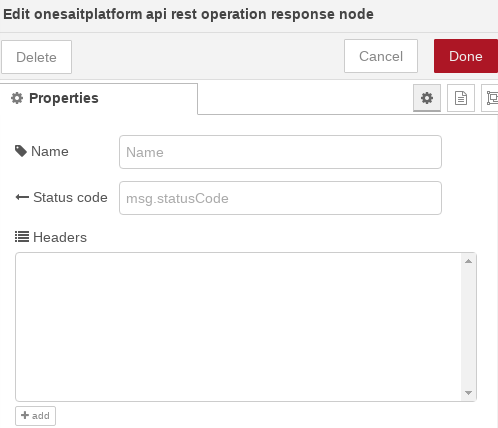
- OnesaitPlatform REST API Operation: this node must be at the end of each flow that is triggered from an API operation. It is in charge of returning the result to the invocation of such operation. It specifies the return code that you want to return, or «msg.statusCode» by default:
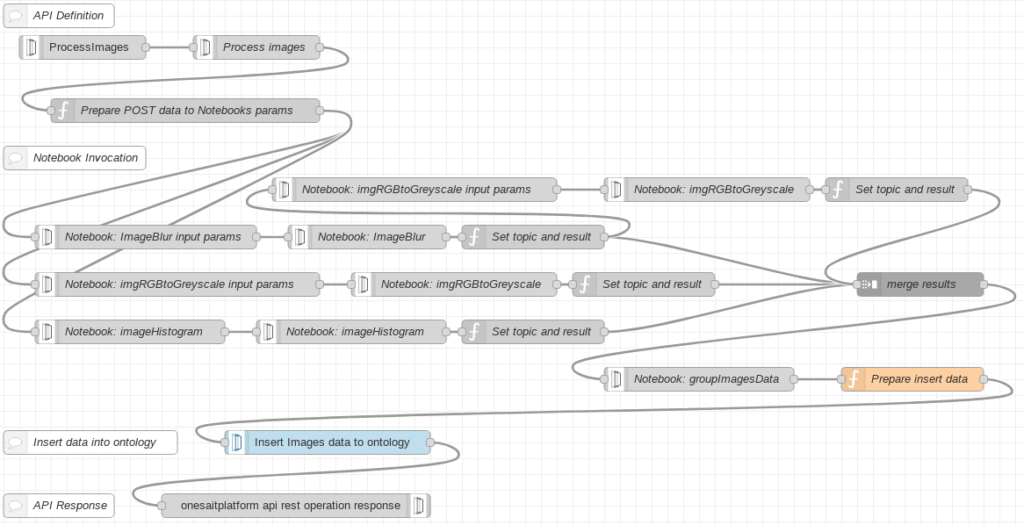
Notebook orchestration
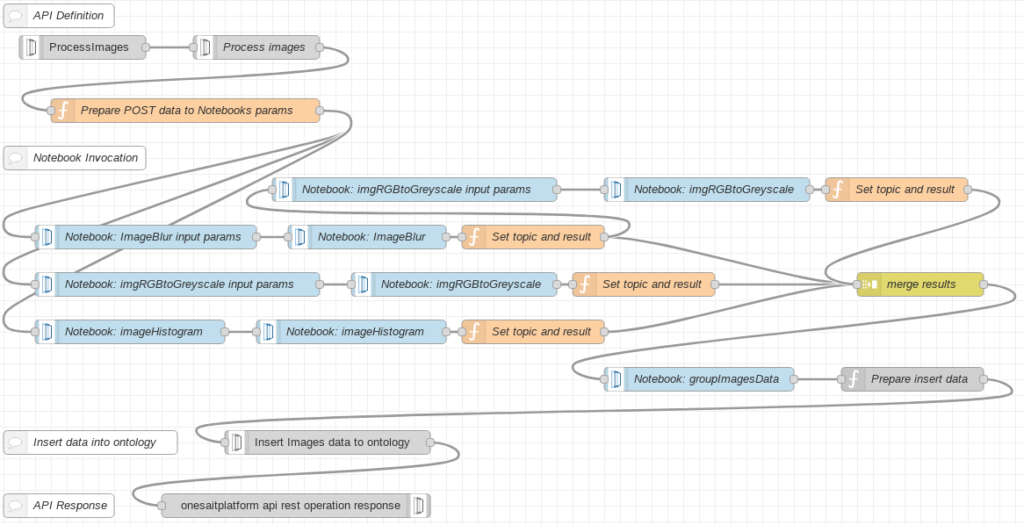
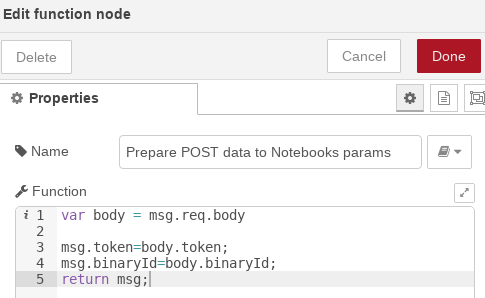
Before starting with the invocation of the different Notebooks, let’s prepare the input data that comes to us from the created API’s POST operation. The «body» of the REST request must give the ID of the image to be processed and the token:
From this «function» node, you will link the execution of the three Notebooks in parallel. Each invocation of the Notebook will be done in three stages: Preparation of parameters, execution of the complete Notebook and preparation of results.
Histogram execution

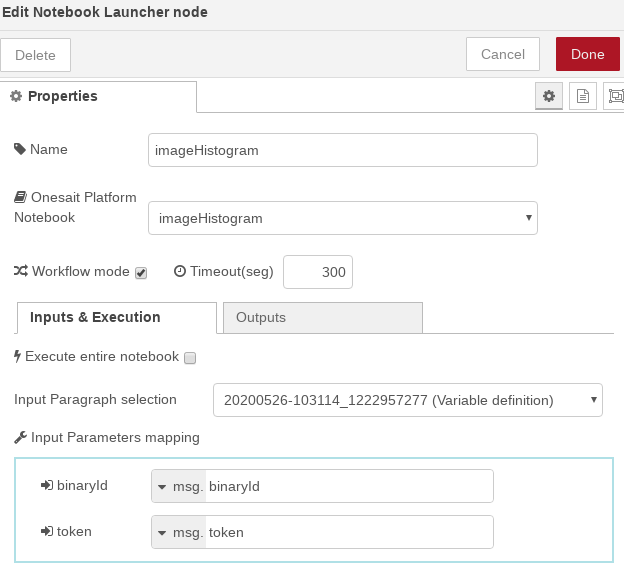
- Preparation of parameters: You will use a Notebook invocation node in paragraph mode, selecting the first one of them (Variable definition). When changing the paragraph selection, the Notebook inputs will appear. In the preceding «function» step, you already prepared the image id and token in the incoming «msg». The output tab is disabled, since you are executing only one paragraph:
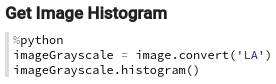
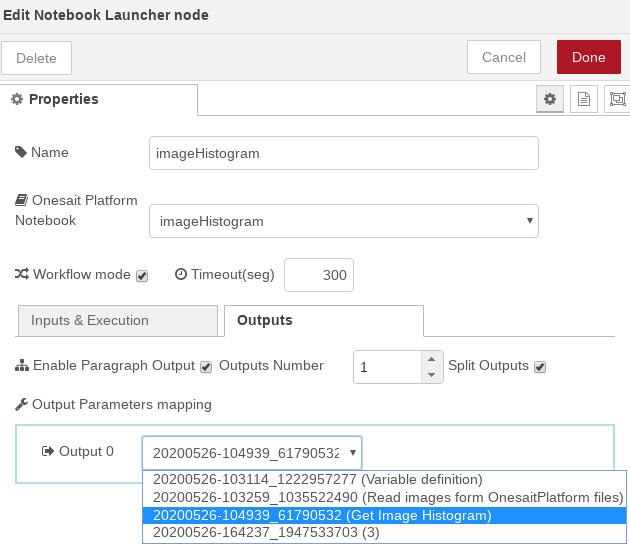
- Execution of the complete Notebook: once the input parameters are defined, in order to generate the histogram, you will invoke the entire Notebook by checking «Execute entire notebook». By doing this, the input options disappear and you are allowed to select the outputs. In this case, you are only interested in the output of paragraph #3 (Get Image Histogram).
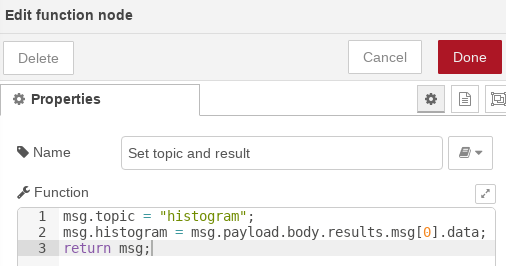
- Preparation of results: finally, you will obtain the result of that paragraph and pass it to a variable of the message for convenience. You must also write down the message as belonging to the topic «histogram»:
Execution of the grayscale filter

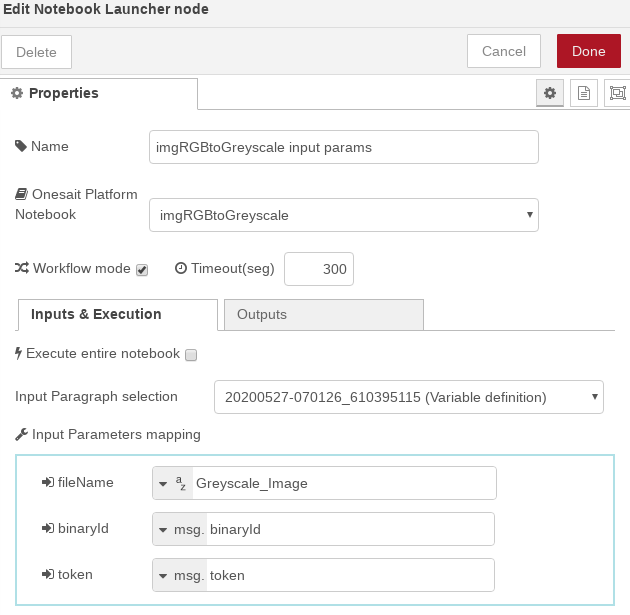
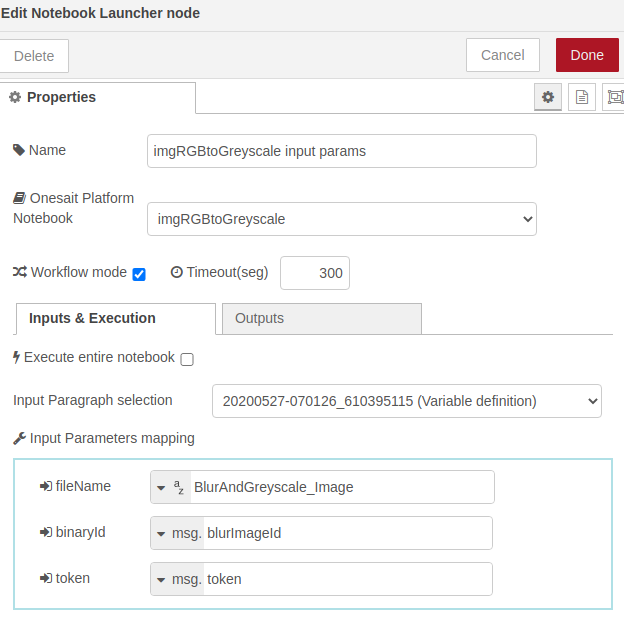
- Preparation of parameters: You will use a Notebook invocation node in paragraph mode, selecting the first one (Variable definition). When changing the paragraph selection, the Notebook inputs will appear. In the preceding step «function» you already prepared the image id and token in the incoming «msg». The name of the resulting image will be put within reach as a String:
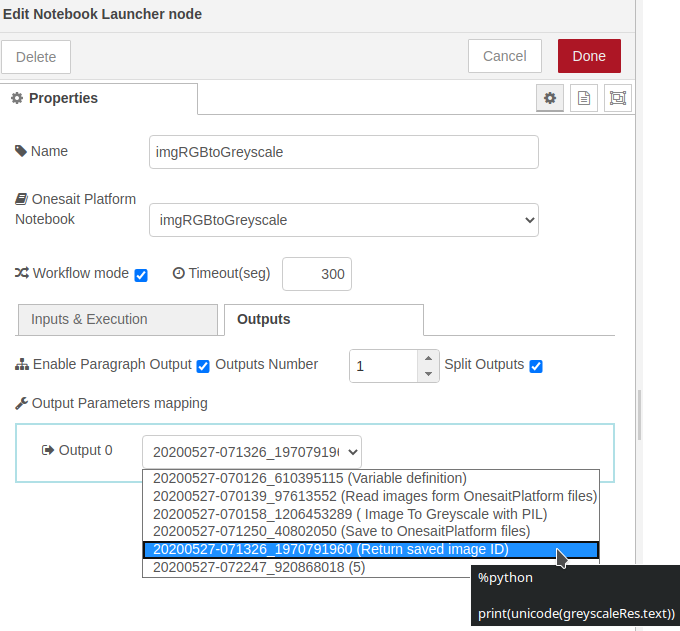
- Execution of the complete Notebook: once the input parameters are defined, in order to generate the grayscale image, you will invoke the entire Notebook by checking «Execute entire notebook». By doing this, the input options disappear and you are allowed to select the outputs. In this case, you are only interested in the output of paragraph #5 (Return saved image ID).
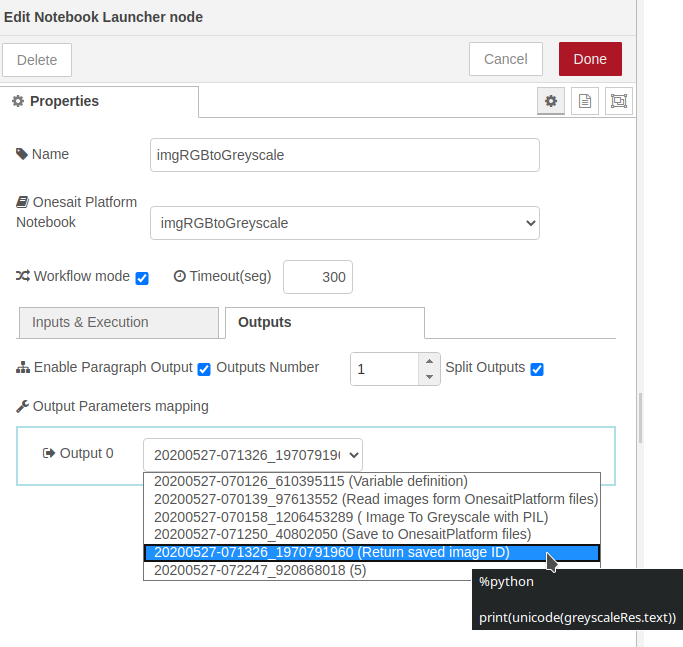
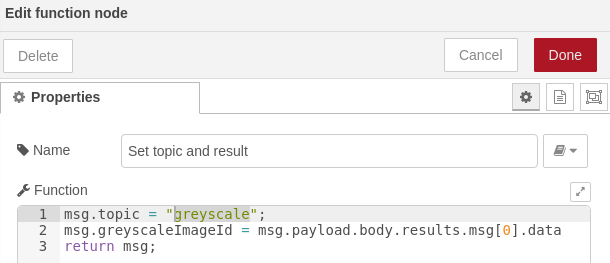
- Preparation of results: Finally, you will obtain the result of that paragraph and pass it to a variable of the message for convenience. You must also write down the message as belonging to the «greyscale» topic:
Execution of the blur filter

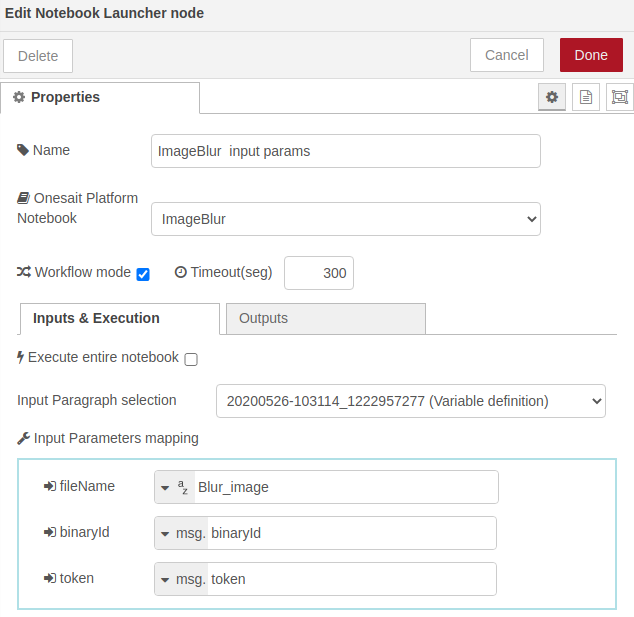
- Preparation of parameters: You will use a Notebook invocation node in paragraph mode, selecting the first one (Variable definition). When changing the paragraph selection, the Notebook inputs will appear. In the preceding step «function», you had already prepared the image id and token in the incoming «msg». The name of the resulting image will be put within reach as a String:
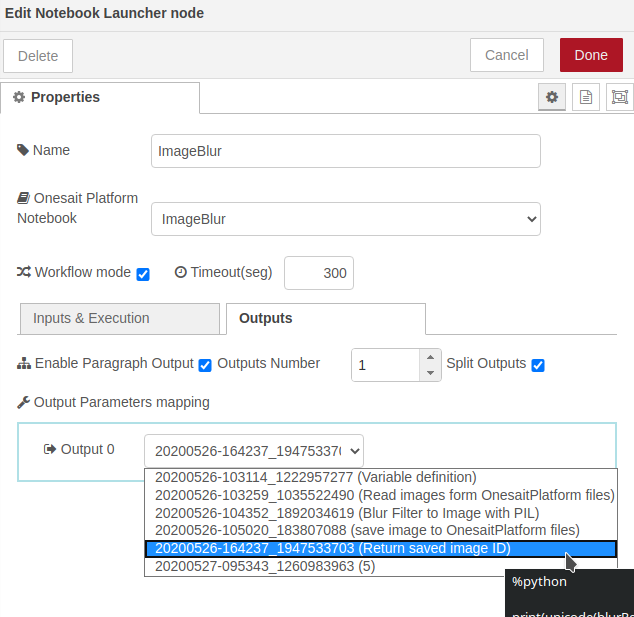
- Execution of the complete Notebook: once the input parameters are defined, in order to generate the unfocused image, you will invoke the entire Notebook by checking «Execute entire Notebook». By doing this, the input options disappear and you are allowed to select the outputs. In this case, you are only interested in the output of paragraph #5 (Return saved image ID).
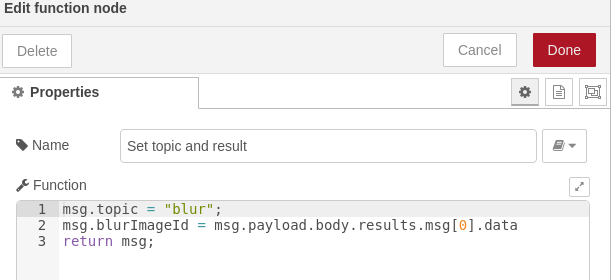
- Preparation of results: Finally you will obtain the result of that paragraph and pass it to a variable of the message for convenience. You must also write down the message as belonging to the «blur» topic:
Execution of the grayscale filter on an unfocused image

- Preparation of parameters: You will use a Notebook invocation node in paragraph mode, selecting the first one (Variable definition). When changing the paragraph selection, the Notebook inputs will appear. In the preceding «function» step, you already prepared the image id (it will be the image with blur filter) and the token in the incoming «msg». The name of the resulting image will be put within reach as a String:
- Execution of the complete Notebook: once the input parameters are defined, in order to generate the grayscale image with blur, you will invoke the entire Notebook by checking «Execute entire notebook». By doing this, the input options disappear and you are allowed to select the outputs. In this case, you are only interested in the output of paragraph #5 (Return saved image ID).
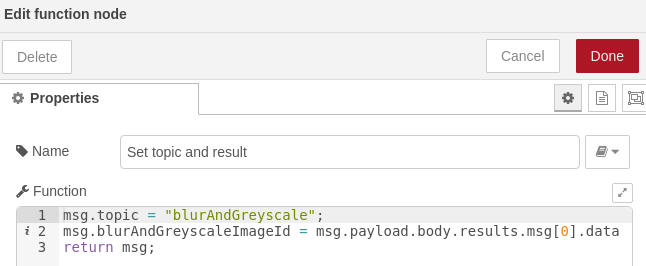
- Preparation of results: Finally you will obtain the result of that paragraph and pass it to a variable of the message for convenience. You must also write down the message as belonging to the “blurAndGreyscale” topic:
Unification of results and generation of ontology instance
This node will unify the four previous messages (blur, greyscale, blurAndGreyscale and histogram) into a single message, separating the properties by the topics of each message.
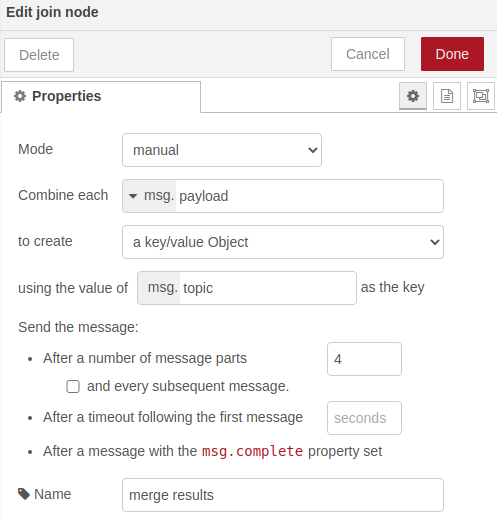
Once the messages are combined in one, you will invoke the paragraph that will generate the ontology instance to be inserted with all the image processing data:
Insertion of the result in the ontology
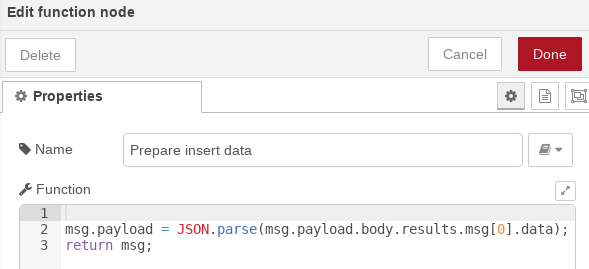
First, get the ontology instance generated by the last Notebook call. The «function» node prepares the necessary msg.payload for the insertion of data in the target ontology:
In the «onesaitplatform-insert» node, specify the target ontology:
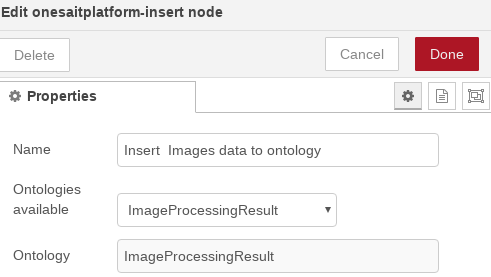
The result of the insertion (ID) will be returned for the call to the API operation.
DASHBOARD
Furthermore, since you have created all this as a REST API, you can use it on demand, for example in one of the Dashboards in the Platform:
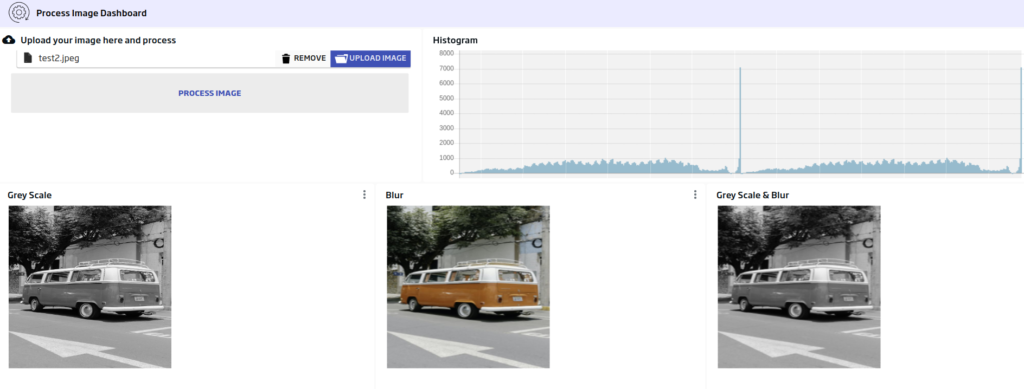
In this Dashboard, you can combine the image upload functionality, as well as the execution of the API that filters the uploaded image.