Data labeling from the Onesait Platform
When working with machines, artificial intelligence or learning projects, it is necessary to carry out a labeling as correct as possible, since, as they say, the result of the trained models is only as good as the data we use to train them. Therefore, this work of data aggregation and labeling is very important.
There are many Open Source solutions on the market to carry out labeling, such as LabelMe, YoLo Label, and others. However, these solutions often involve cloning the project repository, installing required environments (such as Anaconda for LabelMe) and so on.
To skip this middle step when working with our image datasets, we have integrated a new tool into the Onesait Platform: Data Labeling Tool.

Data Labeling Tool
With this new tool, we can carry out all the labeling of our project in the Platform’s own environment.
As a practical example, we are going to see how to create a project with the Data Labeling Tool to generate labeled data from a video, in which we will label the expressions that appear and whose data we can use, for example, for a facial recognition or sentiment recognition project.
Let’s see how to carry it out and what result we get.
Creating the project and loading data
First of all, access the Platform with a user who has an ANALYTICS- or ADMINISTRATOR-type role.
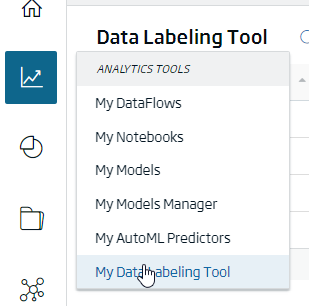
Once inside, open the «Analytics Tools» menu, and select the «My Data Labeling Tool» option.
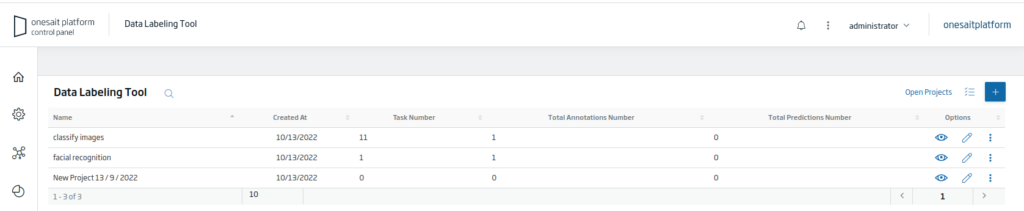
This screen will show a list with the existing projects.
Click on the «+» icon to create a new project.

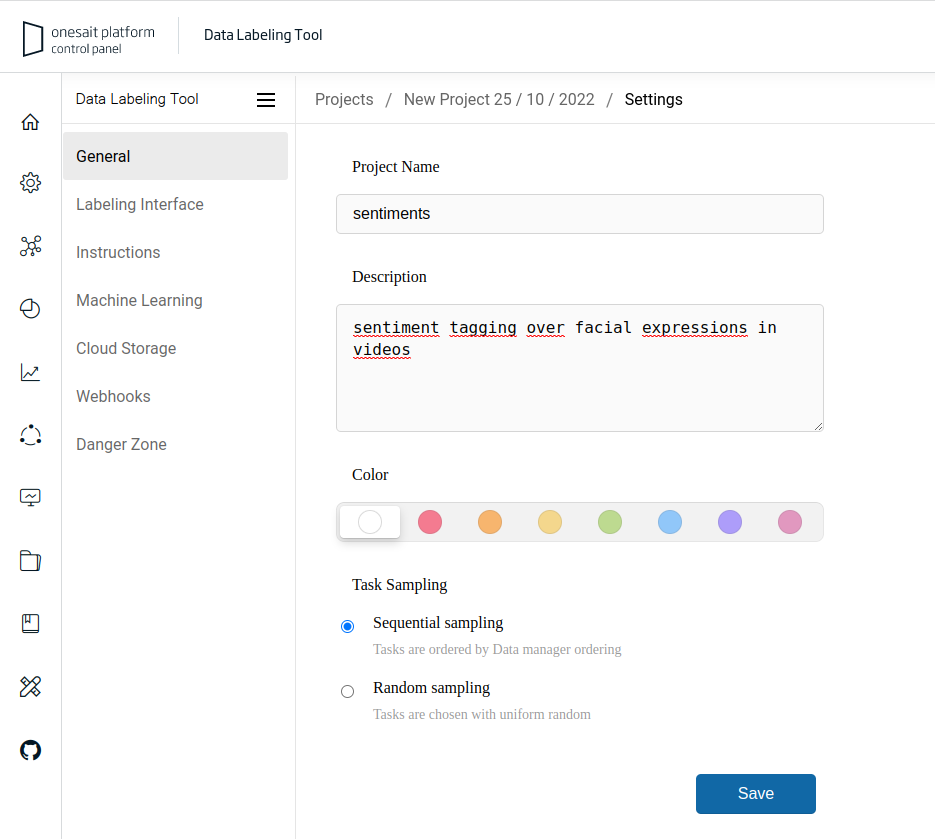
The first thing you have to do is assign a name and a description to your project.
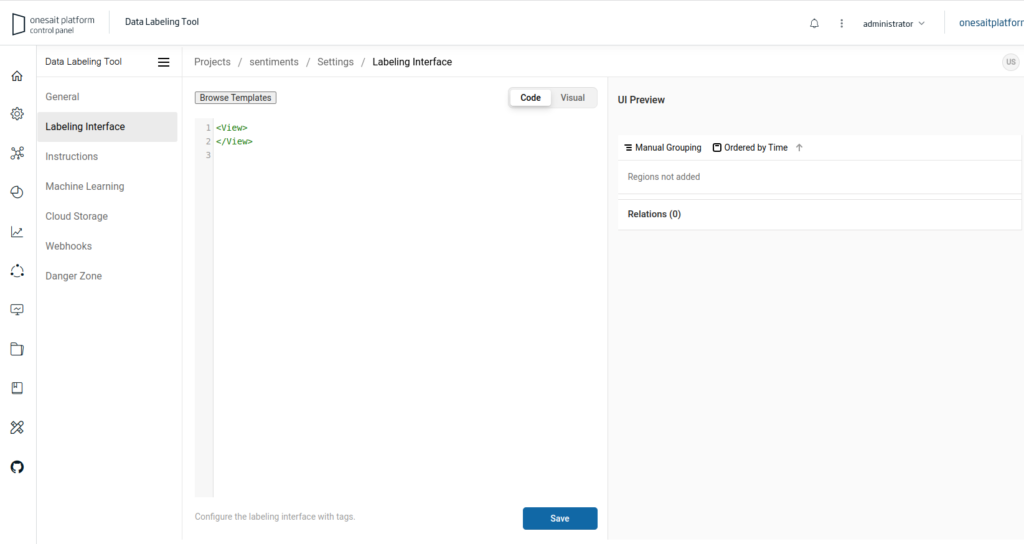
The next step that you must carry out will be to configure a labeling interface. In this step, you will specify how to label the information that comes to the system, implementing a form, for which you can use the predefined templates that are of great help in this task.
With these templates you can, visually, select, for the type of project that you do, how you will want the output information.
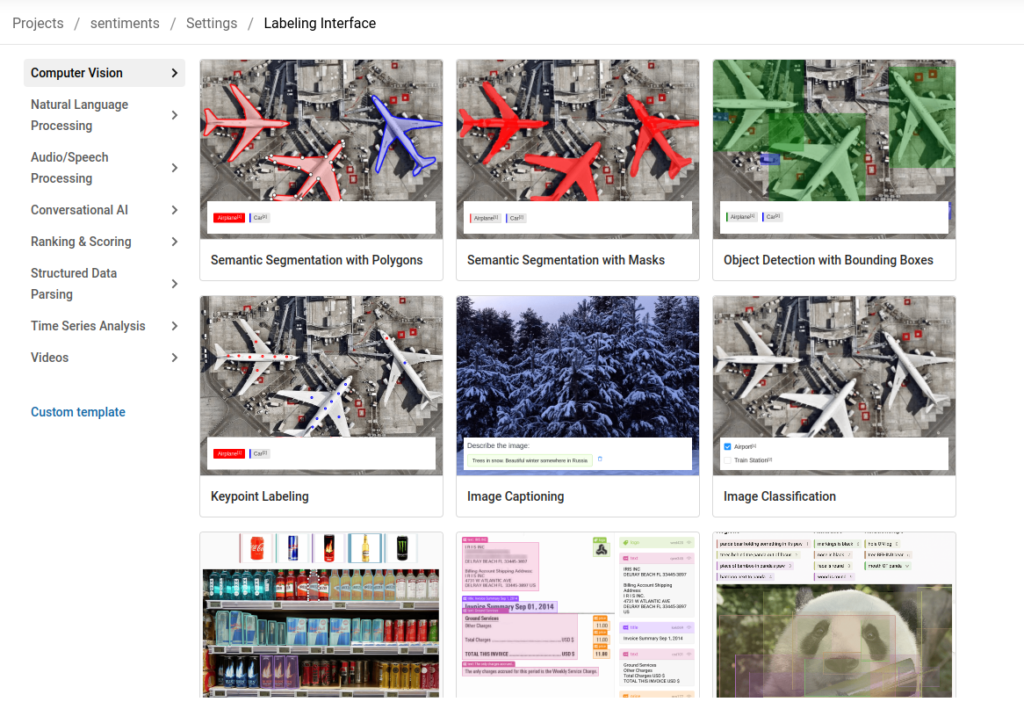
For this example, select the «Videos» option:
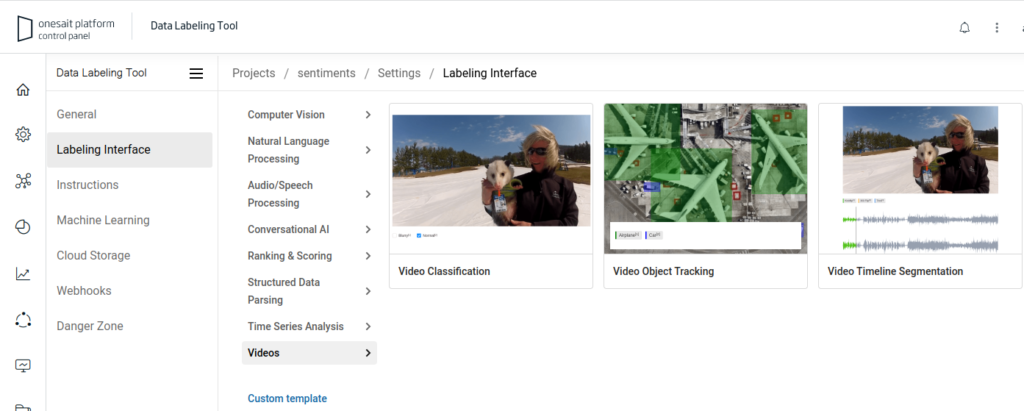
And in the available options, «Video Timeline Segmentation»:
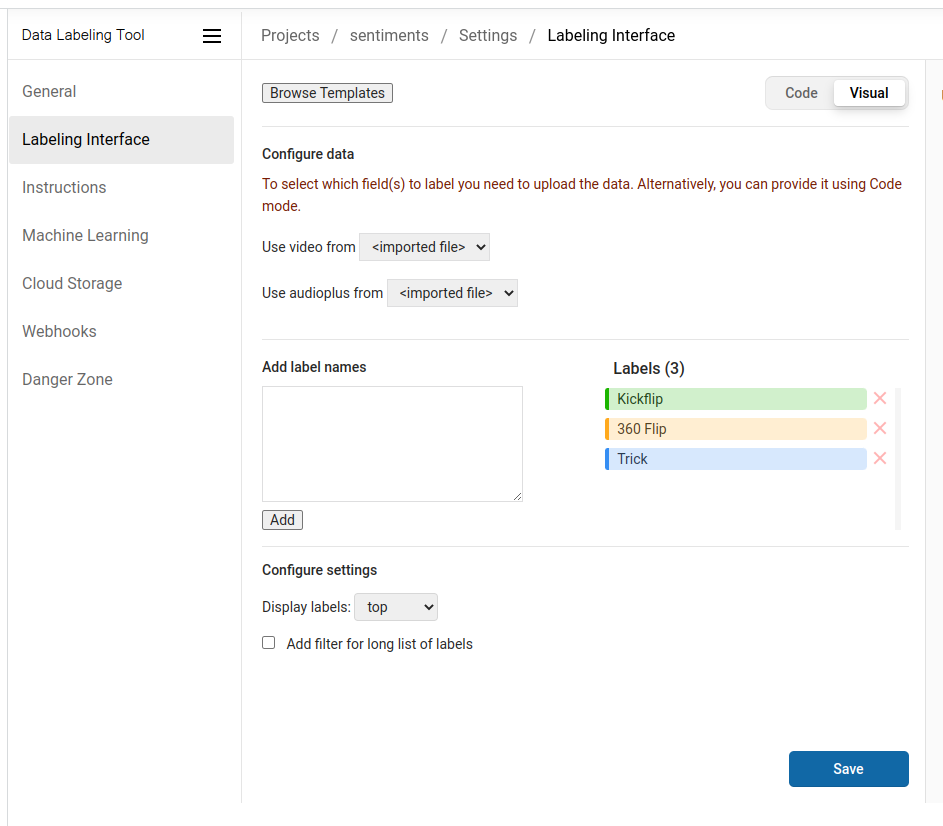
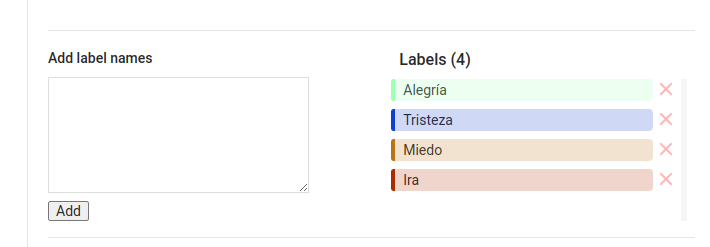
Now, change the labels that appear by default (kickflip, etc.) for those that interest you: joy, sadness, fear, anger, etc.
Click on the «Save» button and you will move to the list of tasks to label. As you can see, it will be empty, so we are going to show you a couple of ways to get tasks or input data.
The first one is to use the Platform’s File Repository, which is the recommended option if you are working in a team with other people, or even if you plan to use the same input data for more than one project. To use this option, choose «Source Cloud Storage».
To do this, return to the screen of the list of projects that you already saw:

If you look closely, now your project will appear in the list. Click on the icon with three dots located to the far right:

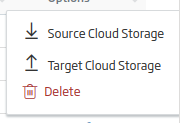
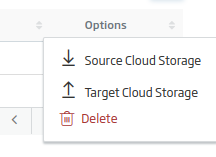
Among the options that will appear, select the Source Cloud Storage.
In the screen that will appear, you will see the Source Cloud Storages of this project, although for the moment there aren’t any yet.

To create a new one, click the «+» button:

A form will open and you will have to fill it out. The summary of the fields to fill in is:
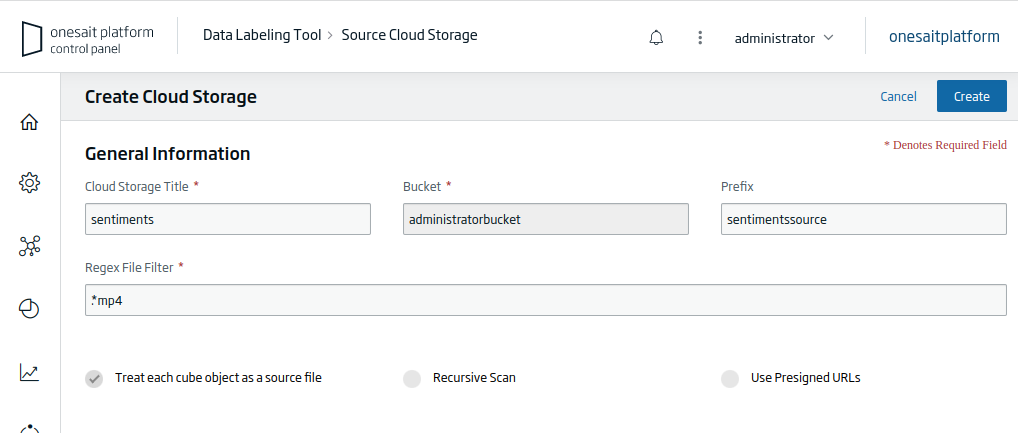
- Cloud Storage Title: descriptive title of the cloud storage.
- Bucket: bucket where the files will be stored.
- Prefix: prefix or path where the files will be stored.
- Regex File Filter: regex pattern that will be followed to identify which files should be loaded.
- Treat each cube object as a source file: check this option if, for example, the files are images.
- Recursive Scan: performs the recursive search on folders that are nested within the one specified in the prefix.
- Use Presigned URLs.
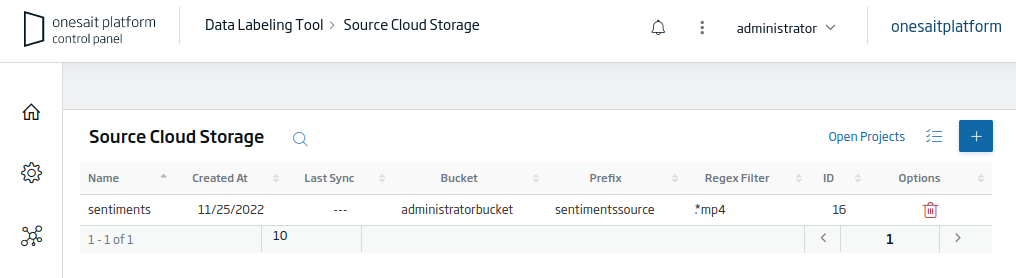
After filling in the form and pressing the «Create» button, the Source Cloud Storage that has been defined will appear in the list:
You’ll have created an entry with this prefix in the Platform’s File Repository, where you can upload the files you want to import as tasks to the project.

To do this in a simple way, you only have to click the pencil icon:

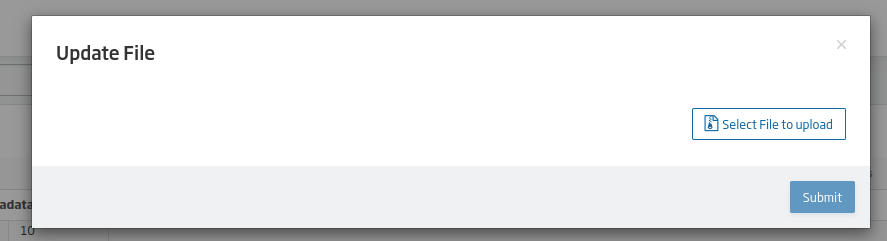
In the options of that path that has been created with .metadata, the following modal window will appear, from which you can create a file. Here, search your local device for the video file that you want to label.
Having done that, you will have uploaded your video, which will appear listed:

The last step will be to synchronise the project for this Source Cloud Storage. To do this, in the project settings, you can see a defined source by clicking the «Sync Storage» button. All files that meet the condition of the regex pattern will be loaded as tasks to the project.
In this case, the newly uploaded image would be loaded, and it would already be available to be labelled:

Another way to upload data or tasks to the project is by clicking the «Import» button:

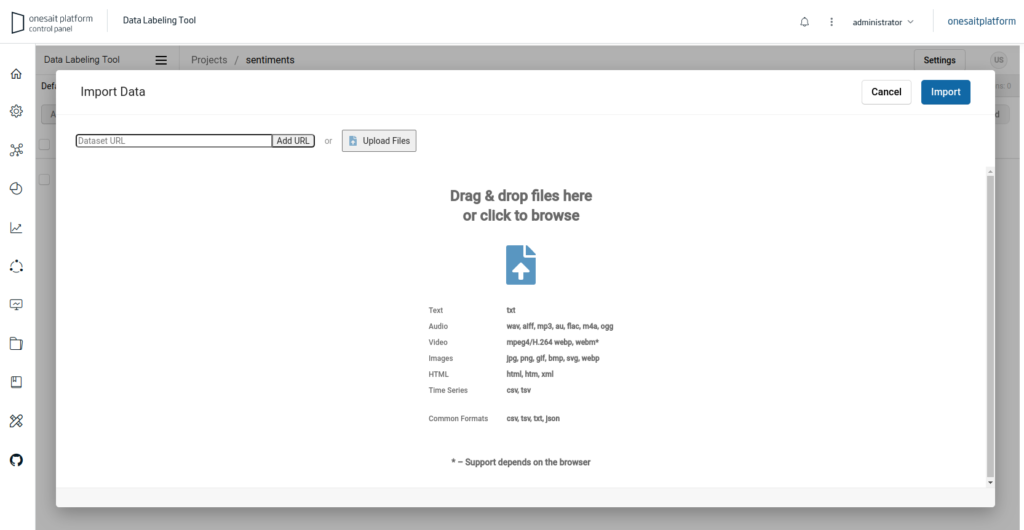
Here, select the files that contain the tasks that you need to label.
Just as you created a Source Cloud Storage to obtain the tasks, we must now create a Target Cloud Storage so that the labeling results are stored as files using the Platform’s file manager.
To create a Target Cloud Storage, go the project management screen, click on the three dots icon again, and select the «Target Cloud Storage» option:
Since this is the first time this is accessed for this project, the table will appear empty. Click on the «+» button:

Again you will be shown a form that you must fill out:
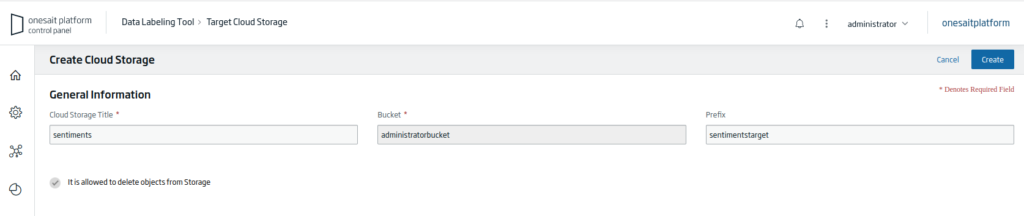
- Cloud Storage Title: descriptive title to differentiate it from other Target Clouds Storages in the project.
- Bucket: bucket of the file repository where the files will be placed.
- Prefix: path or folder route where the files will be saved.
- It is allowed to delete objects from Storage: indicates whether or not objects can be deleted from the storage.
Once everything is filled in, click the Create button, and if everything went well, an element will now appear in the previous list. Also, if you go to the project configuration, you can check that a Target Cloud Storage, with its sync button, has been assigned:
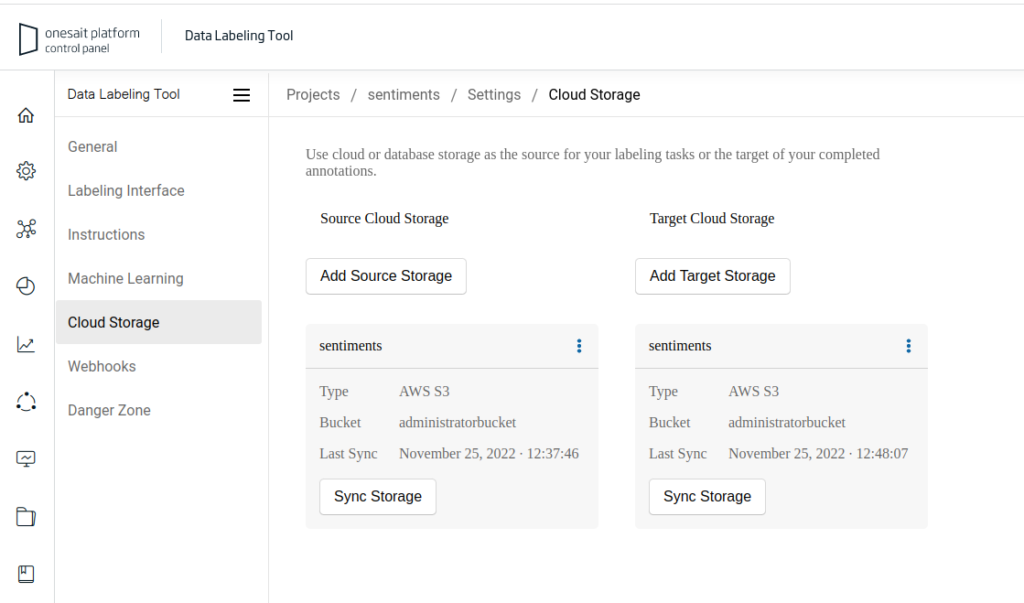
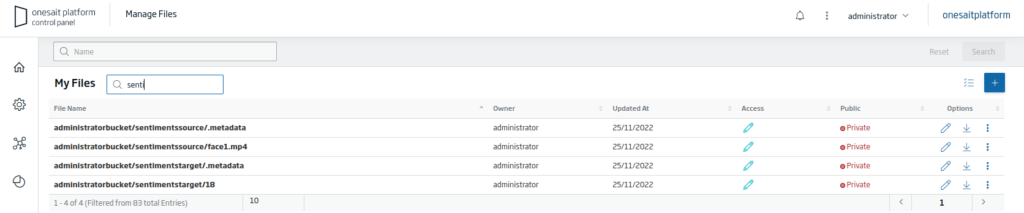
You can also see, in the Platform’s file manager, that an entry for the targets has been created:

As you label tasks, the results will be stored here
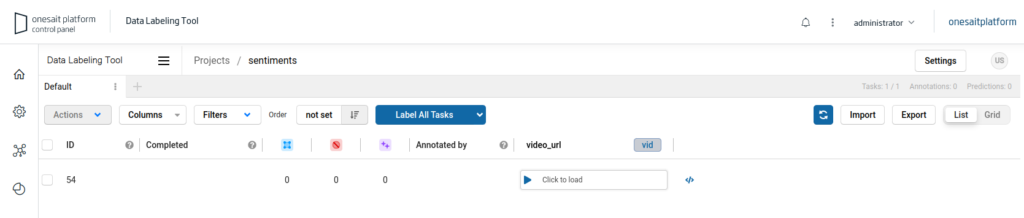
Video labeling
Once the video has been uploaded to the labeling tool, you can proceed to label it by clicking on the task with the video:
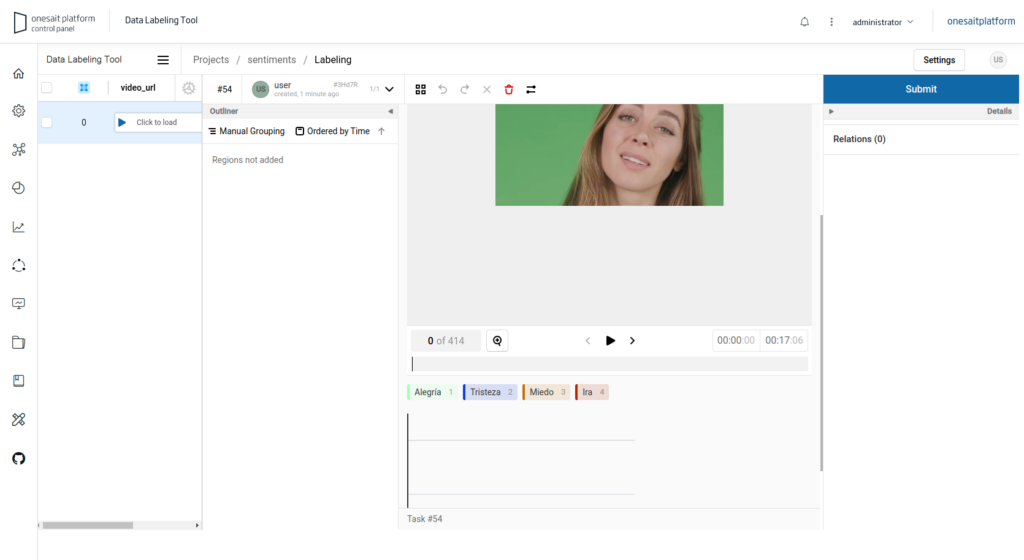
The video appear, with a timeline on which you can label sections of the video, depending on the sentiment shown.
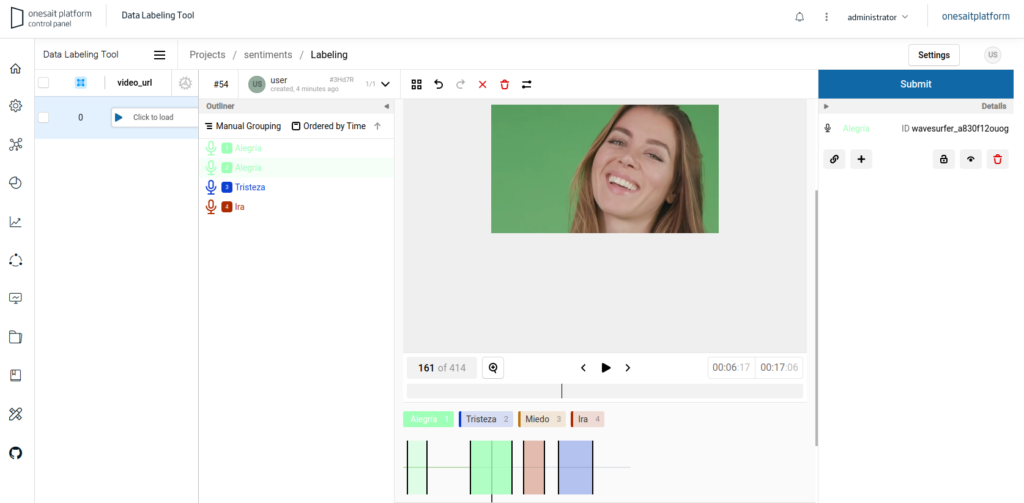
When you are done labeling, click on the «Submit» button.
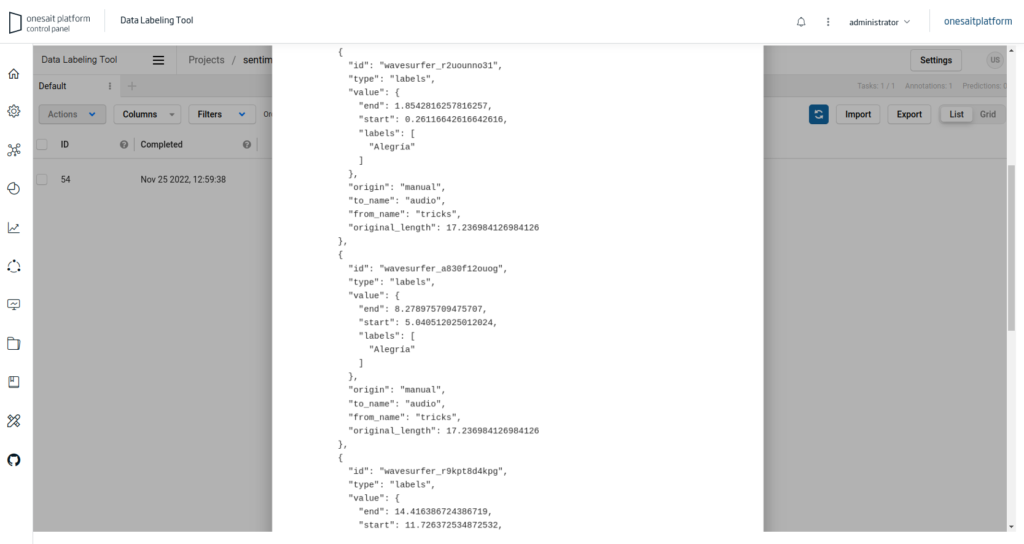
The result of the labeling will be a JSON similar to this one:
Since you have the Target Cloud Storage configured, the result of the labeling is added to the specified bucket:
And with this, you already have the labeling ready to proceed with the training.
We hope you found it interesting and, if you have any questions or doubts, leave us a comment.
Finally, remember that this tool is available from Onesait Platform version 4.2.0-Predator.
Header image: https://datawow.io/