
Getting to know Fn (part I): Serverless MultiCloud Platform
Today we are starting a new series about Fn Project, an open source serverless platform for containers that can run anywhere (Cloud or CPD), is easily extensible and allows programming functions in Java, Python, Go, Node.js, Ruby or C#.
Throughout different entries, we will learn about this platform, from its concept to other more advanced aspects, such as:
- Advanced configuration.
- How to integrate Fn with Kubernetes.
- How to integrate FDK for Java with GraalVM to generate Java functions that run faster.
- Using Fn Flow for function orchestration.
- How to integrate Fn with Spring Cloud Functions (Spring’s FaaS platform).
- How to create a Function from a Docker image.
Getting to know Fn
Throughout today’s post, we are going to explain a bit about this serverless multicloud platform.
Serverless?
We could say that this is a trend in Software Architecture that reduces the notion of infrastructure, because, although this trend still requires servers, developers don’t have to worry about load balancing, multithreading or any other infrastructure issue, as the chosen platform itself manages the resources, allowing developers to focus only on their code.
There are currently many serverless frameworks and platforms from Cloud providers such as AWS Lambda (Amazon), Azure Functions (Microsoft), Cloud Functions (Google), Cloudflare Workers (Cloudflare) or OpenWhisk (IBM). These Cloud solutions charge by the number of invocations and can only be deployed on this provider.
In that sense, Fn Project is Cloud-agnostic, as it can be deployed in any environment supporting Docker (it integrates with Kubernetes) and it is supported by Oracle.
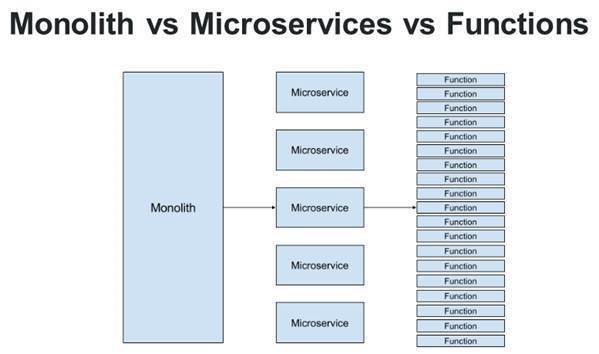
Comparing serverless with MSA
In serverless, each piece of code is called a Function, and a serverless provider provides Functions as a Service (FaaS), including everything needed to provision, scale, patch and maintain the environment.
In a Microservices Architecture (MSA), instead of creating one large monolithic service, the service is decomposed into smaller services that provide the same set of functions. This simplifies the development and creation of web services. However, each microservice still runs its own server, which must be scaled and managed.
Thus, we see how FaaS is taking things a step further:
Fn architecture
A typical Fn implementation might look like this:
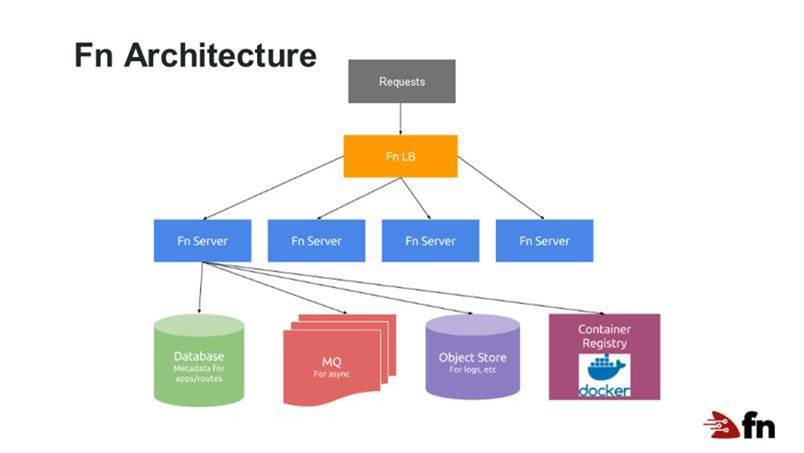
Where a load balancer provides a front-end to several Fn servers, each server manages and executes the function code as needed; the servers can be scaled up or down as needed. With Fn, each role is a Docker container.
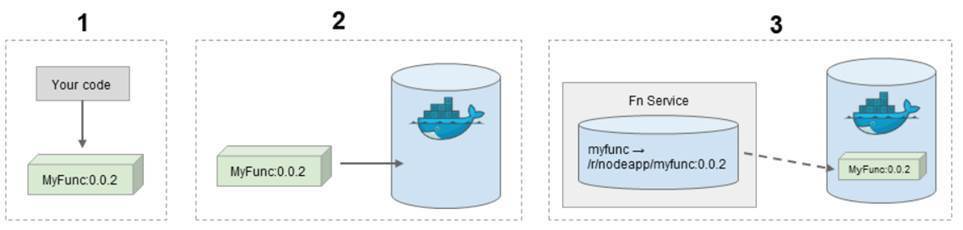
Deploying Fn
The process of deploying an Fn project is broken down into three steps:
- Build a Docker image with the function’s code (and increment the version number).
- Upload the container image to the Docker Registry (DockerHub by default).
- Create a trigger for execution on the server.
So, when calling the function via URL or command, the container is executed and returns the results:
Practical example in Java
Let’s see now a small example of how to deploy this via Java:
Installing Fn
The first step is to install Fn. This can be done in different ways, depending on the environment we are in. So, on Linux and macOS, you only have to run the following script:
curl -LSs https://raw.githubusercontent.com/fnproject/cli/master/install | shIn a Windows environment, the easiest way is to install Docker first, and once it is ready, download Fn from the project’s repository. Once installed, you will have to add the fn.exe executable to the PATH.
Launching Fn
Running Fn is as simple as launching «fn start» on the command line. This will start Fn in Single Server Mode (as a Docker image), using an embedded database and message queue.
On Windows, if you have an older version of Docker installed, you may get an error like this one:

Solving this problem is not difficult, since you only have to manually launch the executor with the following line of code:
docker run --memory 1024M --memory-swap 1024M --privileged --rm --name functions -it -v /var/run/docker.sock:/var/run/docker.sock -v D:/fn/data:/fn/app/data -p 8080:8080 fnproject/fnserverIn my case, what I have done is to upgrade to WSL2 (the Windows subsystem for Linux), install a Linux distribution on Windows (Ubuntu) and enable Docker so that instead of using Hyper-V it works natively on WSL2. This allows me to run Docker from this Linux distribution:

Creating the first function
Select the folder where you want to work, and run the following code:
fn init --runtime java java_fn_exampleThis will initialize the Java runtime. Then you can move to the «java_fn_example» directory, where you can check that several things have been created: a «pom.xml» file (Maven project), a «func.yaml» (Fn Descriptor) and a «src» folder for the source files.
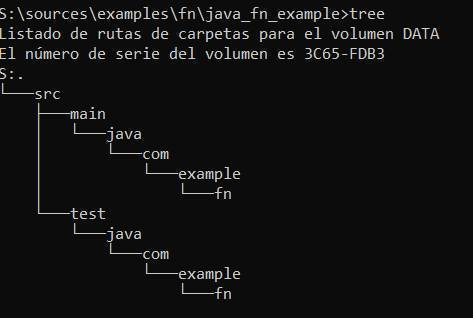
The serial number of the volume is 3C65-FDB3.»
To create the application, launch the following command:
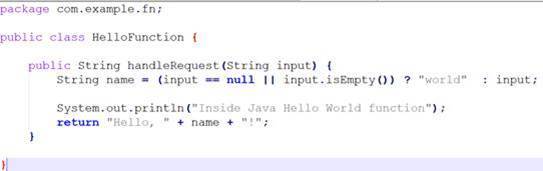
fn create app java_fn_example-appHere it is interesting to look at the class that implements the function («HelloFunction»), which is located in «src/main/java/com/example/fn». Here you can see that we have implemented the mythical «Hello» + name:
Deploying the function
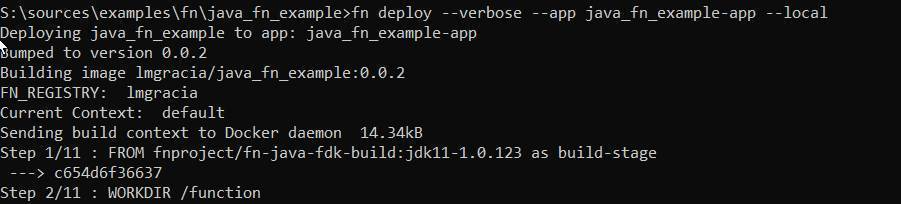
To deploy the function, you must use the function created by default. In order to deploy in your local environment, launch (adding the verbose):
fn deploy--verbose --appjava_fn_example-app--local
This will compile the Maven project, generating the Docker image.
Running
Now that you have the function deployed, you can move on to running it. For starters, do it with the Fn CLI:
fn invoke java_fn_example-app java_fn_exampleYou can also invoke it through the endpoint that the Fn itself enables. To do this, first execute the following line of code:
fn inspectfunctionjava_fn_example-app java_fn_example

If you capture the URL that appears, you will be able to invoke it via curl:
curl -X "POST" http://localhost:8080/invoke/01F00Z4AHENG8G00GZJ0000007

NOTE: As it is a serverless architecture, you can see that the image of the function is not in execution as such, but the FnServer is the one in charge of launching it:

Completing the example
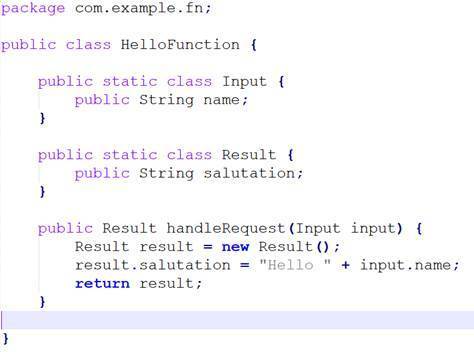
Now that you have seen how to build a function, let’s complete the example function «HelloFunction». To do that, instead of a String, configure it to receive a JSON as input and to return another JSON.
The FDK offers us a utility to map JSON to classes based on the name of the attributes, so if I send a JSON like this: { “name”: “Luismi” } and I leave the function like this automatically, the FDK will map the JSON’s name onto the Input class:
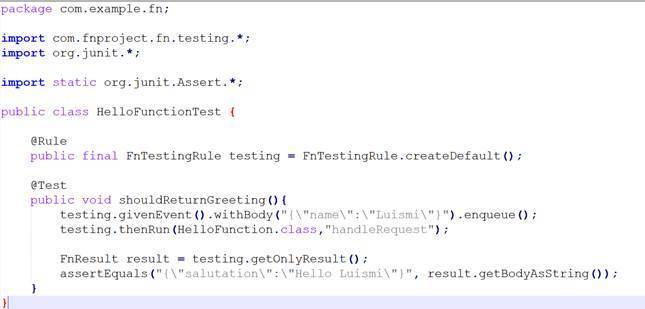
Let’s do an fn build to rebuild the function. However, this is going to fail, because we haven’t updated the function’s test, so you must proceed to update the test, and then do the build:
Once this is done, you can invoke it with the following line of code:
curl -X "POST" -H "Content-Type: application/json" -d '{"name":"Luismi"}' http://localhost:8080/invoke/01F00Z4AHENG8G00GZJ0000007And what are you going to receive? Something similar to this:

Triggers
Another interesting functionality is triggers. A trigger represents an entry point for function invocation. Each type of trigger requires a specific configuration that is defined inside the func.yaml file, for example:
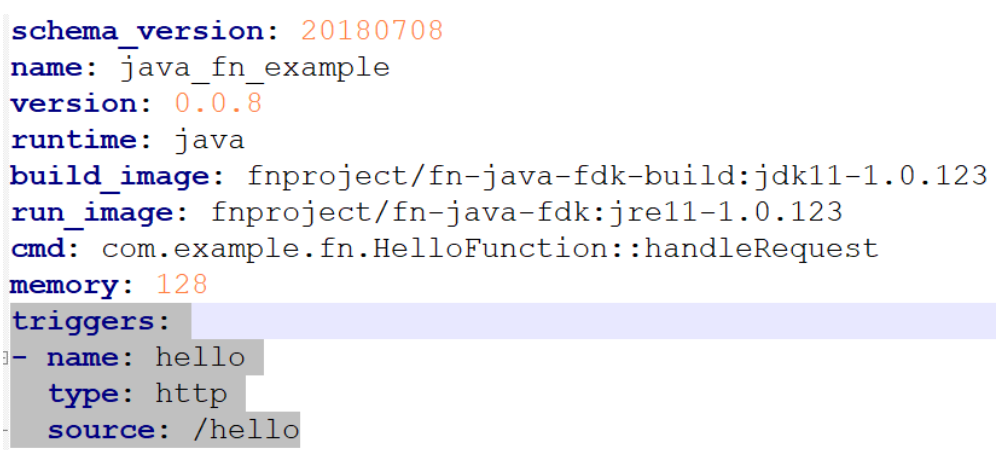
After deploying, this will now allow you to invoke the function by its endpoint: http://localhost:8080/t/java_fn_example-app/hello

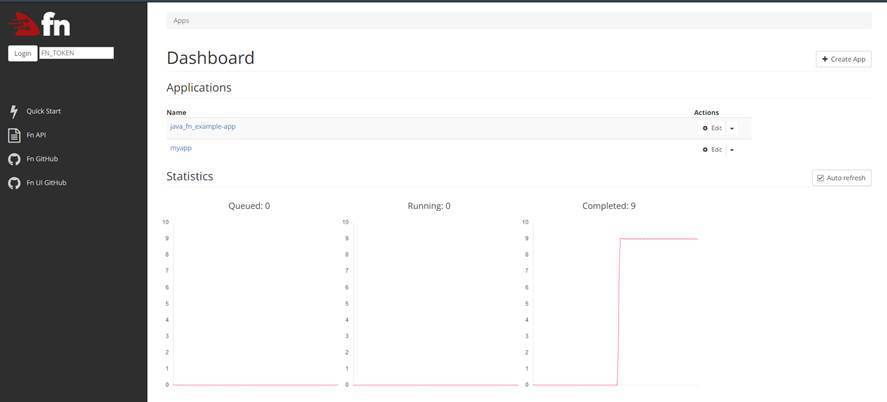
User interface for Fn
Finally, we don’t want to leave out the «UI for fn» project, which as its name suggests, is a user interface to see the status of your Fn instance.
To launch this graphical environment, launch the following line of code:
docker run --rm -it --link fnserver:api -p 4000:4000 -e "FN_API_URL=http://api:8080" fnproject/uiThis will launch the UI, where you can see which applications you have created, which ones are running, and whether there are any in queue or not:
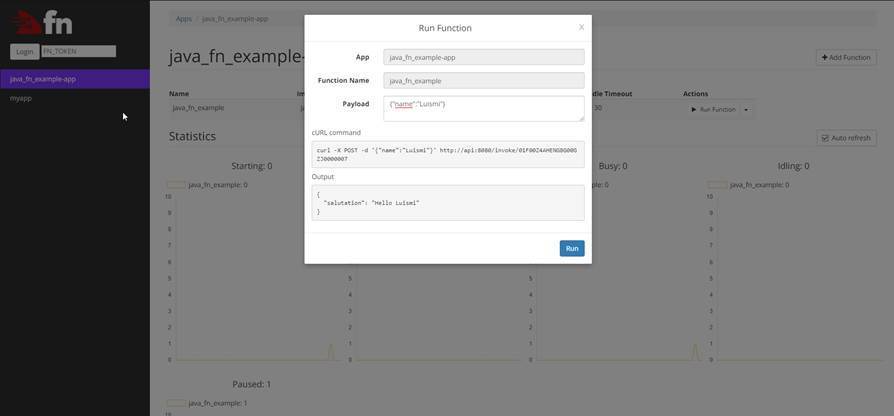
A handy thing about this is that it will also allow us to test our function:
This is the end of this first post about Fn. We hope you found it interesting, and we’ll see you next week in the next post.
If you have any questions, please leave us a comment.


Pingback: Getting to know Fn (part II): Generating an Fn function with Java and GraalVM – Onesait Platform Blog
Pingback: Getting to know Fn (part III): creating a Python function – Onesait Platform Blog
Pingback: Creating a Spring Cloud Function on Fn Project – Onesait Platform Blog
Pingback: Release 3.2.0-Legend of the Onesait Platform – Onesait Platform Blog
Pingback: Serverless in 2021 and Onesait Platform – Onesait Platform Blog